| OpenGL renderer | Python bindings | Alternative renderers | Mobile |
|---|---|---|---|
Click the bird for
the interactive manual!
Dear ImGui Bundle: an extensive set of ready-to-use widgets and libraries, based on ImGui. Start your first app in 5 lines of code, or less.
Whether you prefer Python or C++, this pack has you covered, with the same ease in both languages.
Key Features
-
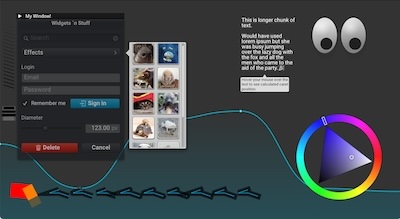
A lot of widgets and libraries: All of Dear ImGui along with a suite of additional libraries for plotting, node editing, markdown rendering, and much more.
-
Always up-to-date: The libraries are always very close to the latest version of Dear ImGui. This is also true for Python developers, since the bindings are automatically generated.
-
Interactive Demos and Documentation: Quickly get started with our interactive manual and demos that showcase the capabilities of the pack. Read or copy-paste the source code (Python and C++) directly from the interactive manual!
-
Cross-platform: Works on Windows, Linux, macOS, iOS, Android, and WebAssembly!
-
Easy to use, yet very powerful: Start your first app in 3 lines. The Immediate Mode GUI (IMGUI) paradigm is simple and powerful, letting you focus on the creative aspects of your projects.
-
Fast: Rendering is done via OpenGL (or any other renderer you choose), through native code.
-
Beautifully documented Python bindings and stubs: The Python bindings stubs reflect the C++ API and documentation, serving as a reference and aiding autocompletion in your IDE. See for example the stubs for imgui, and for hello_imgui (which complete the hello_imgui manual).
For a detailed look at each feature and more information, explore the sections listed in the Table of Contents.
Example code
A hello world example with Dear ImGui Bundle
For Python developers
from imgui_bundle import imgui, immapp
immapp.run(gui_function=lambda: imgui.text("Hello, world!"))
For C++ developers
#include "immapp/immapp.h"
#include "imgui.h"
int main() {   ImmApp::Run([] {   ImGui::Text("Hello, world!");   });  }
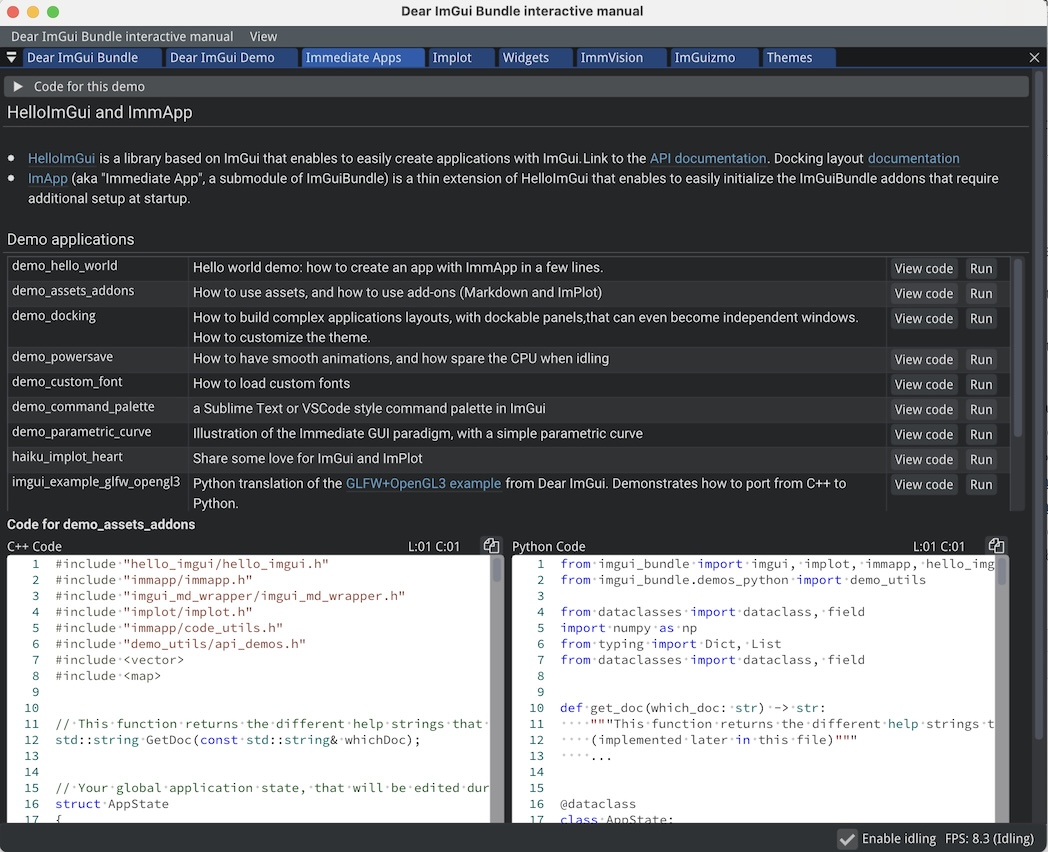
Interactive Manual
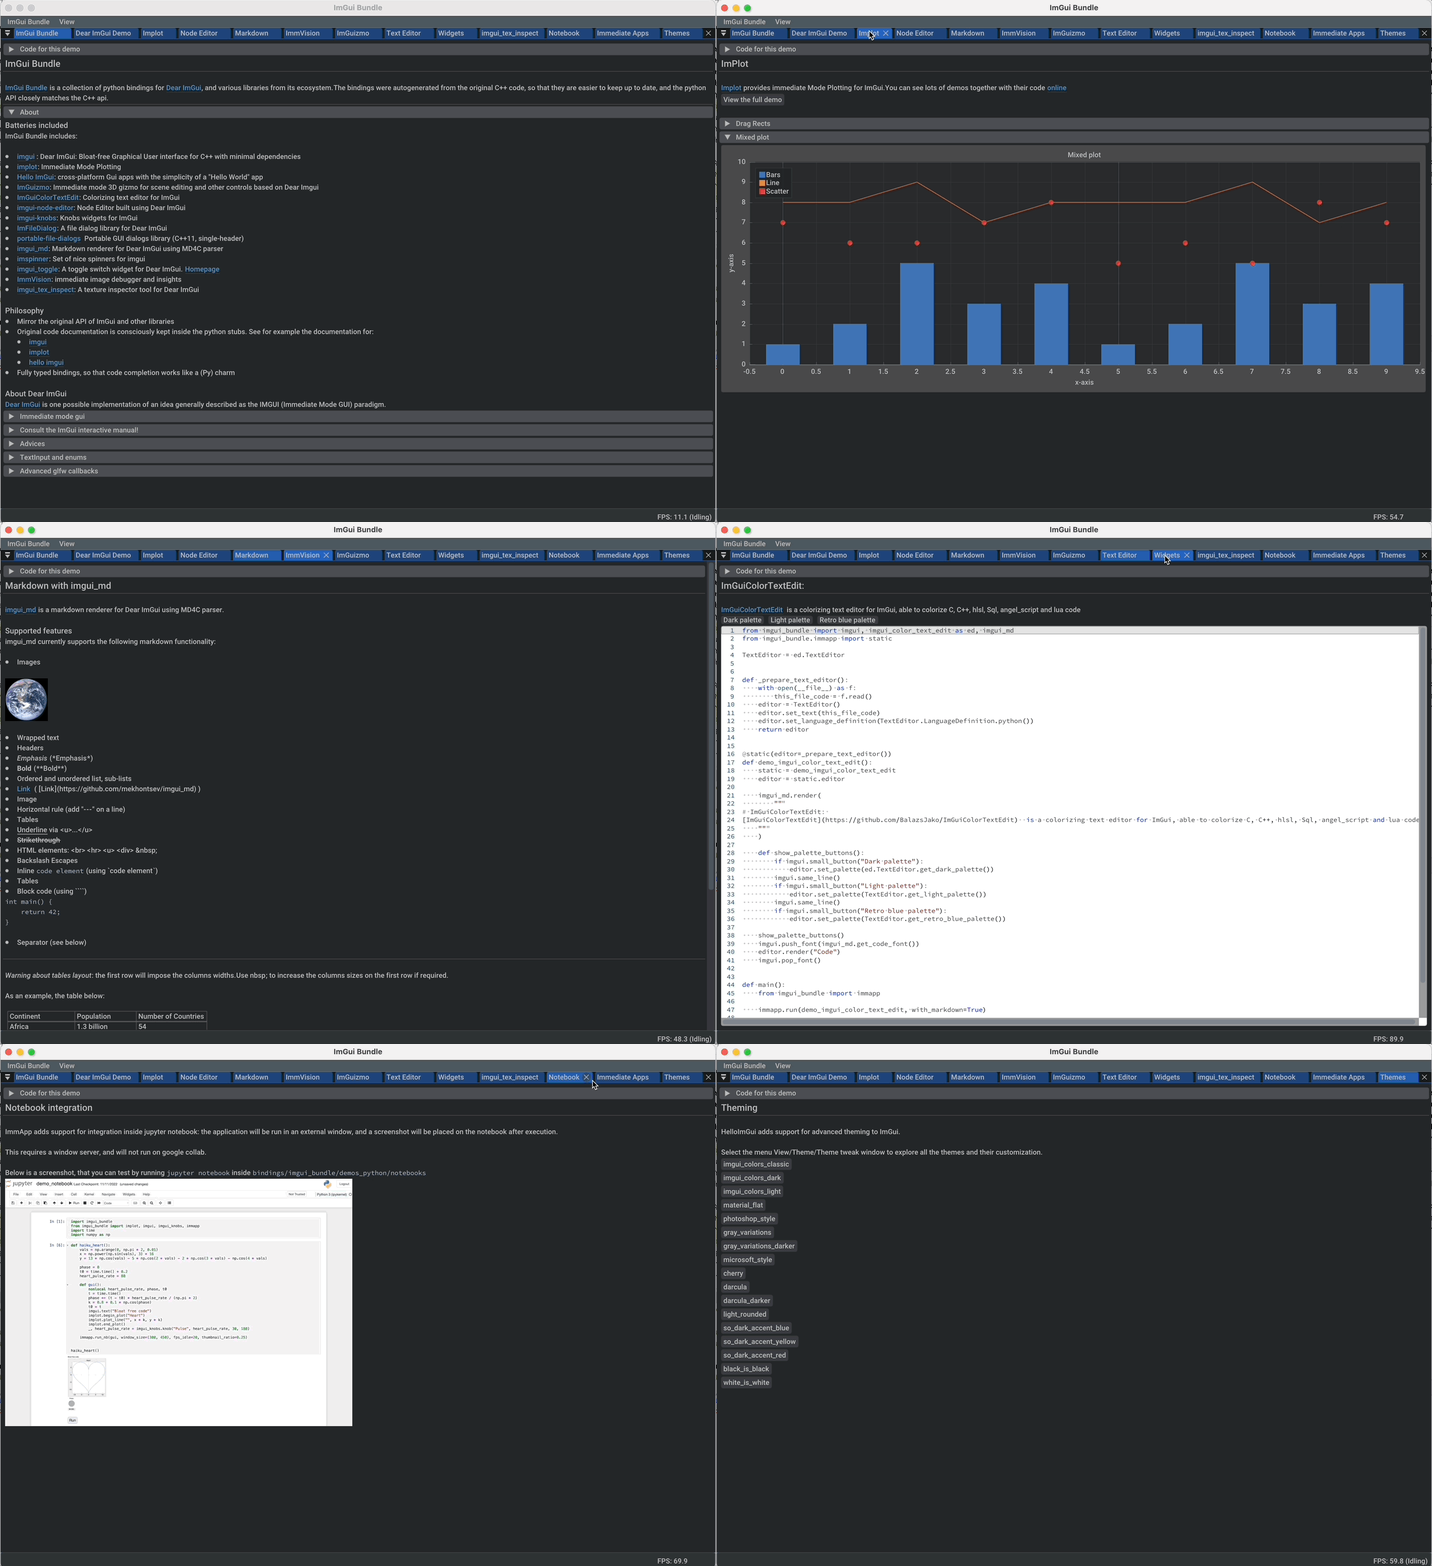
Click on the animated demonstration below to launch the fully interactive manual.
Dear ImGui Bundle includes the following libraries, which are available in C++ and in Python:
Dear ImGui : Bloat-free Graphical User interface with minimal dependencies |
|
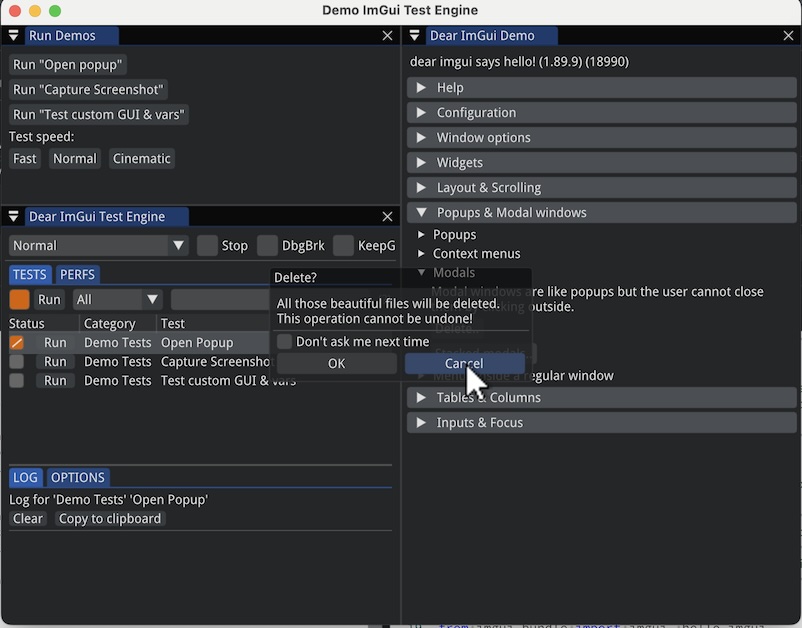
ImGui Test Engine: Dear ImGui Tests & Automation Engine |
|
Hello ImGui: cross-platform Gui apps with the simplicity of a "Hello World" app |
|
ImPlot: Immediate Mode Plotting |
|
ImPlot3D: Immediate Mode 3D Plotting |
|
ImGuizmo: Immediate mode 3D gizmo for scene editing and other controls based on Dear ImGui |
|
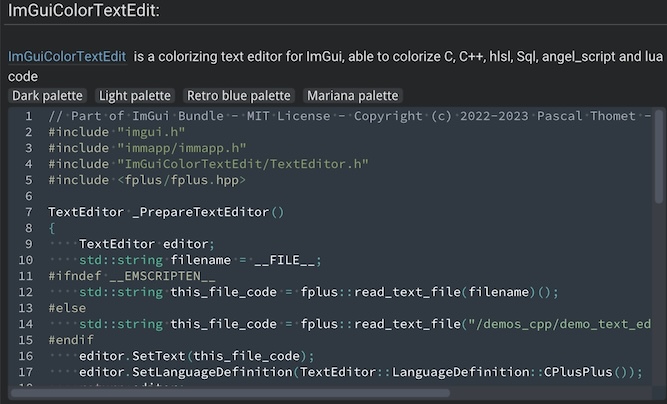
ImGuiColorTextEdit: Colorizing text editor for ImGui |
|
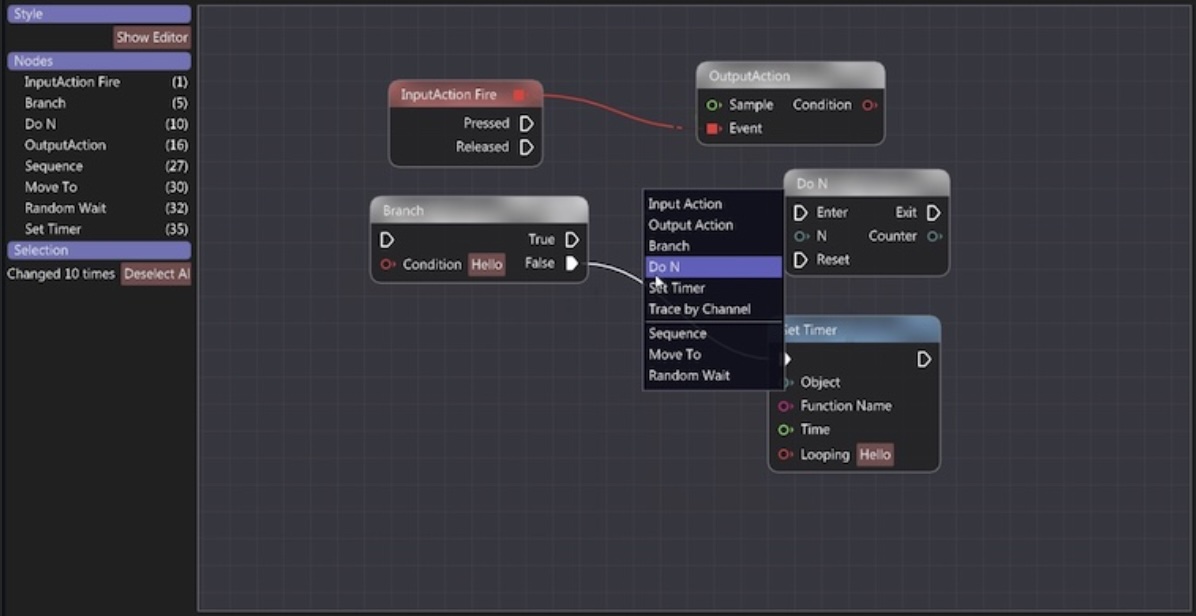
imgui-node-editor: Node Editor built using Dear ImGui |
|
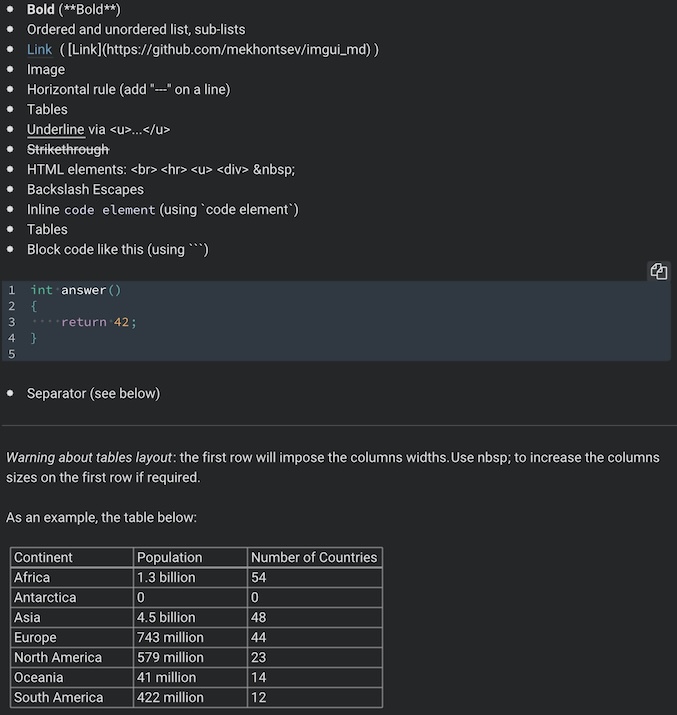
imgui_md: Markdown renderer for Dear ImGui using MD4C parser |
|
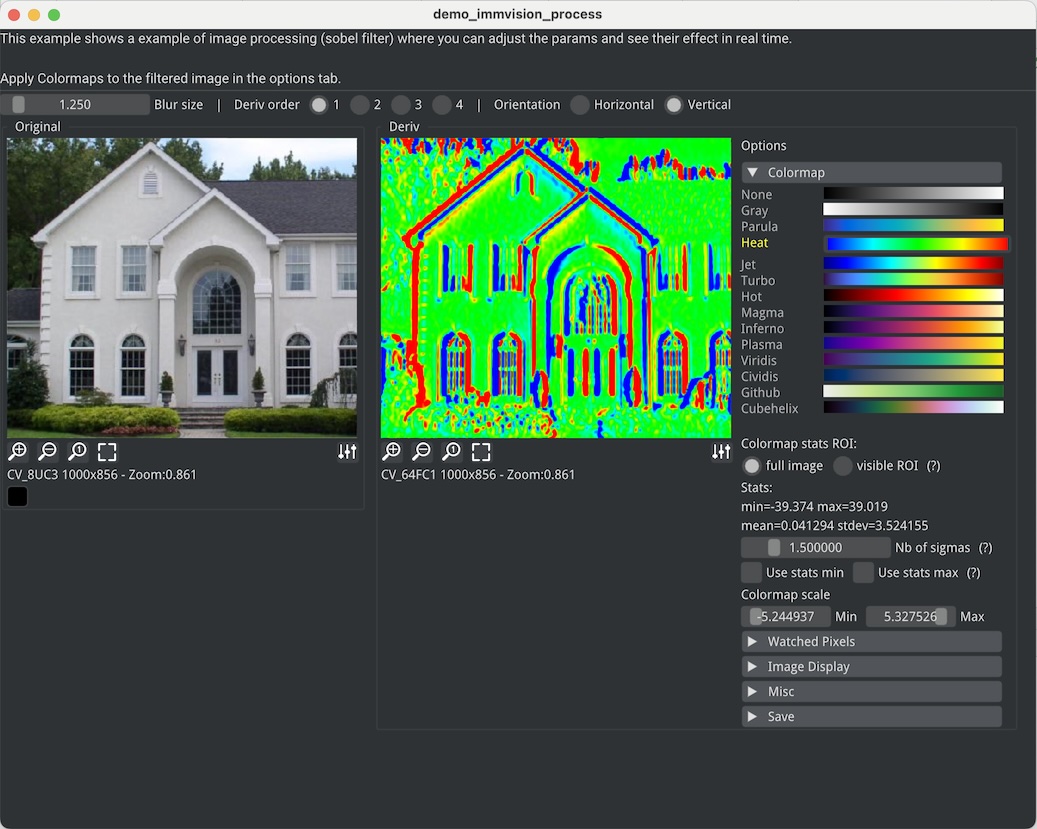
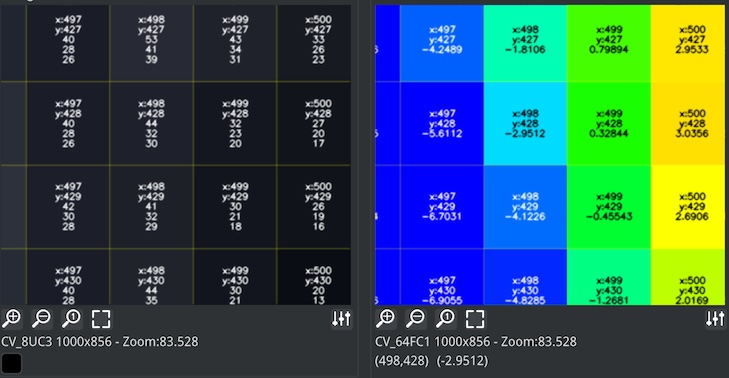
ImmVision: Immediate image debugger and insights |
|
NanoVG: Antialiased 2D vector drawing library on top of OpenGL for UI and visualizations |
|
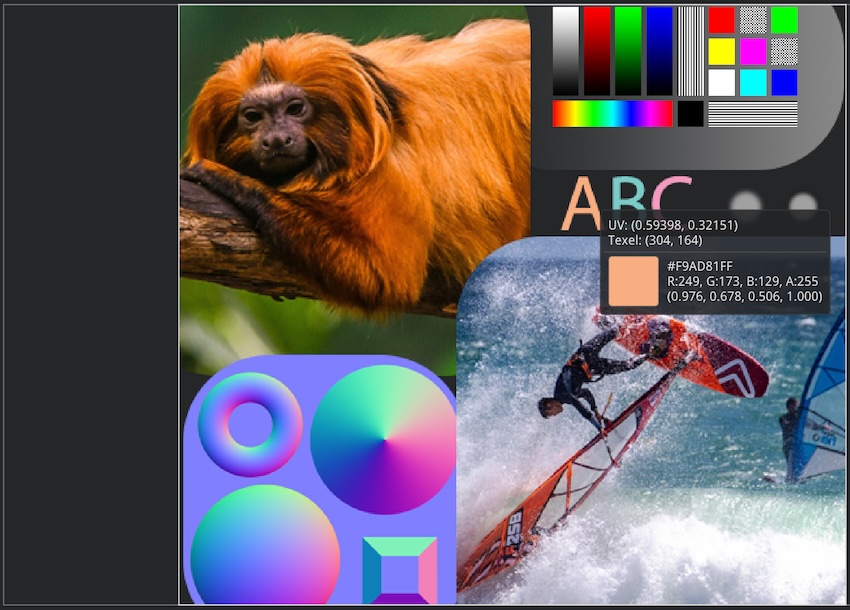
imgui_tex_inspect: A texture inspector tool for Dear ImGui |
|
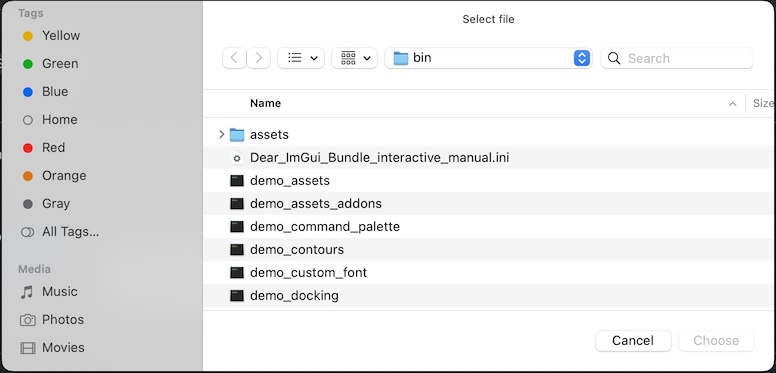
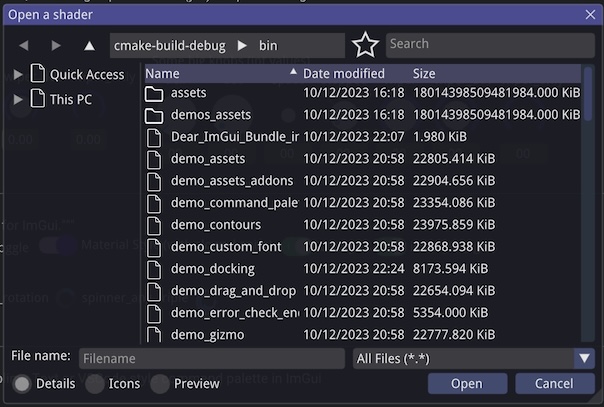
ImFileDialog: A file dialog library for Dear ImGui |
|
portable-file-dialogs OS native file dialogs library (C++11, single-header) |
|
imgui-knobs: Knobs widgets for ImGui |
|
imspinner: Set of nice spinners for imgui |
|
imgui_toggle: A toggle switch widget for Dear ImGui |
|
ImCoolBar: A Cool bar for Dear ImGui |
|
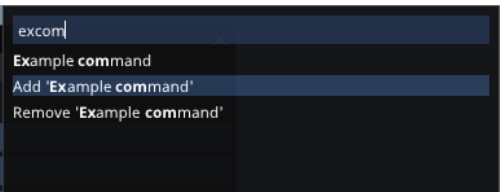
imgui-command-palette: A Sublime Text or VSCode style command palette in ImGui |
A big thank you to their authors for their awesome work!
pip install imgui-bundle  # (1)
pip install opencv-python # (2)
pip install pyGLM # (3)-
imgui_bundle: Binary wheels are available for Windows, MacOS and Linux. If a compilation from source is needed, the build process might take up to 5 minutes, and will require an internet connection.
-
OpenCV: in order to run the immvision module, install opencv-python. The alternative OpenCV versions, such as opencv-python-headless (headless) opencv-contrib-python (with extra modules) also work.
-
pyGLM: in order to run the demo, install pyGLM
Platform notes
-
Windows: Under windows, you might need to install msvc redist.
-
macOS : under macOS, if a binary wheel is not available (e.g. for older macOS versions), pip will try to compile from source. This might fail if you do not have XCode installed. In this case, install imgui-bundle with the following command
SYSTEM_VERSION_COMPAT=0 pip install --only-binary=:all: imgui_bundle
git clone https://github.com/pthom/imgui_bundle.git
cd imgui_bundle
git submodule update --init --recursive # (1)
pip install -v . # (2)
pip install opencv-python
pip install pyGLM-
Since there are lots of submodules, this might take a few minutes
-
The build process might take up to 5 minutes
Simply run demo_imgui_bundle.
The source for the demos can be found inside bindings/imgui_bundle/demos_python.
|
Tip
|
Consider demo_imgui_bundle as an always available manual for Dear ImGui Bundle with lots of examples and related code source.
|
The easiest way to use Dear ImGui Bundle in an external project is to use the template available at https://github.com/pthom/imgui_bundle_template.
This template includes everything you need to set up your own project.
If you choose to clone this repo, follow these instructions:
git clone https://github.com/pthom/imgui_bundle.git
cd imgui_bundle
git submodule update --init --recursive # (1)
mkdir build
cd build
cmake .. -DIMMVISION_FETCH_OPENCV=ON # (2)
make -j-
Since there are lots of submodules, this might take a few minutes
-
The flag
-DIMMVISION_FETCH_OPENCV=ONis optional. If set, a minimal version of OpenCV will be downloaded a compiled at this stage (this might require a few minutes)
The immvision module will only be built if OpenCV can be found. Otherwise, it will be ignored, and no error will be emitted.
If you have an existing OpenCV install, set its path via:
cmake .. -DOpenCV_DIR=/.../path/to/OpenCVConfig.cmakeIf you built ImGuiBundle from source, Simply run build/bin/demo_imgui_bundle.
The source for the demos can be found inside bindings/imgui_bundle/demos_cpp.
|
Tip
|
Consider demo_imgui_bundle as a manual with lots of examples and related code source. It is always available online
|
First, install Dear ImGui Bundle following the [install-instructions].
Then study the examples below.
from imgui_bundle import imgui, immapp


def gui():
    imgui.text("Hello, world!")


immapp.run(
    gui_function=gui,  # The Gui function to run
    window_title="Hello!",  # the window title
    window_size_auto=True,  # Auto size the application window given its widgets
    # Uncomment the next line to restore window position and size from previous run
    # window_restore_previous_geometry==True
)#include "immapp/immapp.h"
#include "imgui.h"
void Gui()
{
ImGui::Text("Hello, world!");
}
int main(int, char **)
{
ImmApp::Run(
Gui,
"Hello!",
true // window_size_auto
// Uncomment the next line to restore window position and size from previous run
// , true // windowRestorePreviousGeometry
);
return 0;
}C++ build instructions (click to expand)
Build with cmake, using imgui_bundle_add_app
imgui_bundle_add_app is a cmake command, close to add_executable, which will:
-
automatically link your app to the required libraries (imgui_bundle, OpenGl, glad, etc)
-
embed the assets (for desktop, mobile, and emscripten apps)
-
add an icon for your app (on desktop and mobile platforms)
-
perform additional customization (app icon and name on mobile platforms, etc)
Option 1: using imgui_bundle as a submodule
First, add imgui_bundle as a submodule:
git submodule add https://github.com/pthom/imgui_bundle.git
cd imgui_bundle
git submodule update --init --recursive
Then, write a simple CMakeLists file where you add imgui_bundle, then call imgui_bundle_add_app to create your application.
cmake_minimum_required(VERSION 3.20)
project(imgui_bundle_hello)
set(CMAKE_CXX_STANDARD 17)

add_subdirectory(imgui_bundle)
imgui_bundle_add_app(hello_world hello_world.cpp)
Option 2 : Fetch imgui_bundle during compilation
cmake_minimum_required(VERSION 3.12)
project(helloworld_with_helloimgui)
set(CMAKE_CXX_STANDARD 17)

include(FetchContent)
Set(FETCHCONTENT_QUIET FALSE)
FetchContent_Declare(imgui_bundle GIT_REPOSITORY https://github.com/pthom/imgui_bundle.git GIT_TAG main)
FetchContent_MakeAvailable(imgui_bundle)
# set(IMMVISION_FETCH_OPENCV ON) # optional, if you wish to build ImmVision

# Build your app
imgui_bundle_add_app(hello_world hello_world.cpp)|
Note
|
This cmake file is part of a quick start template available at https://github.com/pthom/imgui_bundle_template. Refer to it if you wish to customize the application icon. |
|
Tip
|
As shown in the screenshot, Dear ImGui Bundle provides a variety of predefined themes. In this demo, you can access them via the menu "View/Theme". |
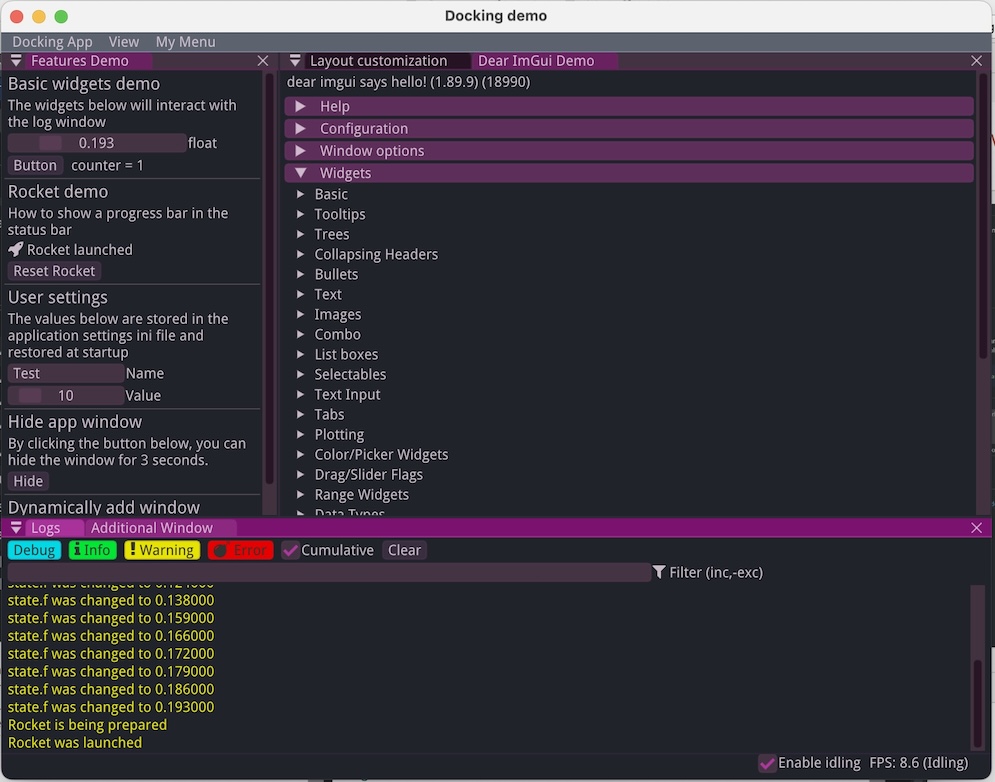
This demonstration showcases how to:
-
set up a complex docking layouts (with several possible layouts):
-
use the status bar
-
use default menus (App and view menu), and how to customize them
-
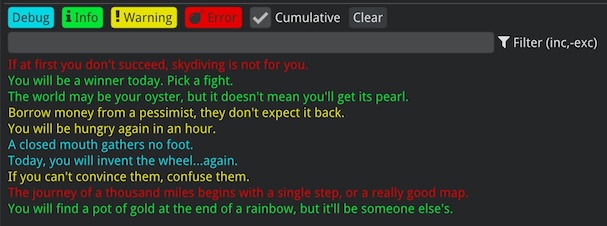
display a log window
-
load additional fonts
-
use a specific application state (instead of using static variables)
-
save some additional user settings within imgui ini file
Its source code is heavily documented and should be self-explanatory.
Click to see its source code in C++
C++
/*
A more complex app demo

It demonstrates how to:
- set up a complex docking layouts (with several possible layouts):
- use the status bar
- use default menus (App and view menu), and how to customize them
- display a log window
- load additional fonts, possibly colored, and with emojis
- use a specific application state (instead of using static variables)
- save some additional user settings within imgui ini file
- use borderless windows, that are movable and resizable
 */

#include "hello_imgui/hello_imgui.h"
#include "hello_imgui/icons_font_awesome_6.h"
#include "nlohmann/json.hpp"
#include "imgui.h"
#include "imgui_stdlib.h"
#include "imgui_internal.h"
#include "demo_utils/api_demos.h"

#include <sstream>

// Poor man's fix for C++ late arrival in the unicode party:
//    - C++17: u8"my string" is of type const char*
//    - C++20: u8"my string" is of type const char8_t*
// However, ImGui text functions expect const char*.
#ifdef __cpp_char8_t
#define U8_TO_CHAR(x) reinterpret_cast<const char*>(x)
#else
#define U8_TO_CHAR(x) x
#endif
// And then, we need to tell gcc to stop validating format string (it gets confused by the u8"" string)
#ifdef __GNUC__
#pragma GCC diagnostic ignored "-Wformat"
#endif


//////////////////////////////////////////////////////////////////////////
//    Our Application State
//////////////////////////////////////////////////////////////////////////
struct MyAppSettings
{
    HelloImGui::InputTextData motto = HelloImGui::InputTextData(
        "Hello, Dear ImGui\n"
        "Unleash your creativity!\n",
        true, // multiline
        ImVec2(14.f, 3.f) // initial size (in em)
        );
    int value = 10;
};

struct AppState
{
    float f = 0.0f;
    int counter = 0;

    float rocket_launch_time = 0.f;
    float rocket_progress = 0.0f;

    enum class RocketState {
        Init,
        Preparing,
        Launched
    };
    RocketState rocket_state = RocketState::Init;

    MyAppSettings myAppSettings; // This values will be stored in the application settings
    ImFont* TitleFont = nullptr;
    ImFont* ColorFont = nullptr;
    ImFont* EmojiFont = nullptr;
    ImFont* LargeIconFont = nullptr;
};


//////////////////////////////////////////////////////////////////////////
//    Additional fonts handling
//////////////////////////////////////////////////////////////////////////
void LoadFonts(AppState& appState) // This is called by runnerParams.callbacks.LoadAdditionalFonts
{
    // First, load the default font (the default font should be loaded first)
    // In this example, we instruct HelloImGui to use FontAwesome6 instead of FontAwesome4
    HelloImGui::GetRunnerParams()->callbacks.defaultIconFont = HelloImGui::DefaultIconFont::FontAwesome6;
    HelloImGui::ImGuiDefaultSettings::LoadDefaultFont_WithFontAwesomeIcons();

    // Load the title font. Also manually merge FontAwesome icons to it
    HelloImGui::FontLoadingParams fontLoadingParamsTitleIcons;
    fontLoadingParamsTitleIcons.mergeFontAwesome = true;
    appState.TitleFont = HelloImGui::LoadFont("fonts/Roboto/Roboto-BoldItalic.ttf", 18.f, fontLoadingParamsTitleIcons);

    // Load an Emoji font
    HelloImGui::FontLoadingParams fontLoadingParamsEmoji;
    fontLoadingParamsEmoji.useFullGlyphRange = true;
    appState.EmojiFont = HelloImGui::LoadFont("fonts/NotoEmoji-Regular.ttf", 24.f, fontLoadingParamsEmoji);

    // Load a large icon font
    HelloImGui::FontLoadingParams fontLoadingParamsLargeIcon;
    fontLoadingParamsLargeIcon.useFullGlyphRange = true;
    appState.LargeIconFont = HelloImGui::LoadFont("fonts/Font_Awesome_6_Free-Solid-900.otf", 24.f, fontLoadingParamsLargeIcon);

#ifdef IMGUI_ENABLE_FREETYPE
    // Load a colored font (requires FreeType & lunasvg)
    HelloImGui::FontLoadingParams fontLoadingParamsColor;
    fontLoadingParamsColor.loadColor = true;
    appState.ColorFont = HelloImGui::LoadFont("fonts/Playbox/Playbox-FREE.otf", 24.f, fontLoadingParamsColor);
#endif
}


//////////////////////////////////////////////////////////////////////////
//    Save additional settings in the ini file
//////////////////////////////////////////////////////////////////////////
// This demonstrates how to store additional info in the application settings
// Use this sparingly!
// This is provided as a convenience only, and it is not intended to store large quantities of text data.

// Warning, the save/load function below are quite simplistic!
std::string MyAppSettingsToString(const MyAppSettings& myAppSettings)
{
    using namespace nlohmann;
    json j;
    j["motto"] = HelloImGui::InputTextDataToString(myAppSettings.motto);
    j["value"] = myAppSettings.value;
    return j.dump();
}
MyAppSettings StringToMyAppSettings(const std::string& s)
{
    if (s.empty())
        return MyAppSettings();
    MyAppSettings myAppSettings;
    using namespace nlohmann;
    try {
        json j = json::parse(s);
        myAppSettings.motto = HelloImGui::InputTextDataFromString(j["motto"].get<std::string>());
        myAppSettings.value = j["value"];
    }
    catch (json::exception& e)
    {
        HelloImGui::Log(HelloImGui::LogLevel::Error, "Error while parsing user settings: %s", e.what());
    }
    return myAppSettings;
}

// Note: LoadUserSettings() and SaveUserSettings() will be called in the callbacks `PostInit` and `BeforeExit`:
//     runnerParams.callbacks.PostInit = [&appState]   { LoadMyAppSettings(appState);};
//     runnerParams.callbacks.BeforeExit = [&appState] { SaveMyAppSettings(appState);};
void LoadMyAppSettings(AppState& appState) //
{
    appState.myAppSettings = StringToMyAppSettings(HelloImGui::LoadUserPref("MyAppSettings"));
}
void SaveMyAppSettings(const AppState& appState)
{
    HelloImGui::SaveUserPref("MyAppSettings", MyAppSettingsToString(appState.myAppSettings));
}

//////////////////////////////////////////////////////////////////////////
//    Gui functions used in this demo
//////////////////////////////////////////////////////////////////////////

// Display a button that will hide the application window
void DemoHideWindow(AppState& appState)
{
    ImGui::PushFont(appState.TitleFont); ImGui::Text("Hide app window"); ImGui::PopFont();
    static double lastHideTime = -1.;
    if (ImGui::Button("Hide"))
    {
        lastHideTime =  ImGui::GetTime();
        HelloImGui::GetRunnerParams()->appWindowParams.hidden = true;
    }
    if (ImGui::IsItemHovered())
        ImGui::SetTooltip("By clicking this button, you can hide the window for 3 seconds.");
    if (lastHideTime > 0.)
    {
        double now = ImGui::GetTime();
        if (now - lastHideTime > 3.)
        {
            lastHideTime = -1.;
            HelloImGui::GetRunnerParams()->appWindowParams.hidden = false;
        }
    }
}

// Display a button that will add another dockable window during execution
void DemoShowAdditionalWindow(AppState& appState)
{
    // In order to add a dockable window during execution, you should use
    //     HelloImGui::AddDockableWindow()
    // Note: you should not modify manually the content of runnerParams.dockingParams.dockableWindows
    //       (since HelloImGui is constantly looping on it)

    ImGui::PushFont(appState.TitleFont); ImGui::Text("Dynamically add window"); ImGui::PopFont();

    auto currentWindow = ImGui::GetCurrentWindow();

    const char* windowName = "Additional Window";
    if (ImGui::Button("Show additional window"))
    {
        HelloImGui::DockableWindow additionalWindow;
        additionalWindow.label = windowName;
        additionalWindow.includeInViewMenu = false;       // this window is not shown in the view menu,
        additionalWindow.rememberIsVisible = true;       // its visibility is not saved in the settings file,
        additionalWindow.dockSpaceName = "MiscSpace";     // when shown, it will appear in MiscSpace.
        additionalWindow.GuiFunction = [] { ImGui::Text("This is the additional window"); };
        HelloImGui::AddDockableWindow(
            additionalWindow,
            false  // forceDockspace=false: means that the window will be docked to the last space it was docked to
                   // i.e. dockSpaceName is ignored if the user previously moved the window to another space
        );
    }
    ImGui::SetItemTooltip("By clicking this button, you can show an additional window");

    if (ImGui::Button("Remove additional window"))
        HelloImGui::RemoveDockableWindow(windowName);
    ImGui::SetItemTooltip("By clicking this button, you can remove the additional window");
}

void DemoLogs(AppState& appState)
{
    ImGui::PushFont(appState.TitleFont); ImGui::Text("Log Demo"); ImGui::PopFont();

    ImGui::BeginGroup();
    // Edit a float using a slider from 0.0f to 1.0f
    bool changed = ImGui::SliderFloat("float", &appState.f, 0.0f, 1.0f);
    if (changed)
        HelloImGui::Log(HelloImGui::LogLevel::Warning, "state.f was changed to %f", appState.f);

    // Buttons return true when clicked (most widgets return true when edited/activated)
    if (ImGui::Button("Button"))
    {
        appState.counter++;
        HelloImGui::Log(HelloImGui::LogLevel::Info, "Button was pressed");
    }

    ImGui::SameLine();
    ImGui::Text("counter = %d", appState.counter);
    ImGui::EndGroup();
    if (ImGui::IsItemHovered())
        ImGui::SetTooltip("These widgets will interact with the log window");
}

void DemoUserSettings(AppState& appState)
{
    ImGui::PushFont(appState.TitleFont); ImGui::Text("User settings"); ImGui::PopFont();
    ImGui::BeginGroup();
    ImGui::SetNextItemWidth(HelloImGui::EmSize(7.f));
    ImGui::SliderInt("Value", &appState.myAppSettings.value, 0, 100);
    HelloImGui::InputTextResizable("Motto", &appState.myAppSettings.motto);
    ImGui::Text("(this text widget is resizable)");
    ImGui::EndGroup();
    if (ImGui::IsItemHovered())
        ImGui::SetTooltip("The values below are stored in the application settings ini file and restored at startup");
}

void DemoRocket(AppState& appState)
{
    ImGui::PushFont(appState.TitleFont); ImGui::Text("Status Bar Demo"); ImGui::PopFont();
    ImGui::BeginGroup();
    if (appState.rocket_state == AppState::RocketState::Init)
    {
        if (ImGui::Button(ICON_FA_ROCKET" Launch rocket"))
        {
            appState.rocket_launch_time = (float)ImGui::GetTime();
            appState.rocket_state = AppState::RocketState::Preparing;
            HelloImGui::Log(HelloImGui::LogLevel::Warning, "Rocket is being prepared");
        }
    }
    else if (appState.rocket_state == AppState::RocketState::Preparing)
    {
        ImGui::Text("Please Wait");
        appState.rocket_progress = (float)(ImGui::GetTime() - appState.rocket_launch_time) / 3.f;
        if (appState.rocket_progress >= 1.0f)
        {
            appState.rocket_state = AppState::RocketState::Launched;
            HelloImGui::Log(HelloImGui::LogLevel::Warning, "Rocket was launched");
        }
    }
    else if (appState.rocket_state == AppState::RocketState::Launched)
    {
        ImGui::Text(ICON_FA_ROCKET " Rocket launched");
        if (ImGui::Button("Reset Rocket"))
        {
            appState.rocket_state = AppState::RocketState::Init;
            appState.rocket_progress = 0.f;
        }
    }
    ImGui::EndGroup();
    if (ImGui::IsItemHovered())
        ImGui::SetTooltip("Look at the status bar after clicking");
}

void DemoDockingFlags(AppState& appState)
{
    ImGui::PushFont(appState.TitleFont); ImGui::Text("Main dock space node flags"); ImGui::PopFont();
    ImGui::TextWrapped(R"(
This will edit the ImGuiDockNodeFlags for "MainDockSpace".
Most flags are inherited by children dock spaces.
    )");
    struct DockFlagWithInfo {
        ImGuiDockNodeFlags flag;
        std::string label;
        std::string tip;
    };
    std::vector<DockFlagWithInfo> all_flags = {
        {ImGuiDockNodeFlags_NoSplit, "NoSplit", "prevent Dock Nodes from being split"},
        {ImGuiDockNodeFlags_NoResize, "NoResize", "prevent Dock Nodes from being resized"},
        {ImGuiDockNodeFlags_AutoHideTabBar, "AutoHideTabBar",
         "show tab bar only if multiple windows\n"
         "You will need to restore the layout after changing (Menu \"View/Restore Layout\")"},
        {ImGuiDockNodeFlags_NoDockingInCentralNode, "NoDockingInCentralNode",
         "prevent docking in central node\n"
         "(only works with the main dock space)"},
        // {ImGuiDockNodeFlags_PassthruCentralNode, "PassthruCentralNode", "advanced"},
    };
    auto & mainDockSpaceNodeFlags = HelloImGui::GetRunnerParams()->dockingParams.mainDockSpaceNodeFlags;
    for (const auto& flag: all_flags)
    {
        ImGui::CheckboxFlags(flag.label.c_str(), &mainDockSpaceNodeFlags, flag.flag);
        if (ImGui::IsItemHovered())
            ImGui::SetTooltip("%s", flag.tip.c_str());
    }
}

void GuiWindowLayoutCustomization(AppState& appState)
{
    ImGui::PushFont(appState.TitleFont); ImGui::Text("Switch between layouts"); ImGui::PopFont();
    ImGui::Text("with the menu \"View/Layouts\"");
    if (ImGui::IsItemHovered())
        ImGui::SetTooltip("Each layout remembers separately the modifications applied by the user, \nand the selected layout is restored at startup");
    ImGui::Separator();
    ImGui::PushFont(appState.TitleFont); ImGui::Text("Change the theme"); ImGui::PopFont();
    ImGui::Text("with the menu \"View/Theme\"");
    if (ImGui::IsItemHovered())
        ImGui::SetTooltip("The selected theme is remembered and restored at startup");
    ImGui::Separator();
    DemoDockingFlags(appState);
    ImGui::Separator();
}

void GuiWindowAlternativeTheme(AppState& appState)
{
    // Since this window applies a theme, We need to call "ImGui::Begin" ourselves so
    // that we can apply the theme before opening the window.
    //
    // In order to obtain this, we applied the following option to the window
    // that displays this Gui:
    //     alternativeThemeWindow.callBeginEnd = false;

    // Apply the theme before opening the window
    ImGuiTheme::ImGuiTweakedTheme tweakedTheme;
    tweakedTheme.Theme = ImGuiTheme::ImGuiTheme_WhiteIsWhite;
    tweakedTheme.Tweaks.Rounding = 0.0f;
    ImGuiTheme::PushTweakedTheme(tweakedTheme);

    // Open the window
    bool windowOpened = ImGui::Begin("Alternative Theme");
    if (windowOpened)
    {
        // Display some widgets
        ImGui::PushFont(appState.TitleFont); ImGui::Text("Alternative Theme"); ImGui::PopFont();
        ImGui::Text("This window uses a different theme");
        ImGui::SetItemTooltip("    ImGuiTheme::ImGuiTweakedTheme tweakedTheme;\n"
                              "    tweakedTheme.Theme = ImGuiTheme::ImGuiTheme_WhiteIsWhite;\n"
                              "    tweakedTheme.Tweaks.Rounding = 0.0f;\n"
                              "    ImGuiTheme::PushTweakedTheme(tweakedTheme);");

        if (ImGui::CollapsingHeader("Basic Widgets", ImGuiTreeNodeFlags_DefaultOpen))
        {
            static bool checked = true;
            ImGui::Checkbox("Checkbox", &checked);

            if (ImGui::Button("Button"))
                HelloImGui::Log(HelloImGui::LogLevel::Info, "Button was pressed");
            ImGui::SetItemTooltip("This is a button");

            static int radio = 0;
            ImGui::RadioButton("Radio 1", &radio, 0); ImGui::SameLine();
            ImGui::RadioButton("Radio 2", &radio, 1); ImGui::SameLine();
            ImGui::RadioButton("Radio 3", &radio, 2);

            // Haiku
            {
                // Display a image of the haiku below with Japanese characters
                // with an informative tooltip
                float haikuImageHeight = HelloImGui::EmSize(5.f);
                HelloImGui::ImageFromAsset("images/haiku.png", ImVec2(0.f, haikuImageHeight));
                ImGui::SetItemTooltip(R"(
Extract from Wikipedia
-------------------------------------------------------------------------------

In early 1686, Bashō composed one of his best-remembered haiku:

        furu ike ya / kawazu tobikomu / mizu no oto

   an ancient pond / a frog jumps in / the splash of water

This poem became instantly famous.

-------------------------------------------------------------------------------

This haiku is here rendered as an image, mainly to preserve space,
because adding a Japanese font to the project would enlarge its size.
Handling Japanese font is of course possible within ImGui / Hello ImGui!
            )");

                // Display the haiku text as an InputTextMultiline
                static std::string poem =
                    "   Old Pond\n"
                    "  Frog Leaps In\n"
                    " Water's Sound\n"
                    "\n"
                    "      Matsuo Bashō - 1686";
                ImGui::InputTextMultiline("##Poem", &poem, HelloImGui::EmToVec2(15.f, 5.5f));
            }

            // A popup with a modal window
            if (ImGui::Button("Open Modal"))
                ImGui::OpenPopup("MyModal");
            if (ImGui::BeginPopupModal("MyModal", NULL, ImGuiWindowFlags_AlwaysAutoResize))
            {
                ImGui::Text("This is a modal window");
                if (ImGui::Button("Close"))
                    ImGui::CloseCurrentPopup();
                ImGui::EndPopup();
            }

            static std::string text = "Hello, world!";
            ImGui::InputText("Input text", &text);

            if (ImGui::TreeNode("Text Display"))
            {
                ImGui::Text("Hello, world!");
                ImGui::TextColored(ImVec4(1.f, 0.5f, 0.5f, 1.f), "Some text");
                ImGui::TextDisabled("Disabled text");
                ImGui::TextWrapped("This is a long text that will be wrapped in the window");
                ImGui::TreePop();
            }
        }
    }
    // Close the window
    ImGui::End();

    // Restore the theme
    ImGuiTheme::PopTweakedTheme();
}

void DemoAssets(AppState& appState)
{
    ImGui::PushFont(appState.TitleFont); ImGui::Text("Image From Asset"); ImGui::PopFont();
    HelloImGui::BeginGroupColumn();
    ImGui::Dummy(HelloImGui::EmToVec2(0.f, 0.45f));
    ImGui::Text("Hello");
    HelloImGui::EndGroupColumn();
    HelloImGui::ImageFromAsset("images/world.png", HelloImGui::EmToVec2(2.5f, 2.5f));
}

void DemoFonts(AppState& appState)
{
    ImGui::PushFont(appState.TitleFont); ImGui::Text("Fonts - " ICON_FA_ROCKET); ImGui::PopFont();

    ImGui::TextWrapped("Mix icons " ICON_FA_FACE_SMILE " and text " ICON_FA_ROCKET "");
    if (ImGui::IsItemHovered())
        ImGui::SetTooltip("Example with Font Awesome Icons");

    ImGui::Text("Emojis");

    ImGui::BeginGroup();
    {
        ImGui::PushFont(appState.EmojiFont);
        // ✌️ (Victory Hand Emoji)
        ImGui::Text(U8_TO_CHAR(u8"\U0000270C\U0000FE0F"));
        ImGui::SameLine();

        // ❤️ (Red Heart Emoji)
        ImGui::Text(U8_TO_CHAR(u8"\U00002764\U0000FE0F"));
        ImGui::SameLine();

#ifdef IMGUI_USE_WCHAR32
        // 🌴 (Palm Tree Emoji)
        ImGui::Text(U8_TO_CHAR(u8"\U0001F334"));
        ImGui::SameLine();

        // 🚀 (Rocket Emoji)
        ImGui::Text(U8_TO_CHAR(u8"\U0001F680"));
        ImGui::SameLine();
#endif

        ImGui::PopFont();
    }
    ImGui::EndGroup();
    if (ImGui::IsItemHovered())
        ImGui::SetTooltip("Example with NotoEmoji font");

#ifdef IMGUI_ENABLE_FREETYPE
    ImGui::Text("Colored Fonts");
    ImGui::PushFont(appState.ColorFont);
    ImGui::Text("COLOR!");
    ImGui::PopFont();
    if (ImGui::IsItemHovered())
        ImGui::SetTooltip("Example with Playbox-FREE.otf font");
#endif
}

void DemoThemes(AppState& appState)
{
    ImGui::PushFont(appState.TitleFont); ImGui::Text("Themes"); ImGui::PopFont();
    auto& tweakedTheme = HelloImGui::GetRunnerParams()->imGuiWindowParams.tweakedTheme;

    ImGui::BeginGroup();
    ImVec2 buttonSize = HelloImGui::EmToVec2(7.f, 0.f);
    if (ImGui::Button("Cherry", buttonSize))
    {
        tweakedTheme.Theme = ImGuiTheme::ImGuiTheme_Cherry;
        ImGuiTheme::ApplyTweakedTheme(tweakedTheme);
    }
    if (ImGui::Button("DarculaDarker", buttonSize))
    {
        tweakedTheme.Theme = ImGuiTheme::ImGuiTheme_DarculaDarker;
        ImGuiTheme::ApplyTweakedTheme(tweakedTheme);
    }
    ImGui::EndGroup();
    if (ImGui::IsItemHovered())
            ImGui::SetTooltip(
                "There are lots of other themes: look at the menu View/Theme\n"
                "The selected theme is remembered and restored at startup"
            );
}

// The Gui of the demo feature window
void GuiWindowDemoFeatures(AppState& appState)
{
    DemoFonts(appState);
    ImGui::Separator();
    DemoAssets(appState);
    ImGui::Separator();
    DemoLogs(appState);
    ImGui::Separator();
    DemoRocket(appState);
    ImGui::Separator();
    DemoUserSettings(appState);
    ImGui::Separator();
    DemoHideWindow(appState);
    ImGui::Separator();
    DemoShowAdditionalWindow(appState);
    ImGui::Separator();
    DemoThemes(appState);
    ImGui::Separator();
}

// The Gui of the status bar
void StatusBarGui(AppState& app_state)
{
    if (app_state.rocket_state == AppState::RocketState::Preparing)
    {
        ImGui::Text("Rocket completion: ");
        ImGui::SameLine();
        ImGui::ProgressBar(app_state.rocket_progress, HelloImGui::EmToVec2(7.0f, 1.0f));
    }
}

// The menu gui
void ShowMenuGui(HelloImGui::RunnerParams& runnerParams)
{
    HelloImGui::ShowAppMenu(runnerParams);
    HelloImGui::ShowViewMenu(runnerParams);

    if (ImGui::BeginMenu("My Menu"))
    {
        bool clicked = ImGui::MenuItem("Test me", "", false);
        if (clicked)
        {
            HelloImGui::Log(HelloImGui::LogLevel::Warning, "It works");
        }
        ImGui::EndMenu();
    }
}

void ShowAppMenuItems()
{
    if (ImGui::MenuItem("A Custom app menu item"))
        HelloImGui::Log(HelloImGui::LogLevel::Info, "Clicked on A Custom app menu item");
}

void ShowTopToolbar(AppState& appState)
{
    ImGui::PushFont(appState.LargeIconFont);
    if (ImGui::Button(ICON_FA_POWER_OFF))
        HelloImGui::GetRunnerParams()->appShallExit = true;

    ImGui::SameLine(ImGui::GetWindowWidth() - HelloImGui::EmSize(7.f));
    if (ImGui::Button(ICON_FA_HOUSE))
        HelloImGui::Log(HelloImGui::LogLevel::Info, "Clicked on Home in the top toolbar");
    ImGui::SameLine();
    if (ImGui::Button(ICON_FA_FLOPPY_DISK))
        HelloImGui::Log(HelloImGui::LogLevel::Info, "Clicked on Save in the top toolbar");
    ImGui::SameLine();
    if (ImGui::Button(ICON_FA_ADDRESS_BOOK))
        HelloImGui::Log(HelloImGui::LogLevel::Info, "Clicked on Address Book in the top toolbar");

    ImGui::SameLine(ImGui::GetWindowWidth() - HelloImGui::EmSize(2.f));
    ImGui::Text(ICON_FA_BATTERY_THREE_QUARTERS);
    ImGui::PopFont();
}

void ShowRightToolbar(AppState& appState)
{
    ImGui::PushFont(appState.LargeIconFont);
    if (ImGui::Button(ICON_FA_CIRCLE_ARROW_LEFT))
        HelloImGui::Log(HelloImGui::LogLevel::Info, "Clicked on Circle left in the right toolbar");

    if (ImGui::Button(ICON_FA_CIRCLE_ARROW_RIGHT))
        HelloImGui::Log(HelloImGui::LogLevel::Info, "Clicked on Circle right in the right toolbar");
    ImGui::PopFont();
}

//////////////////////////////////////////////////////////////////////////
//    Docking Layouts and Docking windows
//////////////////////////////////////////////////////////////////////////

//
// 1. Define the Docking splits (two versions are available)
//
std::vector<HelloImGui::DockingSplit> CreateDefaultDockingSplits()
{
    //    Define the default docking splits,
    //    i.e. the way the screen space is split in different target zones for the dockable windows
    //     We want to split "MainDockSpace" (which is provided automatically) into three zones, like this:
    //
    //    ___________________________________________
    //    |        |                                |
    //    | Command|                                |
    //    | Space  |    MainDockSpace               |
    //    |------- |                                |
    //    |        |--------------------------------|
    //    |        |       CommandSpace2            |
    //    -------------------------------------------
    //    |     MiscSpace                           |
    //    -------------------------------------------
    //

    // Then, add a space named "MiscSpace" whose height is 25% of the app height.
    // This will split the preexisting default dockspace "MainDockSpace" in two parts.
    HelloImGui::DockingSplit splitMainMisc;
    splitMainMisc.initialDock = "MainDockSpace";
    splitMainMisc.newDock = "MiscSpace";
    splitMainMisc.direction = ImGuiDir_Down;
    splitMainMisc.ratio = 0.25f;

    // Then, add a space to the left which occupies a column whose width is 25% of the app width
    HelloImGui::DockingSplit splitMainCommand;
    splitMainCommand.initialDock = "MainDockSpace";
    splitMainCommand.newDock = "CommandSpace";
    splitMainCommand.direction = ImGuiDir_Left;
    splitMainCommand.ratio = 0.25f;

    // Then, add CommandSpace2 below MainDockSpace
    HelloImGui::DockingSplit splitMainCommand2;
    splitMainCommand2.initialDock = "MainDockSpace";
    splitMainCommand2.newDock = "CommandSpace2";
    splitMainCommand2.direction = ImGuiDir_Down;
    splitMainCommand2.ratio = 0.5f;

    std::vector<HelloImGui::DockingSplit> splits {splitMainMisc, splitMainCommand, splitMainCommand2};
    return splits;
}

std::vector<HelloImGui::DockingSplit> CreateAlternativeDockingSplits()
{
    //    Define alternative docking splits for the "Alternative Layout"
    //    ___________________________________________
    //    |                |                        |
    //    | Misc           |                        |
    //    | Space          |    MainDockSpace       |
    //    |                |                        |
    //    -------------------------------------------
    //    |                       |                 |
    //    |                       | Command         |
    //    |     CommandSpace      | Space2          |
    //    |                       |                 |
    //    -------------------------------------------

    HelloImGui::DockingSplit splitMainCommand;
    splitMainCommand.initialDock = "MainDockSpace";
    splitMainCommand.newDock = "CommandSpace";
    splitMainCommand.direction = ImGuiDir_Down;
    splitMainCommand.ratio = 0.5f;

    HelloImGui::DockingSplit splitMainCommand2;
    splitMainCommand2.initialDock = "CommandSpace";
    splitMainCommand2.newDock = "CommandSpace2";
    splitMainCommand2.direction = ImGuiDir_Right;
    splitMainCommand2.ratio = 0.4f;

    HelloImGui::DockingSplit splitMainMisc;
    splitMainMisc.initialDock = "MainDockSpace";
    splitMainMisc.newDock = "MiscSpace";
    splitMainMisc.direction = ImGuiDir_Left;
    splitMainMisc.ratio = 0.5f;

    std::vector<HelloImGui::DockingSplit> splits {splitMainCommand, splitMainCommand2, splitMainMisc};
    return splits;
}

//
// 2. Define the Dockable windows
//
std::vector<HelloImGui::DockableWindow> CreateDockableWindows(AppState& appState)
{
    // A window named "FeaturesDemo" will be placed in "CommandSpace". Its Gui is provided by "GuiWindowDemoFeatures"
    HelloImGui::DockableWindow featuresDemoWindow;
    featuresDemoWindow.label = "Features Demo";
    featuresDemoWindow.dockSpaceName = "CommandSpace";
    featuresDemoWindow.GuiFunction = [&] { GuiWindowDemoFeatures(appState); };

    // A layout customization window will be placed in "MainDockSpace". Its Gui is provided by "GuiWindowLayoutCustomization"
    HelloImGui::DockableWindow layoutCustomizationWindow;
    layoutCustomizationWindow.label = "Layout customization";
    layoutCustomizationWindow.dockSpaceName = "MainDockSpace";
    layoutCustomizationWindow.GuiFunction = [&appState]() { GuiWindowLayoutCustomization(appState); };

    // A Log window named "Logs" will be placed in "MiscSpace". It uses the HelloImGui logger gui
    HelloImGui::DockableWindow logsWindow;
    logsWindow.label = "Logs";
    logsWindow.dockSpaceName = "MiscSpace";
    logsWindow.GuiFunction = [] { HelloImGui::LogGui(); };

    // A Window named "Dear ImGui Demo" will be placed in "MainDockSpace"
    HelloImGui::DockableWindow dearImGuiDemoWindow;
    dearImGuiDemoWindow.label = "Dear ImGui Demo";
    dearImGuiDemoWindow.dockSpaceName = "MainDockSpace";
    dearImGuiDemoWindow.imGuiWindowFlags = ImGuiWindowFlags_MenuBar;
    dearImGuiDemoWindow.GuiFunction = [] { ImGui::ShowDemoWindow(); };

    // alternativeThemeWindow
    HelloImGui::DockableWindow alternativeThemeWindow;
    // Since this window applies a theme, We need to call "ImGui::Begin" ourselves so
    // that we can apply the theme before opening the window.
    alternativeThemeWindow.callBeginEnd = false;
    alternativeThemeWindow.label = "Alternative Theme";
    alternativeThemeWindow.dockSpaceName = "CommandSpace2";
    alternativeThemeWindow.GuiFunction = [&appState]() { GuiWindowAlternativeTheme(appState); };

    std::vector<HelloImGui::DockableWindow> dockableWindows {
        featuresDemoWindow,
        layoutCustomizationWindow,
        logsWindow,
        dearImGuiDemoWindow,
        alternativeThemeWindow
    };
    return dockableWindows;
}

//
// 3. Define the layouts:
//        A layout is stored inside DockingParams, and stores the splits + the dockable windows.
//        Here, we provide the default layout, and two alternative layouts.
//
HelloImGui::DockingParams CreateDefaultLayout(AppState& appState)
{
    HelloImGui::DockingParams dockingParams;
    // dockingParams.layoutName = "Default"; // By default, the layout name is already "Default"
    dockingParams.dockingSplits = CreateDefaultDockingSplits();
    dockingParams.dockableWindows = CreateDockableWindows(appState);
    return dockingParams;
}

std::vector<HelloImGui::DockingParams> CreateAlternativeLayouts(AppState& appState)
{
    HelloImGui::DockingParams alternativeLayout;
    {
        alternativeLayout.layoutName = "Alternative Layout";
        alternativeLayout.dockingSplits = CreateAlternativeDockingSplits();
        alternativeLayout.dockableWindows = CreateDockableWindows(appState);
    }
    HelloImGui::DockingParams tabsLayout;
    {
        tabsLayout.layoutName = "Tabs Layout";
        tabsLayout.dockableWindows = CreateDockableWindows(appState);
        // Force all windows to be presented in the MainDockSpace
        for (auto& window: tabsLayout.dockableWindows)
            window.dockSpaceName = "MainDockSpace";
        // In "Tabs Layout", no split is created
        tabsLayout.dockingSplits = {};
    }
    return {alternativeLayout, tabsLayout};
}


//////////////////////////////////////////////////////////////////////////
// Define the app initial theme
//////////////////////////////////////////////////////////////////////////
void SetupMyTheme()
{
    // Example of theme customization at App startup
    // This function is called in the callback `SetupImGuiStyle` in order to apply a custom theme:
    //     runnerParams.callbacks.SetupImGuiStyle = SetupMyTheme;

    // Apply default style
    HelloImGui::ImGuiDefaultSettings::SetupDefaultImGuiStyle();
    // Create a tweaked theme
    ImGuiTheme::ImGuiTweakedTheme tweakedTheme;
    tweakedTheme.Theme = ImGuiTheme::ImGuiTheme_MaterialFlat;
    tweakedTheme.Tweaks.Rounding = 10.0f;
    // Apply the tweaked theme
    ImGuiTheme::ApplyTweakedTheme(tweakedTheme); // Note: you can also push/pop the theme in order to apply it only to a specific part of the Gui: ImGuiTheme::PushTweakedTheme(tweakedTheme) / ImGuiTheme::PopTweakedTheme()
    // Then apply further modifications to ImGui style
    ImGui::GetStyle().ItemSpacing = ImVec2(6, 4);  // Reduce spacing between items ((8, 4) by default)
    ImGui::GetStyle().Colors[ImGuiCol_Text] = ImVec4(0.8, 0.8, 0.85, 1.0);  // Change text color
}


//////////////////////////////////////////////////////////////////////////
//    main(): here, we simply fill RunnerParams, then run the application
//////////////////////////////////////////////////////////////////////////
int main(int, char**)
{
    ChdirBesideAssetsFolder();

    //#############################################################################################
    // Part 1: Define the application state, fill the status and menu bars, load additional font
    //#############################################################################################

    // Our application state
    AppState appState;

    // Hello ImGui params (they hold the settings as well as the Gui callbacks)
    HelloImGui::RunnerParams runnerParams;

    runnerParams.appWindowParams.windowTitle = "Docking Demo";
    runnerParams.imGuiWindowParams.menuAppTitle = "Docking Demo";
    runnerParams.appWindowParams.windowGeometry.size = {1000, 900};
    runnerParams.appWindowParams.restorePreviousGeometry = true;
    runnerParams.appWindowParams.borderless = true;
    runnerParams.appWindowParams.borderlessMovable = true;
    runnerParams.appWindowParams.borderlessResizable = true;
    runnerParams.appWindowParams.borderlessClosable = true;

    // Set LoadAdditionalFonts callback
    runnerParams.callbacks.LoadAdditionalFonts = [&appState]() { LoadFonts(appState); };

    //
    // Status bar
    //
    // We use the default status bar of Hello ImGui
    runnerParams.imGuiWindowParams.showStatusBar = true;
    // Add custom widgets in the status bar
    runnerParams.callbacks.ShowStatus = [&appState]() { StatusBarGui(appState); };
    // uncomment next line in order to hide the FPS in the status bar
    // runnerParams.imGuiWindowParams.showStatusFps = false;

    //
    // Menu bar
    //
    // Here, we fully customize the menu bar:
    // by setting `showMenuBar` to true, and `showMenu_App` and `showMenu_View` to false,
    // HelloImGui will display an empty menu bar, which we can fill with our own menu items via the callback `ShowMenus`
    runnerParams.imGuiWindowParams.showMenuBar = true;
    runnerParams.imGuiWindowParams.showMenu_App = false;
    runnerParams.imGuiWindowParams.showMenu_View = false;
    // Inside `ShowMenus`, we can call `HelloImGui::ShowViewMenu` and `HelloImGui::ShowAppMenu` if desired
    runnerParams.callbacks.ShowMenus = [&runnerParams]() {ShowMenuGui(runnerParams);};
    // Optional: add items to Hello ImGui default App menu
    runnerParams.callbacks.ShowAppMenuItems = ShowAppMenuItems;

    //
    // Top and bottom toolbars
    //
    // toolbar options
    HelloImGui::EdgeToolbarOptions edgeToolbarOptions;
    edgeToolbarOptions.sizeEm = 2.5f;
    edgeToolbarOptions.WindowBg = ImVec4(0.8f, 0.8f, 0.8f, 0.35f);
    // top toolbar
    runnerParams.callbacks.AddEdgeToolbar(
        HelloImGui::EdgeToolbarType::Top,
        [&appState]() { ShowTopToolbar(appState); },
        edgeToolbarOptions
    );
    // right toolbar
    edgeToolbarOptions.WindowBg.w = 0.4f;
    runnerParams.callbacks.AddEdgeToolbar(
        HelloImGui::EdgeToolbarType::Right,
        [&appState]() { ShowRightToolbar(appState); },
        edgeToolbarOptions
    );

    //
    // Load user settings at callbacks `PostInit` and save them at `BeforeExit`
    //
    runnerParams.callbacks.PostInit = [&appState]   { LoadMyAppSettings(appState);};
    runnerParams.callbacks.BeforeExit = [&appState] { SaveMyAppSettings(appState);};

    // Change style
    runnerParams.callbacks.SetupImGuiStyle = SetupMyTheme;

    //#############################################################################################
    // Part 2: Define the application layout and windows
    //#############################################################################################

    // First, tell HelloImGui that we want full screen dock space (this will create "MainDockSpace")
    runnerParams.imGuiWindowParams.defaultImGuiWindowType = HelloImGui::DefaultImGuiWindowType::ProvideFullScreenDockSpace;
    // In this demo, we also demonstrate multiple viewports: you can drag windows outside out the main window in order to put their content into new native windows
    runnerParams.imGuiWindowParams.enableViewports = true;
    // Set the default layout (this contains the default DockingSplits and DockableWindows)
    runnerParams.dockingParams = CreateDefaultLayout(appState);
    // Add alternative layouts
    runnerParams.alternativeDockingLayouts = CreateAlternativeLayouts(appState);

    // uncomment the next line if you want to always start with the layout defined in the code
    //     (otherwise, modifications to the layout applied by the user layout will be remembered)
    // runnerParams.dockingParams.layoutCondition = HelloImGui::DockingLayoutCondition::ApplicationStart;

    //#############################################################################################
    // Part 3: Where to save the app settings
    //#############################################################################################
    // tag::app_settings[]
    // By default, HelloImGui will save the settings in the current folder.
    // This is convenient when developing, but not so much when deploying the app.
    // You can tell HelloImGui to save the settings in a specific folder: choose between
    //         CurrentFolder
    //         AppUserConfigFolder
    //         AppExecutableFolder
    //         HomeFolder
    //         TempFolder
    //         DocumentsFolder
    //
    // Note: AppUserConfigFolder is:
    //         AppData under Windows (Example: C:\Users\[Username]\AppData\Roaming)
    //         ~/.config under Linux
    //         "~/Library/Application Support" under macOS or iOS
    runnerParams.iniFolderType = HelloImGui::IniFolderType::AppUserConfigFolder;

    // runnerParams.iniFilename: this will be the name of the ini file in which the settings
    // will be stored.
    // In this example, the subdirectory Docking_Demo will be created under the folder defined
    // by runnerParams.iniFolderType.
    //
    // Note: if iniFilename is left empty, the name of the ini file will be derived
    // from appWindowParams.windowTitle
    runnerParams.iniFilename = "Docking_Demo/Docking_demo.ini";
    // end::app_settings[]


    //#############################################################################################
    // Part 4: Run the app
    //#############################################################################################
    HelloImGui::Run(runnerParams); // Note: with ImGuiBundle, it is also possible to use ImmApp::Run(...)


    return 0;
}
Click to see its source code in Python
Python:
# A more complex app demo
#
# It demonstrates how to:
# - set up a complex docking layouts (with several possible layouts):
# - load additional fonts, possibly colored, and with emojis
# - display a log window
# - use the status bar
# - use default menus (App and view menu), and how to customize them
# - use a specific application state (instead of using static variables)
# - save some additional user settings within imgui ini file
# - use borderless windows, that are movable and resizable
import json
from enum import Enum
import time

from imgui_bundle import hello_imgui, icons_fontawesome_6, imgui, immapp, imgui_ctx, ImVec4, ImVec2
from imgui_bundle.demos_python import demo_utils
from typing import List, Any


##########################################################################
#    Our Application State
##########################################################################
class MyAppSettings:
    motto: hello_imgui.InputTextData
    value: int = 10

    def __init__(self):
        self.motto = hello_imgui.InputTextData(
            "Hello, Dear ImGui\n"
            "Unleash your creativity!\n",
            True, # multiline
            (14.0, 3.0) # initial size (in em)
        )

class RocketState(Enum):
    Init = 0
    Preparing = 1
    Launched = 2


# Struct that holds the application's state
class AppState:
    f: float
    counter: int
    rocket_progress: float
    my_app_settings: MyAppSettings
    rocket_state: RocketState
    rocket_launch_time: float

    title_font: imgui.ImFont
    color_font: imgui.ImFont
    emoji_font: imgui.ImFont
    large_icon_font: imgui.ImFont

    def __init__(self):
        self.f = 0
        self.counter = 0
        self.rocket_progress = 0.0
        self.rocket_launch_time = 0.0
        self.my_app_settings = MyAppSettings()
        self.rocket_state = RocketState.Init


##########################################################################
#    Additional fonts handling
##########################################################################
def load_fonts(app_state: AppState):  # This is called by runnerParams.callbacks.LoadAdditionalFonts
    # First, load the default font (the default font should be loaded first)
    # In this example, we instruct HelloImGui to use FontAwesome6 instead of FontAwesome4
    hello_imgui.get_runner_params().callbacks.default_icon_font = hello_imgui.DefaultIconFont.font_awesome6
    hello_imgui.imgui_default_settings.load_default_font_with_font_awesome_icons()

    # Load the title font
    # app_state.title_font = hello_imgui.load_font("fonts/DroidSans.ttf", 18.0)
    font_loading_params_title_icons = hello_imgui.FontLoadingParams()
    font_loading_params_title_icons.merge_font_awesome = True
    app_state.title_font = hello_imgui.load_font("fonts/Roboto/Roboto-BoldItalic.ttf", 18, font_loading_params_title_icons)

    # Load the emoji font
    font_loading_params_emoji = hello_imgui.FontLoadingParams()
    font_loading_params_emoji.use_full_glyph_range = True
    app_state.emoji_font = hello_imgui.load_font("fonts/NotoEmoji-Regular.ttf", 24., font_loading_params_emoji)

    # Load a large icon font
    font_loading_params_large_icon = hello_imgui.FontLoadingParams()
    font_loading_params_large_icon.use_full_glyph_range = True
    app_state.large_icon_font = hello_imgui.load_font("fonts/fontawesome-webfont.ttf", 24., font_loading_params_large_icon)

    # Load a colored font
    font_loading_params_color = hello_imgui.FontLoadingParams()
    font_loading_params_color.load_color = True
    app_state.color_font = hello_imgui.load_font("fonts/Playbox/Playbox-FREE.otf", 24., font_loading_params_color)


##########################################################################
#    Save additional settings in the ini file
##########################################################################
# This demonstrates how to store additional info in the application settings
# Use this sparingly!
# This is provided as a convenience only, and it is not intended to store large quantities of text data.

# Warning, the save/load function below are quite simplistic!
def my_app_settings_to_string(settings: MyAppSettings) -> str:
    as_dict: dict[str, Any] = {}
    as_dict["motto"] = hello_imgui.input_text_data_to_dict(settings.motto)
    as_dict["value"] = settings.value
    return json.dumps(as_dict)


def string_to_my_app_settings(s: str) -> MyAppSettings:
    r = MyAppSettings()
    try:
        as_dict = json.loads(s)
        r.motto = hello_imgui.input_text_data_from_dict(as_dict["motto"])
        r.value = as_dict["value"]
    except Exception as e:
        hello_imgui.log(hello_imgui.LogLevel.error, f"Error while loading user settings: {e}")
    return r


def load_my_app_settings(app_state: AppState):
    """
    Note: load_my_app_settings() and save_my_app_settings() will be called in the callbacks `post_init` & `before_exit`
         runner_params.callbacks.post_init = lambda: load_user_settings(app_state)
         runner_params.callbacks.before_exit = lambda: save_user_settings(app_state)
    """
    app_state.my_app_settings = string_to_my_app_settings(
        hello_imgui.load_user_pref("MyAppSettings")
    )


def save_my_app_settings(app_state: AppState):
    hello_imgui.save_user_pref(
        "MyAppSettings", my_app_settings_to_string(app_state.my_app_settings)
    )


##########################################################################
#    Gui functions used in this demo
##########################################################################
@immapp.static(last_hide_time=1)
def demo_hide_window(app_state: AppState):
    # Display a button that will hide the application window
    imgui.push_font(app_state.title_font)
    imgui.text("Hide app window")
    imgui.pop_font()

    if imgui.button("Hide"):
        demo_hide_window.last_hide_time = time.time()
        hello_imgui.get_runner_params().app_window_params.hidden = True
    if imgui.is_item_hovered():
        imgui.set_tooltip("By clicking this button, you can hide the window for 3 seconds.")
    if demo_hide_window.last_hide_time > 0.0:
        now = time.time()
        if now - demo_hide_window.last_hide_time > 3.0:
            demo_hide_window.last_hide_time = -1.0
            hello_imgui.get_runner_params().app_window_params.hidden = False


# Display a button that will add another dockable window during execution
def demo_show_additional_window(app_state: AppState):
    # In order to add a dockable window during execution, you should use
    #     hello_imgui.add_dockable_window()
    # Note: you should not modify manually the content of runnerParams.docking_params.dockable_windows
    #       (since HelloImGui is constantly looping on it)

    imgui.push_font(app_state.title_font)
    imgui.text("Dynamically add window")
    imgui.pop_font()

    window_name = "Additional Window"
    if imgui.button("Show additional window"):
        additional_window = hello_imgui.DockableWindow()
        additional_window.label = window_name
        additional_window.include_in_view_menu = False  # this window is not shown in the view menu,
        additional_window.remember_is_visible = False  # its visibility is not saved in the settings file,
        additional_window.dock_space_name = "MiscSpace"  # when shown, it will appear in MiscSpace.
        additional_window.gui_function = lambda: imgui.text("This is the additional window")
        hello_imgui.add_dockable_window(
            additional_window,
            force_dockspace=False  # means that the window will be docked to the last space it was docked to
                                   # i.e. dock_space_name is ignored if the user previously moved the window to another space
        )
    imgui.set_item_tooltip("By clicking this button, you can show an additional window")

    if imgui.button("Remove additional window"):
        hello_imgui.remove_dockable_window(window_name)
    imgui.set_item_tooltip("By clicking this button, you can remove the additional window")


def demo_basic_widgets(app_state: AppState):
    imgui.push_font(app_state.title_font)
    imgui.text("Basic widgets demo")
    imgui.pop_font()

    imgui.begin_group()
    # Edit a float using a slider from 0.0 to 1.0
    changed, app_state.f = imgui.slider_float("float", app_state.f, 0.0, 1.0)
    if changed:
        hello_imgui.log(
            hello_imgui.LogLevel.warning, f"state.f was changed to {app_state.f}"
        )

    # Buttons return true when clicked (most widgets return true when edited/activated)
    if imgui.button("Button"):
        app_state.counter += 1
        hello_imgui.log(hello_imgui.LogLevel.info, "Button was pressed")
    imgui.same_line()
    imgui.text(f"counter = {app_state.counter}")
    imgui.end_group()

    if imgui.is_item_hovered():
        imgui.set_tooltip("These widgets will interact with the log window")


def demo_user_settings(app_state: AppState):
    imgui.push_font(app_state.title_font)
    imgui.text("User settings")
    imgui.pop_font()

    imgui.begin_group()

    imgui.set_next_item_width(hello_imgui.em_size(7.0))
    _, app_state.my_app_settings.value = imgui.slider_int(
        "Value", app_state.my_app_settings.value, 0, 100
    )

    _ = hello_imgui.input_text_resizable("Motto", app_state.my_app_settings.motto)
    imgui.text("(this text widget is resizable)")

    imgui.end_group()
    if imgui.is_item_hovered():
        imgui.set_tooltip("The values below are stored in the application settings ini file and restored at startup")


def demo_rocket(app_state: AppState):
    imgui.push_font(app_state.title_font)
    imgui.text("Rocket demo")
    imgui.pop_font()

    imgui.begin_group()
    if app_state.rocket_state == RocketState.Init:
        if imgui.button(f"{icons_fontawesome_6.ICON_FA_ROCKET} Launch rocket"):
            app_state.rocket_launch_time = time.time()
            app_state.rocket_state = RocketState.Preparing
            hello_imgui.log(hello_imgui.LogLevel.warning, "Rocket is being prepared")
    elif app_state.rocket_state == RocketState.Preparing:
        imgui.text("Please Wait")
        app_state.rocket_progress = (time.time() - app_state.rocket_launch_time) / 3.0
        if app_state.rocket_progress >= 1.0:
            app_state.rocket_state = RocketState.Launched
            hello_imgui.log(hello_imgui.LogLevel.warning, "Rocket was launched")
    elif app_state.rocket_state == RocketState.Launched:
        imgui.text(f"{icons_fontawesome_6.ICON_FA_ROCKET} Rocket launched")
        if imgui.button("Reset Rocket"):
            app_state.rocket_state = RocketState.Init
            app_state.rocket_progress = 0.0
    imgui.end_group()
    if imgui.is_item_hovered():
        imgui.set_tooltip("Look at the status bar after clicking")


def demo_docking_flags(app_state: AppState):
    imgui.push_font(app_state.title_font)
    imgui.text("Main dock space node flags")
    imgui.pop_font()
    imgui.text_wrapped(
        """
This will edit the ImGuiDockNodeFlags for "MainDockSpace".
Most flags are inherited by children dock spaces.
        """
    )

    class DockFlagWithInfo:
        def __init__(self, flag, label, tip):
            self.flag = flag
            self.label = label
            self.tip = tip

    all_flags = [
        DockFlagWithInfo(
            imgui.DockNodeFlags_.no_docking_split,
            "NoSplit",
            "prevent Dock Nodes from being split",
        ),
        DockFlagWithInfo(
            imgui.DockNodeFlags_.no_resize,
            "NoResize",
            "prevent Dock Nodes from being resized",
        ),
        DockFlagWithInfo(
            imgui.DockNodeFlags_.auto_hide_tab_bar,
            "AutoHideTabBar",
            "show tab bar only if multiple windows\n"
            + 'You will need to restore the layout after changing (Menu "View/Restore Layout")',
        ),
        DockFlagWithInfo(
            imgui.DockNodeFlags_.no_docking_over_central_node,
            "NoDockingInCentralNode",
            "prevent docking in central node\n(only works with the main dock space)",
        ),
        # DockFlagWithInfo(imgui.DockNodeFlags_.passthru_central_node, "PassthruCentralNode", "advanced"),
    ]

    main_dock_space_node_flags = (
        hello_imgui.get_runner_params().docking_params.main_dock_space_node_flags
    )
    for flag_with_info in all_flags:
        _, main_dock_space_node_flags = imgui.checkbox_flags(
            flag_with_info.label, main_dock_space_node_flags, flag_with_info.flag
        )
        if imgui.is_item_hovered():
            imgui.set_tooltip("%s" % flag_with_info.tip)

    hello_imgui.get_runner_params().docking_params.main_dock_space_node_flags = (
        main_dock_space_node_flags
    )


def gui_window_layout_customization(app_state: AppState):
    imgui.push_font(app_state.title_font)
    imgui.text("Switch between layouts")
    imgui.pop_font()
    imgui.text('with the menu "View/Layouts"')
    if imgui.is_item_hovered():
        imgui.set_tooltip(
            "Each layout remembers separately the modifications applied by the user, \n"
            + "and the selected layout is restored at startup"
        )

    imgui.separator()

    imgui.push_font(app_state.title_font)
    imgui.text("Change the theme")
    imgui.pop_font()
    imgui.text('with the menu "View/Theme"')
    if imgui.is_item_hovered():
        imgui.set_tooltip("The selected theme is remembered and restored at startup")
    imgui.separator()

    demo_docking_flags(app_state)
    imgui.separator()


def gui_window_alternative_theme(app_state: AppState):
    # Since this window applies a theme, We need to call "imgui.begin" ourselves so
    # that we can apply the theme before opening the window.
    #
    # In order to obtain this, we applied the following option to the window
    # that displays this Gui:
    #     alternative_theme_window.call_begin_end = False

    # emulate C/C++ static variable: we will store some static variables
    # as attributes of the function
    statics = gui_window_alternative_theme

    # Apply the theme before opening the window
    tweaked_theme = hello_imgui.ImGuiTweakedTheme()
    tweaked_theme.theme = hello_imgui.ImGuiTheme_.white_is_white
    tweaked_theme.tweaks.rounding = 0.0
    hello_imgui.push_tweaked_theme(tweaked_theme)

    # Open the window
    window_opened = imgui.begin("Alternative Theme")
    if window_opened:
        # Display some widgets
        imgui.push_font(app_state.title_font)
        imgui.text("Alternative Theme")
        imgui.pop_font()
        imgui.text("This window uses a different theme")
        imgui.set_item_tooltip("""
            tweaked_theme = hello_imgui.ImGuiTheme.ImGuiTweakedTheme()
            tweaked_theme.theme = hello_imgui.ImGuiTheme_.white_is_white.value
            tweaked_theme.tweaks.rounding = 0.0
            hello_imgui.apply_tweaked_theme(tweaked_theme)
        """
        )

        if imgui.collapsing_header("Basic Widgets", imgui.TreeNodeFlags_.default_open.value):
            if not hasattr(statics, "checked"):
                statics.checked = True
            _, statics.checked = imgui.checkbox("Checkbox", statics.checked)

            if imgui.button("Button"):
                hello_imgui.log(hello_imgui.LogLevel.info, "Button was pressed")
            imgui.set_item_tooltip("This is a button")

            if not hasattr(statics, "radio"):
                statics.radio = 0
            if imgui.radio_button("Radio 1", statics.radio == 0):
                statics.radio = 0
            imgui.same_line()
            if imgui.radio_button("Radio 2", statics.radio == 1):
                statics.radio = 1
            imgui.same_line()
            if imgui.radio_button("Radio 3", statics.radio == 2):
                statics.radio = 2

            # Haiku
            # Display a image of the haiku below with Japanese characters
            # with an informative tooltip
            haiku_image_height = hello_imgui.em_size(5.0)
            hello_imgui.image_from_asset("images/haiku.png", (0.0, haiku_image_height))
            imgui.set_item_tooltip("""
Extract from Wikipedia
-------------------------------------------------------------------------------

In early 1686, Bashō composed one of his best-remembered haiku:

        furu ike ya / kawazu tobikomu / mizu no oto

   an ancient pond / a frog jumps in / the splash of water

This poem became instantly famous.

-------------------------------------------------------------------------------

This haiku is here rendered as an image, mainly to preserve space,
because adding a Japanese font to the project would enlarge its size.
Handling Japanese font is of course possible within ImGui / Hello ImGui!
            """)

            # Display the haiku text as an InputTextMultiline
            if not hasattr(statics, "poem"):
                statics.poem = (
                    "   Old Pond\n"
                    "  Frog Leaps In\n"
                    " Water's Sound\n"
                    "\n"
                    "      Matsuo Bashō - 1686"
                )

            _, statics.poem = imgui.input_text_multiline("##Poem", statics.poem, hello_imgui.em_to_vec2(15.0, 5.5))

            # a popup with a modal window
            if imgui.button("Open Modal"):
                imgui.open_popup("MyModal")
            popup_opened, _ = imgui.begin_popup_modal("MyModal", None, imgui.WindowFlags_.always_auto_resize.value)
            if popup_opened:
                imgui.text("This is a modal window")
                if imgui.button("Close"):
                    imgui.close_current_popup()
                imgui.end_popup()

            if not hasattr(statics, "text"):
                statics.text = "Hello, world!"
            _, statics.text = imgui.input_text("Input text", statics.text)

            if imgui.tree_node("Text Display"):
                imgui.text("Hello, world!")
                imgui.text_colored((1.0, 0.5, 0.5, 1.0), "Some text")
                imgui.text_disabled("Disabled text")
                imgui.text_wrapped("This is a long text that will be wrapped in the window")
                imgui.tree_pop()

    # Close the window
    imgui.end()

    # Restore the theme
    hello_imgui.pop_tweaked_theme()


def demo_assets(app_state: AppState):
    imgui.push_font(app_state.title_font)
    imgui.text("Image From Assets")
    imgui.pop_font()
    hello_imgui.begin_group_column()
    imgui.dummy(hello_imgui.em_to_vec2(0.0, 0.45))
    imgui.text("Hello")
    hello_imgui.end_group_column()
    hello_imgui.image_from_asset("images/world.png", hello_imgui.em_to_vec2(2.5, 2.5))


def demo_fonts(app_state: AppState):
    imgui.push_font(app_state.title_font)
    imgui.text("Fonts - " + icons_fontawesome_6.ICON_FA_ROCKET)
    imgui.pop_font()

    imgui.text_wrapped("Mix icons " + icons_fontawesome_6.ICON_FA_FACE_SMILE + " and text " + icons_fontawesome_6.ICON_FA_ROCKET)
    if imgui.is_item_hovered():
        imgui.set_tooltip("Example with Font Awesome Icons")

    imgui.text("Emojis")

    with imgui_ctx.begin_group():
        imgui.push_font(app_state.emoji_font)
        imgui.text("✌❤🌴🚀")
        imgui.pop_font()

    if imgui.is_item_hovered():
        imgui.set_tooltip("Example with NotoEmoji font")

    imgui.text("Colored Fonts")
    imgui.push_font(app_state.color_font)
    imgui.text("COLOR!")
    imgui.pop_font()
    if imgui.is_item_hovered():
        imgui.set_tooltip("Example with Playbox-FREE.otf font")


def demo_themes(app_state: AppState):
    imgui.push_font(app_state.title_font)
    imgui.text("Themes")
    imgui.pop_font()

    tweaked_theme = hello_imgui.get_runner_params().imgui_window_params.tweaked_theme

    imgui.begin_group()
    button_size = hello_imgui.em_to_vec2(7.0, 0.0)
    if imgui.button("Cherry", button_size):
        tweaked_theme.theme = hello_imgui.ImGuiTheme_.cherry
        hello_imgui.apply_tweaked_theme(tweaked_theme)
    if imgui.button("DarculaDarker", button_size):
        tweaked_theme.theme = hello_imgui.ImGuiTheme_.darcula_darker
        hello_imgui.apply_tweaked_theme(tweaked_theme)
    imgui.end_group()
    if imgui.is_item_hovered():
        imgui.set_tooltip(
            "There are lots of other themes: look at the menu View/Theme\n"
            "The selected theme is remembered and restored at startup"
        )


def gui_window_demo_features(app_state: AppState):
    demo_fonts(app_state)
    imgui.separator()
    demo_assets(app_state)
    imgui.separator()
    demo_basic_widgets(app_state)
    imgui.separator()
    demo_rocket(app_state)
    imgui.separator()
    demo_user_settings(app_state)
    imgui.separator()
    demo_hide_window(app_state)
    imgui.separator()
    demo_show_additional_window(app_state)
    imgui.separator()
    demo_themes(app_state)
    imgui.separator()


def status_bar_gui(app_state: AppState):
    if app_state.rocket_state == RocketState.Preparing:
        imgui.text("Rocket completion: ")
        imgui.same_line()
        imgui.progress_bar(app_state.rocket_progress, hello_imgui.em_to_vec2(7.0, 1.0))  # type: ignore


def show_menu_gui(runner_params: hello_imgui.RunnerParams):
    hello_imgui.show_app_menu(runner_params)
    hello_imgui.show_view_menu(runner_params)
    if imgui.begin_menu("My Menu"):
        clicked, _ = imgui.menu_item("Test me", "", False)
        if clicked:
            hello_imgui.log(hello_imgui.LogLevel.warning, "It works")
        imgui.end_menu()


def show_app_menu_items():
    clicked, _ = imgui.menu_item("A Custom app menu item", "", False)
    if clicked:
        hello_imgui.log(hello_imgui.LogLevel.info, "Clicked on A Custom app menu item")


def show_top_toolbar(app_state: AppState):
    imgui.push_font(app_state.large_icon_font)
    if imgui.button(icons_fontawesome_6.ICON_FA_POWER_OFF):
        hello_imgui.get_runner_params().app_shall_exit = True

    imgui.same_line(imgui.get_window_width() - hello_imgui.em_size(7.0))
    if imgui.button(icons_fontawesome_6.ICON_FA_HOUSE):
        hello_imgui.log(hello_imgui.LogLevel.info, "Clicked on Home in the top toolbar")
    imgui.same_line()
    if imgui.button(icons_fontawesome_6.ICON_FA_FLOPPY_DISK):
        hello_imgui.log(hello_imgui.LogLevel.info, "Clicked on Save in the top toolbar")
    imgui.same_line()
    if imgui.button(icons_fontawesome_6.ICON_FA_ADDRESS_BOOK):
        hello_imgui.log(hello_imgui.LogLevel.info, "Clicked on Address Book in the top toolbar")

    imgui.same_line(imgui.get_window_width() - hello_imgui.em_size(2.0))
    imgui.text(icons_fontawesome_6.ICON_FA_BATTERY_THREE_QUARTERS)
    imgui.pop_font()


def show_right_toolbar(app_state: AppState):
    imgui.push_font(app_state.large_icon_font)
    if imgui.button(icons_fontawesome_6.ICON_FA_CIRCLE_ARROW_LEFT):
        hello_imgui.log(hello_imgui.LogLevel.info, "Clicked on Circle left in the right toolbar")
    if imgui.button(icons_fontawesome_6.ICON_FA_CIRCLE_ARROW_RIGHT):
        hello_imgui.log(hello_imgui.LogLevel.info, "Clicked on Circle right in the right toolbar")
    imgui.pop_font()


##########################################################################
#    Docking Layouts and Docking windows
##########################################################################

#
# 1. Define the Docking splits (two versions are available)
#
def create_default_docking_splits() -> List[hello_imgui.DockingSplit]:
    # Define the default docking splits,
    # i.e. the way the screen space is split in different target zones for the dockable windows
    # We want to split "MainDockSpace" (which is provided automatically) into three zones, like this:
    #
    #    ___________________________________________
    #    |        |                                |
    #    | Command|                                |
    #    | Space  |    MainDockSpace               |
    #    |------- |                                |
    #    |        |--------------------------------|
    #    |        |       CommandSpace2            |
    #    -------------------------------------------
    #    |     MiscSpace                           |
    #    -------------------------------------------
    #

    # Uncomment the next line if you want to always start with this layout.
    # Otherwise, modifications to the layout applied by the user layout will be remembered.
    # runner_params.docking_params.layout_condition = hello_imgui.DockingLayoutCondition.ApplicationStart

    # Then, add a space named "MiscSpace" whose height is 25% of the app height.
    # This will split the preexisting default dockspace "MainDockSpace" in two parts.
    split_main_misc = hello_imgui.DockingSplit()
    split_main_misc.initial_dock = "MainDockSpace"
    split_main_misc.new_dock = "MiscSpace"
    split_main_misc.direction = imgui.Dir.down
    split_main_misc.ratio = 0.25

    # Then, add a space to the left which occupies a column whose width is 25% of the app width
    split_main_command = hello_imgui.DockingSplit()
    split_main_command.initial_dock = "MainDockSpace"
    split_main_command.new_dock = "CommandSpace"
    split_main_command.direction = imgui.Dir.left
    split_main_command.ratio = 0.25

    # Then, add CommandSpace2 below MainDockSpace
    split_main_command2 = hello_imgui.DockingSplit()
    split_main_command2.initial_dock = "MainDockSpace"
    split_main_command2.new_dock = "CommandSpace2"
    split_main_command2.direction = imgui.Dir.down
    split_main_command2.ratio = 0.5

    splits = [split_main_misc, split_main_command, split_main_command2]
    return splits


def create_alternative_docking_splits() -> List[hello_imgui.DockingSplit]:
    # Define alternative docking splits for the "Alternative Layout"
    #    ___________________________________________
    #    |                |                        |
    #    | Misc           |                        |
    #    | Space          |    MainDockSpace       |
    #    |                |                        |
    #    -------------------------------------------
    #    |                       |                 |
    #    |                       | Command         |
    #    |     CommandSpace      | Space2          |
    #    -------------------------------------------

    split_main_command = hello_imgui.DockingSplit()
    split_main_command.initial_dock = "MainDockSpace"
    split_main_command.new_dock = "CommandSpace"
    split_main_command.direction = imgui.Dir.down
    split_main_command.ratio = 0.5

    split_main_command2 = hello_imgui.DockingSplit()
    split_main_command2.initial_dock = "CommandSpace"
    split_main_command2.new_dock = "CommandSpace2"
    split_main_command2.direction = imgui.Dir.right
    split_main_command2.ratio = 0.4

    split_main_misc = hello_imgui.DockingSplit()
    split_main_misc.initial_dock = "MainDockSpace"
    split_main_misc.new_dock = "MiscSpace"
    split_main_misc.direction = imgui.Dir.left
    split_main_misc.ratio = 0.5

    splits = [split_main_command, split_main_command2, split_main_misc]
    return splits


#
# 2. Define the Dockable windows
#
def create_dockable_windows(app_state: AppState) -> List[hello_imgui.DockableWindow]:
    # A features demo window named "FeaturesDemo" will be placed in "CommandSpace".
    # Its Gui is provided by "gui_window_demo_features"
    features_demo_window = hello_imgui.DockableWindow()
    features_demo_window.label = "Features Demo"
    features_demo_window.dock_space_name = "CommandSpace"
    features_demo_window.gui_function = lambda: gui_window_demo_features(app_state)

    # A layout customization window will be placed in "MainDockSpace".
    # Its Gui is provided by "gui_window_layout_customization"
    layout_customization_window = hello_imgui.DockableWindow()
    layout_customization_window.label = "Layout customization"
    layout_customization_window.dock_space_name = "MainDockSpace"
    layout_customization_window.gui_function = lambda: gui_window_layout_customization(app_state)

    # A Log window named "Logs" will be placed in "MiscSpace". It uses the HelloImGui logger gui
    logs_window = hello_imgui.DockableWindow()
    logs_window.label = "Logs"
    logs_window.dock_space_name = "MiscSpace"
    logs_window.gui_function = hello_imgui.log_gui

    # A Window named "Dear ImGui Demo" will be placed in "MainDockSpace"
    dear_imgui_demo_window = hello_imgui.DockableWindow()
    dear_imgui_demo_window.label = "Dear ImGui Demo"
    dear_imgui_demo_window.dock_space_name = "MainDockSpace"
    dear_imgui_demo_window.imgui_window_flags = imgui.WindowFlags_.menu_bar.value
    dear_imgui_demo_window.gui_function = imgui.show_demo_window  # type: ignore

    # alternativeThemeWindow
    alternative_theme_window = hello_imgui.DockableWindow()
    # Since this window applies a theme, We need to call "imgui.begin" ourselves so
    # that we can apply the theme before opening the window.
    alternative_theme_window.call_begin_end = False
    alternative_theme_window.label = "Alternative Theme"
    alternative_theme_window.dock_space_name = "CommandSpace2"
    alternative_theme_window.gui_function = lambda: gui_window_alternative_theme(app_state)

    dockable_windows = [
        features_demo_window,
        layout_customization_window,
        logs_window,
        dear_imgui_demo_window,
        alternative_theme_window,
    ]
    return dockable_windows


#
# 3. Define the layouts:
# A layout is stored inside DockingParams, and stores the splits + the dockable windows.
# Here, we provide the default layout, and two alternative layouts.
def create_default_layout(app_state: AppState) -> hello_imgui.DockingParams:
    docking_params = hello_imgui.DockingParams()
    # By default, the layout name is already "Default"
    # docking_params.layout_name = "Default"
    docking_params.docking_splits = create_default_docking_splits()
    docking_params.dockable_windows = create_dockable_windows(app_state)
    return docking_params


def create_alternative_layouts(app_state: AppState) -> List[hello_imgui.DockingParams]:
    alternative_layout = hello_imgui.DockingParams()
    alternative_layout.layout_name = "Alternative Layout"
    alternative_layout.docking_splits = create_alternative_docking_splits()
    alternative_layout.dockable_windows = create_dockable_windows(app_state)

    tabs_layout = hello_imgui.DockingParams()
    tabs_layout.layout_name = "Tabs Layout"
    tabs_layout.dockable_windows = create_dockable_windows(app_state)
    # Force all windows to be presented in the MainDockSpace
    for window in tabs_layout.dockable_windows:
        window.dock_space_name = "MainDockSpace"
    # In "Tabs Layout", no split is created
    tabs_layout.docking_splits = []

    return [alternative_layout, tabs_layout]


##########################################################################
#    Define the app initial theme
##########################################################################
def setup_my_theme():
    """Example of theme customization at App startup
    This function is called in the callback `setup_imgui_style` in order to apply a custom theme:
        runner_params.callbacks.setup_imgui_style = setup_my_theme()
    """
    # Apply default style
    hello_imgui.imgui_default_settings.setup_default_imgui_style()
    # Create a tweaked theme
    tweaked_theme = hello_imgui.ImGuiTweakedTheme()
    tweaked_theme.theme = hello_imgui.ImGuiTheme_.material_flat
    tweaked_theme.tweaks.rounding = 10.0
    # Apply the tweaked theme
    hello_imgui.apply_tweaked_theme(tweaked_theme)  # Note: you can also push/pop the theme in order to apply it only to a specific part of the Gui:  hello_imgui.push_tweaked_theme(tweaked_theme) / hello_imgui.pop_tweaked_theme()
    # Then apply further modifications to ImGui style
    imgui.get_style().item_spacing = ImVec2(6, 4)  # Reduce spacing between items ((8, 4) by default)
    imgui.get_style().set_color_(imgui.Col_.text.value, (0.8, 0.8, 0.85, 1.0))  # Change text color


##########################################################################
#    main(): here, we simply fill RunnerParams, then run the application
##########################################################################
def main():
    # By default, an assets folder is installed via pip inside site-packages/lg_imgui_bundle/assets
    # and provides two fonts (fonts/DroidSans.ttf and fonts/fontawesome-webfont.ttf)
    # If you need to add more assets, make a copy of this assets folder and add your own files,
    # and call set_assets_folder
    hello_imgui.set_assets_folder(demo_utils.demos_assets_folder())

    #
    # Part 1: Define the application state, fill the status and menu bars, and load additional font
    #

    # Our application state
    app_state = AppState()

    # Hello ImGui params (they hold the settings as well as the Gui callbacks)
    runner_params = hello_imgui.RunnerParams()
    runner_params.app_window_params.window_title = "Docking Demo"
    runner_params.imgui_window_params.menu_app_title = "Docking Demo"
    runner_params.app_window_params.window_geometry.size = (1000, 900)
    runner_params.app_window_params.restore_previous_geometry = True
    runner_params.app_window_params.borderless = True
    runner_params.app_window_params.borderless_movable = True
    runner_params.app_window_params.borderless_resizable = True
    runner_params.app_window_params.borderless_closable = True

    # Set LoadAdditionalFonts callback
    runner_params.callbacks.load_additional_fonts = lambda: load_fonts(app_state)

    #
    # Status bar
    #
    # We use the default status bar of Hello ImGui
    runner_params.imgui_window_params.show_status_bar = True
    # Add custom widgets in the status bar
    runner_params.callbacks.show_status = lambda: status_bar_gui(app_state)
    # uncomment next line in order to hide the FPS in the status bar
    # runner_params.im_gui_window_params.show_status_fps = False

    #
    # Menu bar
    #
    # Here, we fully customize the menu bar:
    # by setting `show_menu_bar` to True, and `show_menu_app` and `show_menu_view` to False,
    # HelloImGui will display an empty menu bar, which we can fill with our own menu items via the callback `show_menus`
    runner_params.imgui_window_params.show_menu_bar = True
    runner_params.imgui_window_params.show_menu_app = False
    runner_params.imgui_window_params.show_menu_view = False
    # Inside `show_menus`, we can call `hello_imgui.show_view_menu` and `hello_imgui.show_app_menu` if desired
    runner_params.callbacks.show_menus = lambda: show_menu_gui(runner_params)
    # Optional: add items to Hello ImGui default App menu
    runner_params.callbacks.show_app_menu_items = show_app_menu_items

    #
    # Top and bottom toolbars
    #
    # toolbar options
    edge_toolbar_options = hello_imgui.EdgeToolbarOptions()
    edge_toolbar_options.size_em = 2.5
    edge_toolbar_options.window_bg = ImVec4(0.8, 0.8, 0.8, 0.35)
    # top toolbar
    runner_params.callbacks.add_edge_toolbar(
        hello_imgui.EdgeToolbarType.top,
        lambda: show_top_toolbar(app_state),
        edge_toolbar_options,
    )
    # right toolbar
    edge_toolbar_options.window_bg.w = 0.4
    runner_params.callbacks.add_edge_toolbar(
        hello_imgui.EdgeToolbarType.right,
        lambda: show_right_toolbar(app_state),
        edge_toolbar_options,
    )

    #
    # Load user settings at callbacks `post_init` and save them at `before_exit`
    #
    runner_params.callbacks.post_init = lambda: load_my_app_settings(app_state)
    runner_params.callbacks.before_exit = lambda: save_my_app_settings(app_state)

    # Change style
    runner_params.callbacks.setup_imgui_style = setup_my_theme

    #
    # Part 2: Define the application layout and windows
    #

    # First, tell HelloImGui that we want full screen dock space (this will create "MainDockSpace")
    runner_params.imgui_window_params.default_imgui_window_type = (
        hello_imgui.DefaultImGuiWindowType.provide_full_screen_dock_space
    )
    # In this demo, we also demonstrate multiple viewports: you can drag windows outside
    # out the main window in order to put their content into new native windows
    runner_params.imgui_window_params.enable_viewports = True
    # Set the default layout (this contains the default DockingSplits and DockableWindows)
    runner_params.docking_params = create_default_layout(app_state)
    # Add alternative layouts
    runner_params.alternative_docking_layouts = create_alternative_layouts(app_state)

    #
    # Part 3: Where to save the app settings
    #
    # tag::app_settings[]
    # By default, HelloImGui will save the settings in the current folder.
    # This is convenient when developing, but not so much when deploying the app.
    # You can tell HelloImGui to save the settings in a specific folder: choose between
    #         current_folder
    #         app_user_config_folder
    #         app_executable_folder
    #         home_folder
    #         temp_folder
    #         documents_folder
    #
    # Note: app_user_config_folder is:
    #         AppData under Windows (Example: C:\Users\[Username]\AppData\Roaming)
    #         ~/.config under Linux
    #         "~/Library/Application Support" under macOS or iOS
    runner_params.ini_folder_type = hello_imgui.IniFolderType.app_user_config_folder

    # runnerParams.ini_filename: this will be the name of the ini file in which the settings
    # will be stored.
    # In this example, the subdirectory Docking_Demo will be created under the folder defined
    # by runnerParams.ini_folder_type.
    #
    # Note: if ini_filename is left empty, the name of the ini file will be derived
    # from app_window_params.window_title
    runner_params.ini_filename = "Docking_Demo/Docking_demo.ini"
    # end::app_settings[]

    #
    # Part 4: Run the app
    #
    hello_imgui.run(runner_params)


if __name__ == "__main__":
main()|
Tip
|
As shown in the screenshot, Hello ImGui is able to display a custom 3D scene in the background. This is done by using a dedicated callback. |
This demonstration showcases how to:
-
Display a 3D scene in the background via the callback
runnerParams.callbacks.CustomBackground -
Load and compile a shader
-
Adjust uniforms in the GUI
Its source code is heavily documented and should be self-explanatory.
ImGui Test Engine is a Tests & Automation Engine for Dear ImGui.
This demo source code is heavily documented and should be self-explanatory. It shows how to:
-
enable ImGui Test Engine via RunnerParams.use_imgui_test_engine
-
define a callback where the tests are registered (runner_params.callbacks.register_tests)
-
create tests, and:
-
automate actions using "named references" (see https://github.com/ocornut/imgui_test_engine/wiki/Named-References)
-
display an optional custom GUI for a test
-
-
manipulate custom variables
-
check that simulated actions do modify those variables
|
Note
|
See Dear ImGui Test Engine License. (TL;DR: free for individuals, educational, open-source and small businesses uses. Paid for larger businesses) |
Click to see its source code in C++
C++
#ifdef HELLOIMGUI_WITH_TEST_ENGINE
// A demo app that demonstrates how to use ImGui Test Engine (https://github.com/ocornut/imgui_test_engine)
//
// It demonstrates how to:
// - enable ImGui Test Engine via runnerParams.useImGuiTestEngine
// - define a callback where the tests are registered (runnerParams.callbacks.RegisterTests)
// - create tests, and:
//   - automate actions using "named references" (see https://github.com/ocornut/imgui_test_engine/wiki/Named-References)
//   - display an optional custom GUI for a test
//   - manipulate custom variables
//   - check that simulated actions do modify those variables
//
// Important note: ImGui Test Engine falls under the Dear ImGui Test Engine License
//    See: https://github.com/ocornut/imgui_test_engine/blob/main/imgui_test_engine/LICENSE.txt
//    TL;DR: free for individuals, educational, open-source and small businesses uses.
//           Paid for larger businesses. Read license for details.
//           License sales to larger businesses are used to fund and sustain the development of Dear ImGui.

#include "immapp/immapp.h"
#include "imgui.h"
#include "imgui_test_engine/imgui_te_engine.h"
#include "imgui_test_engine/imgui_te_context.h"
#include "imgui_test_engine/imgui_te_ui.h"


#include <vector>

// Our tests, that will automate the application
ImGuiTest* testOpenPopup;
ImGuiTest* testCaptureScreenshot;
ImGuiTest* testCustomGui;

bool gShowStackToolWindow = false;
int nbAltA = 0;


// This function is called at startup and will instantiate the tests
void MyRegisterTests()
{
    ImGuiTestEngine* engine = HelloImGui::GetImGuiTestEngine();

    // Demo 1: Open popup
    testOpenPopup = IM_REGISTER_TEST(engine, "Demo Tests", "Open Popup");
    auto testOpenPopupFunc = [](ImGuiTestContext* ctx) {
        // This is the function that will be called by our test
        ctx->SetRef("Dear ImGui Demo");              // From now on, all actions happen in the "Dear ImGui Demo" window
        ctx->ItemOpen("**/Popups & Modal windows");     // Open the "Popups & Modal windows" tree item
        ctx->ItemOpen("**/Modals");                     // Open the "Modal" tree item
        ctx->ItemClick("**/Delete..");               // Click the "Delete.." button ("**" means: search inside children)
        ctx->ItemClick("//Delete?/Cancel");          // Click the "Cancel" button:
        //    here, "//"  means "ignore previous set_ref" and search
        //    for the cancel button in the root popup window named "Delete?"
        ctx->ItemClose("**/Popups & Modal windows");    // Close the "Popups & Modal windows" tree item
    };
    // Let the test call our function
    testOpenPopup->TestFunc = testOpenPopupFunc;

    // Demo 2: Capture Dear ImGui Demo window
    testCaptureScreenshot = IM_REGISTER_TEST(engine, "Demo Tests", "Capture Screenshot");
    auto testCaptureScreenshotFunc = [](ImGuiTestContext* ctx)
    {
        ctx->SetRef("Dear ImGui Demo");                   // From now on, actions happen in the "Dear ImGui Demo" window
        ctx->ItemOpen("**/Widgets");                         // Open the "Widgets", then "Basic" tree item
        ctx->ItemOpenAll("**/Basic");
        ctx->CaptureScreenshotWindow("Dear ImGui Demo"); // Capture window and save screenshot
        ctx->ItemClose("**/Widgets");
    };
    testCaptureScreenshot->TestFunc = testCaptureScreenshotFunc;

    // Demo 3: a test with a custom GUI and custom variables
    // which asserts that simulated actions successfully changed the variables values
    testCustomGui = IM_REGISTER_TEST(engine, "Demo Tests", "Test custom GUI & vars");
    // Our custom variables container
    struct TestVar2 {
        int myInt = 42;
    };
    testCustomGui->SetVarsDataType<TestVar2>();
    auto testCustomGuiFunc = [](ImGuiTestContext* ctx)
    {
        // Custom GUI for this test: it can edit our custom variable
        TestVar2& vars = ctx->GetVars<TestVar2>();
        ImGui::SetNextWindowSize(HelloImGui::EmToVec2(40, 8));
        ImGui::Begin("Custom Gui Test Window", nullptr, ImGuiWindowFlags_NoSavedSettings);
        ImGui::SliderInt("Slider", &vars.myInt, 0, 1000);
        ImGui::End();
    };
    auto testWithVarsTestFunc = [](ImGuiTestContext* ctx){
        // Our test, that will perform actions in the custom GUI, and assert that actions do change the custom variables
        TestVar2& vars = ctx->GetVars<TestVar2>();
        ctx->SetRef("Custom Gui Test Window");
        IM_CHECK_EQ(vars.myInt, 42);
        ctx->ItemInputValue("Slider", 123);
        IM_CHECK_EQ(vars.myInt, 123);
    };
    // Let the test call our test function, and also call our custom GUI
    testCustomGui->TestFunc = testWithVarsTestFunc;
    testCustomGui->GuiFunc = testCustomGuiFunc;

    // Demo 4: Write to text field
    auto testWrite = IM_REGISTER_TEST(engine, "Demo Tests", "Write to text field");
    auto testWriteFunc = [](ImGuiTestContext* ctx)
    {
        ctx->SetRef("Dear ImGui Demo");
        ctx->ItemOpen("**/Widgets");
        ctx->ItemOpen("**/Text Input");
        ctx->ItemOpen("**/Multi-line Text Input");
        ctx->ItemClick("**/##source");
        ctx->KeyChars("Hello from test engine!");
        // Note: ctx.KeyUp/Down/Press also send events that you can process in the GUI
        //       However, you need to use KeyChars to input text in the text widgets
    };
    testWrite->TestFunc = testWriteFunc;

    // Demo 5: Press Alt+A
    auto testAltA = IM_REGISTER_TEST(engine, "Demo Tests", "Test key combination (Alt-A)");
    auto testAltAFunc = [](ImGuiTestContext* ctx)
    {
        ctx->KeyDown(ImGuiKey_LeftAlt);
        ctx->KeyDown(ImGuiKey_A);
        ctx->KeyUp(ImGuiKey_A);
        ctx->KeyUp(ImGuiKey_LeftAlt);
    };
    testAltA->TestFunc = testAltAFunc;
}


// Our application GUI: shows that we can trigger the test manually
void MyGui()
{
    ImGui::Checkbox("Show ID Stack Tool Window", &gShowStackToolWindow);
    if (ImGui::IsItemHovered())
        ImGui::SetTooltip("This tool window can help to identify the ID of the widgets (use \"Copy path to clipboard\")");
    if (gShowStackToolWindow)
        ImGui::ShowIDStackToolWindow();

    ImGuiTestEngine* testEngine = HelloImGui::GetImGuiTestEngine();
    if (ImGui::Button("Run \"Open popup\""))
        ImGuiTestEngine_QueueTest(testEngine, testOpenPopup);
    if (ImGui::Button("Run \"Capture Screenshot\""))
        ImGuiTestEngine_QueueTest(testEngine, testCaptureScreenshot);
    if (ImGui::Button("Run \"Test custom GUI & vars\""))
        ImGuiTestEngine_QueueTest(testEngine, testCustomGui);

    ImGuiTestEngineIO& engineIo = ImGuiTestEngine_GetIO(testEngine);
    ImGui::Text("Speed:");
    ImGui::SameLine();
    if (ImGui::Button("Fast"))
        engineIo.ConfigRunSpeed = ImGuiTestRunSpeed_Fast;
    ImGui::SameLine();
    if (ImGui::Button("Normal"))
        engineIo.ConfigRunSpeed = ImGuiTestRunSpeed_Normal;
    ImGui::SameLine();
    if (ImGui::Button("Cinematic"))
        engineIo.ConfigRunSpeed = ImGuiTestRunSpeed_Cinematic;

    if (ImGui::IsKeyPressed(ImGuiKey_A) && ImGui::IsKeyDown(ImGuiKey_LeftAlt))
        nbAltA++;
    if (nbAltA > 0)
        ImGui::Text("Alt-A combination was pressed");
}

// Defined later: helps to define the application layout, display the ImGui Demo, & ImGui Test Engine Window
void ApplyApplicationLayout(HelloImGui::RunnerParams* runnerParams);


// Our main function, where we need to:
// - instantiate RunnerParams
// - set `runnerParams.useImGuiTestEngine = true`
// - fill `runnerParams.callbacks.registerTests`
int main(int, const char**)
{
    // Instantiate RunnerParams
    HelloImGui::RunnerParams runnerParams;

    // Apply the application layout configuration
    ApplyApplicationLayout(&runnerParams);

    // Enable ImGui Test Engine
    runnerParams.useImGuiTestEngine = true;

    // Set the test registration function
    runnerParams.callbacks.RegisterTests = MyRegisterTests;

    // Run the ImGui application
    HelloImGui::Run(runnerParams);
}


///////////////////////////////////////////////////////////////////////////////
// End of demo code
///////////////////////////////////////////////////////////////////////////////


// Define the default docking splits for the application layout
std::vector<HelloImGui::DockingSplit> CreateDefaultDockingSplits()
{
    // Define the application layout: split the window into 3 spaces
    HelloImGui::DockingSplit splitMainDemo;
    splitMainDemo.initialDock = "MainDockSpace";
    splitMainDemo.newDock = "ImGuiDemoSpace";
    splitMainDemo.direction = ImGuiDir_Right;
    splitMainDemo.ratio = 0.5f;

    HelloImGui::DockingSplit splitMainTest;
    splitMainTest.initialDock = "MainDockSpace";
    splitMainTest.newDock = "TestEngineSpace";
    splitMainTest.direction = ImGuiDir_Down;
    splitMainTest.ratio = 0.7f;

    return {splitMainDemo, splitMainTest};
}

// Define the dockable windows for the application layout
std::vector<HelloImGui::DockableWindow> CreateDockableWindows()
{
    // Define the app windows: MyGui, ImGui Demo Window, Dear ImGui Test Engine
    HelloImGui::DockableWindow myWindow;
    myWindow.label = "Run Demos";
    myWindow.dockSpaceName = "MainDockSpace";
    myWindow.GuiFunction = &MyGui;

    HelloImGui::DockableWindow dearImGuiDemoWindow;
    dearImGuiDemoWindow.label = "Dear ImGui Demo";
    dearImGuiDemoWindow.dockSpaceName = "ImGuiDemoSpace";
    dearImGuiDemoWindow.GuiFunction = []() { ImGui::ShowDemoWindow(); };

    HelloImGui::DockableWindow testEngineWindow;
    testEngineWindow.label = "Dear ImGui Test Engine";
    testEngineWindow.dockSpaceName = "TestEngineSpace";
    testEngineWindow.GuiFunction = []() { ImGuiTestEngine_ShowTestEngineWindows(HelloImGui::GetImGuiTestEngine(), nullptr); };

    return {myWindow, dearImGuiDemoWindow, testEngineWindow};
}


// Apply the application layout and windows to the runner parameters
void ApplyApplicationLayout(HelloImGui::RunnerParams* runnerParams)
{
    // Define the application layout and windows
    runnerParams->appWindowParams.windowTitle = "Demo ImGui Test Engine";
    runnerParams->imGuiWindowParams.defaultImGuiWindowType =
        HelloImGui::DefaultImGuiWindowType::ProvideFullScreenDockSpace;
    runnerParams->dockingParams.dockingSplits = CreateDefaultDockingSplits();
    runnerParams->dockingParams.dockableWindows = CreateDockableWindows();
    runnerParams->dockingParams.layoutCondition = HelloImGui::DockingLayoutCondition::ApplicationStart;
}
#else // #ifdef HELLOIMGUI_WITH_TEST_ENGINE
int main(int, const char**) {}
#endif // #ifdef HELLOIMGUI_WITH_TEST_ENGINE
Click to see its source code in Python
Python:
# A demo app that demonstrates how to use ImGui Test Engine (https://github.com/ocornut/imgui_test_engine)
#
# It demonstrates how to:
# - enable ImGui Test Engine via RunnerParams.use_imgui_test_engine
# - define a callback where the tests are registered (runner_params.callbacks.register_tests)
# - create tests, and:
#   - automate actions using "named references" (see https://github.com/ocornut/imgui_test_engine/wiki/Named-References)
#   - display an optional custom GUI for a test
#   - manipulate custom variables
#   - check that simulated actions do modify those variables
#
# Important note: ImGui Test Engine falls under the Dear ImGui Test Engine License
#     See: https://github.com/ocornut/imgui_test_engine/blob/main/imgui_test_engine/LICENSE.txt
#     TL;DR: free for individuals, educational, open-source and small businesses uses.
#            Paid for larger businesses. Read license for details.
#            License sales to larger businesses are used to fund and sustain the development of Dear ImGui.


from imgui_bundle import imgui, hello_imgui
from imgui_bundle.imgui.test_engine_checks import CHECK
from typing import List


# Our tests, that will automate the application
test_open_popup: imgui.test_engine.Test
test_capture_screenshot: imgui.test_engine.Test
test_custom_gui: imgui.test_engine.Test

g_show_stack_tool_window = False
nb_alt_a = 0


# This function is called at startup and will instantiate the tests
def my_register_tests():
    # fmt: off
    global test_open_popup, test_capture_screenshot, test_custom_gui
    engine = hello_imgui.get_imgui_test_engine()

    # Demo 1: Open popup
    test_open_popup = imgui.test_engine.register_test(engine, "Demo Tests", "Open Popup")
    def test_open_popup_func(ctx: imgui.test_engine.TestContext) -> None:
        # This is the function that will be called by our test
        ctx.set_ref("Dear ImGui Demo")              # From now on, all actions happen in the "Dear ImGui Demo" window
        ctx.item_open("**/Popups & Modal windows")     # Open the "Popups & Modal windows" tree item
        ctx.item_open("**/Modals")                     # Open the "Modal" tree item
        ctx.item_click("**/Delete..")               # Click the "Delete.." button ("**" means: search inside children)
        ctx.item_click("//Delete?/Cancel")          # Click the "Cancel" button:
                                                    #    here, "//"  means "ignore previous set_ref" and search
                                                    #    for the cancel button in the root popup window named "Delete?"
        ctx.item_close("**/Popups & Modal windows")    # Close the "Popups & Modal windows" tree item
    # let the test call our function
    test_open_popup.test_func = test_open_popup_func

    # Demo 2 : Capture Dear ImGui Demo window
    test_capture_screenshot = imgui.test_engine.register_test(engine, "Demo Tests", "Capture Screenshot")
    def test_capture_screenshot_func(ctx: imgui.test_engine.TestContext) -> None:
        ctx.set_ref("Dear ImGui Demo")                   # From now on, actions happen in the "Dear ImGui Demo" window
        ctx.item_open("**/Widgets")                         # Open the "Widgets", then "Basic" tree item
        ctx.item_open_all("**/Basic")
        ctx.capture_screenshot_window("Dear ImGui Demo") # Capture window and save screenshot
        ctx.item_close("**/Widgets")
    test_capture_screenshot.test_func = test_capture_screenshot_func

    # Demo 3: a test with a custom GUI and custom variables
    #         which asserts that simulated actions successfully changed the variables values
    test_custom_gui = imgui.test_engine.register_test(
        engine, "Demo Tests", "Test custom GUI & vars"
    )
    # Our custom variables container
    class TestVar2:
        my_int = 42

    test_var2 = TestVar2()  # our custom variable(s)

    def test_custom_gui_func(ctx: imgui.test_engine.TestContext) -> None:
        # Custom GUI for this test: it can edit our custom variable
        imgui.set_next_window_size(hello_imgui.em_to_vec2(40, 8))
        imgui.begin(
            "Custom Gui Test Window", None, imgui.WindowFlags_.no_saved_settings.value
        )
        _, test_var2.my_int = imgui.slider_int("Slider", test_var2.my_int, 0, 1000)
        imgui.end()

    def test_with_vars_test_func(ctx: imgui.test_engine.TestContext) -> None:
        # Our test, that will perform actions in the custom GUI, and assert that actions do change the custom variables
        # Optional: reset test_var2 to its startup values
        nonlocal test_var2
        test_var2 = TestVar2()
        # Run the test
        ctx.set_ref("Custom Gui Test Window")
        CHECK(test_var2.my_int == 42)
        ctx.item_input_value("Slider", 123)
        CHECK(test_var2.my_int == 123)

    # let the test call our test function, and also call our custom Gui
    test_custom_gui.test_func = test_with_vars_test_func
    test_custom_gui.gui_func = test_custom_gui_func
    # fmt: on

    # Demo 4: Write to text field
    test_write = imgui.test_engine.register_test(engine, "Demo Tests", "Write to text field")
    def test_write_func(ctx: imgui.test_engine.TestContext) -> None:
        ctx.set_ref("Dear ImGui Demo")
        ctx.item_open("**/Widgets")
        ctx.item_open("**/Text Input")
        ctx.item_open("**/Multi-line Text Input")
        ctx.item_click("**/##source")
        ctx.key_chars("Hello from test engine!")
        # Note: ctx.key_up/down/key_press also send events that you can process in the GUI
        #       However, you need to use key_chars to input text in the text widgets
    test_write.test_func = test_write_func

    # Demo 5: Press Alt+A
    test_alt_a = imgui.test_engine.register_test(engine, "Demo Tests", "Test key combination (Alt-A)")
    def test_alt_a_func(ctx: imgui.test_engine.TestContext) -> None:
        ctx.key_down(imgui.Key.left_alt.value)
        ctx.key_down(imgui.Key.a.value)
        ctx.key_up(imgui.Key.a.value)
        ctx.key_up(imgui.Key.left_alt.value)
    test_alt_a.test_func = test_alt_a_func


# Our application GUI: shows that we can trigger the test manually
def my_gui():
    global g_show_stack_tool_window
    _, g_show_stack_tool_window = imgui.checkbox("Show ID Stack Tool Window", g_show_stack_tool_window)
    if imgui.is_item_hovered():
        imgui.set_tooltip("This tool window can help to identify the ID of the widgets (use \"Copy path to clipboard\")")
    if g_show_stack_tool_window:
        imgui.show_id_stack_tool_window()

    test_engine = hello_imgui.get_imgui_test_engine()
    if imgui.button('Run "Open popup"'):
        imgui.test_engine.queue_test(test_engine, test_open_popup)
    if imgui.button('Run "Capture Screenshot"'):
        imgui.test_engine.queue_test(test_engine, test_capture_screenshot)
    if imgui.button('Run "Test custom GUI & vars"'):
        imgui.test_engine.queue_test(test_engine, test_custom_gui)

    engine_io = imgui.test_engine.get_io(test_engine)
    imgui.text("Speed:")
    imgui.same_line()
    if imgui.button("Fast"):
        engine_io.config_run_speed = imgui.test_engine.TestRunSpeed.fast
    imgui.same_line()
    if imgui.button("Normal"):
        engine_io.config_run_speed = imgui.test_engine.TestRunSpeed.normal
    imgui.same_line()
    if imgui.button("Cinematic"):
        engine_io.config_run_speed = imgui.test_engine.TestRunSpeed.cinematic

    global nb_alt_a
    if imgui.is_key_down(imgui.Key.left_alt) and imgui.is_key_down(imgui.Key.a):
        nb_alt_a += 1
    if nb_alt_a > 0:
        imgui.text("Alt-A combination was pressed")


# Defined later: helps to define the application layout, display the ImGui Demo, & ImGui Test Engine Window
def apply_application_layout(runner_params: hello_imgui.RunnerParams) -> None:
    ...


# Our main  function, where we need to:
#        - instantiate RunnerParams
#        - set `runner_params.use_imgui_test_engine = True`
#        - fill `runner_params.callbacks.register_tests`
def main() -> None:
    runner_params = hello_imgui.RunnerParams()
    apply_application_layout(runner_params)

    runner_params.use_imgui_test_engine = True
    runner_params.callbacks.register_tests = my_register_tests

    hello_imgui.run(runner_params)


# ///////////////////////////////////////////////////////////////////////////////
# // End of demo code
# ///////////////////////////////////////////////////////////////////////////////


# //
# // Note: the code below only helps to
# //    - define the application layout
# //    - display the ImGui Demo Window
# //    - display the ImGui Test Engine Window


def create_default_docking_splits() -> List[hello_imgui.DockingSplit]:
    # Define the application layout: splits the window in 3 spaces
    split_main_demo = hello_imgui.DockingSplit()
    split_main_demo.initial_dock = "MainDockSpace"
    split_main_demo.new_dock = "ImGuiDemoSpace"
    split_main_demo.direction = imgui.Dir.right
    split_main_demo.ratio = 0.5

    split_main_test = hello_imgui.DockingSplit()
    split_main_test.initial_dock = "MainDockSpace"
    split_main_test.new_dock = "TestEngineSpace"
    split_main_test.direction = imgui.Dir.down
    split_main_test.ratio = 0.7

    return [split_main_demo, split_main_test]


def create_dockable_windows() -> List[hello_imgui.DockableWindow]:
    # Define the app windows: my_gui, ImGui Demo Window, Dear ImGui Test Engine
    my_window = hello_imgui.DockableWindow()
    my_window.label = "Run Demos"
    my_window.dock_space_name = "MainDockSpace"
    my_window.gui_function = my_gui

    dear_imgui_demo_window = hello_imgui.DockableWindow()
    dear_imgui_demo_window.label = "Dear ImGui Demo"
    dear_imgui_demo_window.dock_space_name = "ImGuiDemoSpace"
    dear_imgui_demo_window.gui_function = imgui.show_demo_window  # type: ignore

    test_engine_window = hello_imgui.DockableWindow()
    test_engine_window.label = "Dear ImGui Test Engine"
    test_engine_window.dock_space_name = "TestEngineSpace"

    def show_test_engine_windows():
        imgui.test_engine.show_test_engine_windows(
            hello_imgui.get_imgui_test_engine(), True
        )

    test_engine_window.gui_function = show_test_engine_windows

    return [my_window, dear_imgui_demo_window, test_engine_window]


def apply_application_layout(runner_params: hello_imgui.RunnerParams) -> None:  # type: ignore # noqa: F811
    # Define the application layout and windows
    runner_params.app_window_params.window_title = "Demo ImGui Test Engine"
    runner_params.imgui_window_params.default_imgui_window_type = (
        hello_imgui.DefaultImGuiWindowType.provide_full_screen_dock_space
    )
    runner_params.docking_params.docking_splits = create_default_docking_splits()
    runner_params.docking_params.dockable_windows = create_dockable_windows()
    runner_params.docking_params.layout_condition = (
        hello_imgui.DockingLayoutCondition.application_start
    )


if __name__ == "__main__":
main()ImmVision, is an immediate image debugger which can display multiple kinds of images (RGB, RGBA, float, etc.), zoom to examine precise pixel values, display float images with a versatile colormap, etc.
This demonstration showcases how to:
-
display two versions of an image, before after an image processing pipeline
-
zoom on specific ROI of those images to see pixel values
-
play with the parameter of the image processing pipeline
Its source code is heavily documented and should be self-explanatory.
Click to see its source code in C++
C++
#include "demo_utils/api_demos.h"
#include "immvision/immvision.h"
#include "immapp/immapp.h"
#include <opencv2/core.hpp>
#include <opencv2/imgproc.hpp>
#include <opencv2/imgcodecs.hpp>
// The parameters for our image processing pipeline
struct SobelParams
{
enum class Orientation
{
Horizontal,
Vertical
};
float blur_size = 1.25f;
int deriv_order = 1; // order of the derivative
int k_size = 7; // size of the extended Sobel kernel it must be 1, 3, 5, or 7 (or -1 for Scharr)
Orientation orientation = Orientation::Vertical;
};
// Our image processing pipeline
cv::Mat ComputeSobel(const cv::Mat& image, const SobelParams& params)
{
cv::Mat gray;
cv::cvtColor(image, gray, cv::COLOR_BGR2GRAY);
cv::Mat img_float;
gray.convertTo(img_float, CV_32F, 1.0 / 255.0);
cv::Mat blurred;
cv::GaussianBlur(img_float, blurred, cv::Size(), params.blur_size, params.blur_size);
double good_scale = 1.0 / std::pow(2.0, (params.k_size - 2 * params.deriv_order - 2));
int dx, dy;
if (params.orientation == SobelParams::Orientation::Vertical)
{
dx = params.deriv_order;
dy = 0;
}
else
{
dx = 0;
dy = params.deriv_order;
}
cv::Mat r;
cv::Sobel(blurred, r, CV_64F, dx, dy, params.k_size, good_scale);
return r;
}
// A GUI to edit the parameters for our image processing pipeline
bool GuiSobelParams(SobelParams& params)
{
bool changed = false;
// Blur size
ImGui::SetNextItemWidth(ImmApp::EmSize() * 10);
if (ImGui::SliderFloat("Blur size", ¶ms.blur_size, 0.5f, 10.0f))
{
changed = true;
}
ImGui::SameLine();
ImGui::Text(" | ");
ImGui::SameLine();
// Deriv order
ImGui::Text("Deriv order");
ImGui::SameLine();
for (int deriv_order = 1; deriv_order <= 4; ++deriv_order)
{
if (ImGui::RadioButton(std::to_string(deriv_order).c_str(), params.deriv_order == deriv_order))
{
changed = true;
params.deriv_order = deriv_order;
}
ImGui::SameLine();
}
ImGui::Text(" | ");
ImGui::SameLine();
ImGui::Text("Orientation");
ImGui::SameLine();
if (ImGui::RadioButton("Horizontal", params.orientation == SobelParams::Orientation::Horizontal))
{
changed = true;
params.orientation = SobelParams::Orientation::Horizontal;
}
ImGui::SameLine();
if (ImGui::RadioButton("Vertical", params.orientation == SobelParams::Orientation::Vertical))
{
changed = true;
params.orientation = SobelParams::Orientation::Vertical;
}
return changed;
}
// Our Application State contains:
// - the original & processed image (image & imageSobel)
// - our parameters for the processing pipeline (sobelParams)
// - parameters to display the images via ImmVision: they share the same zoom key,
// so that we can move the two image in sync
struct AppStateProcess {
cv::Mat image;
cv::Mat imageSobel;
SobelParams sobelParams;
ImmVision::ImageParams immvisionParams;
ImmVision::ImageParams immvisionParamsSobel;
AppStateProcess(const std::string& image_file) {
ImmVision::UseBgrColorOrder();
image = cv::imread(image_file);
sobelParams = SobelParams();
imageSobel = ComputeSobel(image, sobelParams);
immvisionParams = ImmVision::ImageParams();
immvisionParams.ImageDisplaySize = cv::Size(int(ImmApp::EmSize(22.f)), 0);
immvisionParams.ZoomKey = "z";
immvisionParamsSobel = ImmVision::ImageParams();
immvisionParamsSobel.ImageDisplaySize = cv::Size(int(ImmApp::EmSize(22.f)), 0);
immvisionParamsSobel.ZoomKey = "z";
immvisionParamsSobel.ShowOptionsPanel = true;
}
};
// Our GUI function
// (which instantiates a static app state at startup)
void demo_immvision_process()
{
static AppStateProcess appState(DemosAssetsFolder() + "/images/house.jpg");
ImGuiMd::RenderUnindented(R"(
This example shows a example of image processing (sobel filter) where you can adjust the params and see their effect in real time.
* Pan and zoom the image with the mouse and the mouse wheel
* Apply Colormaps to the filtered image in the options tab.
)");
ImGui::Separator();
if (GuiSobelParams(appState.sobelParams)) {
appState.imageSobel = ComputeSobel(appState.image, appState.sobelParams);
appState.immvisionParamsSobel.RefreshImage = true;
}
ImmVision::Image("Original", appState.image, &appState.immvisionParams);
ImGui::SameLine();
ImmVision::Image("Deriv", appState.imageSobel, &appState.immvisionParamsSobel);
}
// The main function is not present in this file, but it could be written as
// ImmApp::RunWithMarkdown(demo_immvision_process, "demo_immvision_process");Click to see its source code in Python
Python:
import numpy as np
from typing import Any
from numpy.typing import NDArray
from enum import Enum
import cv2  # type: ignore
import math

from imgui_bundle import imgui, immvision, immapp, imgui_md
from imgui_bundle.demos_python import demo_utils

immvision.use_rgb_color_order()

ImageRgb = NDArray[np.uint8]
ImageFloat = NDArray[np.floating[Any]]


class SobelParams:
    """The parameters for our image processing pipeline"""

    class Orientation(Enum):
        Horizontal = 0
        Vertical = 1

    blur_size = 1.25
    deriv_order = 1  # order of the derivative
    k_size = 7  # size of the extended Sobel kernel it must be 1, 3, 5, or 7 (or -1 for Scharr)
    orientation: Orientation = Orientation.Vertical


def compute_sobel(image: ImageRgb, params: SobelParams) -> ImageFloat:
    """Our image processing pipeline"""
    gray = cv2.cvtColor(image, cv2.COLOR_BGR2GRAY)
    img_float = gray / 255.0
    blurred = cv2.GaussianBlur(
        img_float, (0, 0), sigmaX=params.blur_size, sigmaY=params.blur_size
    )

    good_scale = 1.0 / math.pow(2.0, (params.k_size - 2 * params.deriv_order - 2))

    if params.orientation == SobelParams.Orientation.Vertical:
        dx = params.deriv_order
        dy = 0
    else:
        dx = 0
        dy = params.deriv_order
    r = cv2.Sobel(
        blurred, ddepth=cv2.CV_64F, dx=dx, dy=dy, ksize=params.k_size, scale=good_scale
    )
    return r  # type: ignore


def gui_sobel_params(params: SobelParams) -> bool:
    """A GUI to edit the parameters for our image processing pipeline"""
    changed = False

    # Blur size
    imgui.set_next_item_width(immapp.em_size() * 10)
    c, params.blur_size = imgui.slider_float("Blur size", params.blur_size, 0.5, 10)
    if c:
        changed = True
    imgui.same_line()
    imgui.text(" | ")
    imgui.same_line()

    # Deriv order
    imgui.text("Deriv order")
    imgui.same_line()
    for deriv_order in (1, 2, 3, 4):
        c, params.deriv_order = imgui.radio_button(
            str(deriv_order), params.deriv_order, deriv_order
        )
        if c:
            changed = True
        imgui.same_line()

    imgui.text(" | ")
    imgui.same_line()

    imgui.text("Orientation")
    imgui.same_line()
    if imgui.radio_button(
        "Horizontal", params.orientation == SobelParams.Orientation.Horizontal
    ):
        changed = True
        params.orientation = SobelParams.Orientation.Horizontal
    imgui.same_line()
    if imgui.radio_button(
        "Vertical", params.orientation == SobelParams.Orientation.Vertical
    ):
        changed = True
        params.orientation = SobelParams.Orientation.Vertical

    return changed


# Our Application State contains:
#     - the original & processed image (image & imageSobel)
#     - our parameters for the processing pipeline (sobelParams)
#     - parameters to display the images via ImmVision: they share the same zoom key,
#       so that we can move the two image in sync
class AppState:
    image: ImageRgb
    image_sobel: ImageFloat
    sobel_params: SobelParams

    immvision_params: immvision.ImageParams
    immvision_params_sobel: immvision.ImageParams

    def __init__(self, image_file: str):
        self.image = demo_utils.imread_pil(image_file)
        self.sobel_params = SobelParams()
        self.image_sobel = compute_sobel(self.image, self.sobel_params)

        self.immvision_params = immvision.ImageParams()
        self.immvision_params.image_display_size = (int(immapp.em_size(22)), 0)
        self.immvision_params.zoom_key = "z"

        self.immvision_params_sobel = immvision.ImageParams()
        self.immvision_params_sobel.image_display_size = (int(immapp.em_size(22)), 0)
        self.immvision_params_sobel.zoom_key = "z"
        self.immvision_params_sobel.show_options_panel = True


# Our GUI function
#    (which instantiates a static app state at startup)
@immapp.static(app_state=None)
def demo_gui():
    static = demo_gui

    if static.app_state is None:
        static.app_state = AppState(demo_utils.demos_assets_folder() + "/images/house.jpg")

    imgui_md.render_unindented(
        """
        This example shows a example of image processing (sobel filter) where you can adjust the params and see their effect in real time.

        * Pan and zoom the image with the mouse and the mouse wheel
        * Apply Colormaps to the filtered image in the options tab.
        """
    )
    imgui.separator()

    changed = gui_sobel_params(static.app_state.sobel_params)
    if changed:
        static.app_state.image_sobel = compute_sobel(
            static.app_state.image, static.app_state.sobel_params
        )
    static.app_state.immvision_params_sobel.refresh_image = changed

    immvision.image(
        "Original", static.app_state.image, static.app_state.immvision_params
    )
    imgui.same_line()
    immvision.image(
        "Deriv", static.app_state.image_sobel, static.app_state.immvision_params_sobel
    )


def main():
    demo_utils.set_hello_imgui_demo_assets_folder()
    immapp.run_with_markdown(demo_gui, window_size=(1000, 1000))


# The main entry point will run our GUI function
if __name__ == "__main__":
main()Dear ImGui provides lots of widgets by default.
ImGui Manual enables you to browse all of them all, while looking at their code.
Click to see the widgets code in C++
// Part of ImGui Bundle - MIT License - Copyright (c) 2022-2024 Pascal Thomet - https://github.com/pthom/imgui_bundle
#include "hello_imgui/hello_imgui.h"
#include "hello_imgui/icons_font_awesome_4.h"
#include "imspinner/imspinner.h"
#include "imgui_toggle/imgui_toggle.h"
#include "imgui_toggle/imgui_toggle_presets.h"
#include "imgui_toggle/imgui_toggle_palette.h"
#include "imgui_toggle/imgui_toggle_renderer.h"
#include "immapp/immapp.h"
#include "portable_file_dialogs/portable_file_dialogs.h"
#include "imgui-command-palette/imcmd_command_palette.h"
#include "imgui-knobs/imgui-knobs.h"
#include "ImGuiColorTextEdit/TextEditor.h"
#ifdef IMGUI_BUNDLE_WITH_IMFILEDIALOG
#include "ImFileDialog/ImFileDialog.h"
#endif
#include "imgui_md_wrapper.h"
#include "ImCoolBar/ImCoolbar.h"
#include "demo_utils/api_demos.h"

#include <fplus/fplus.hpp>
#include <memory>


void DemoKnobs()
{
    ImGuiMd::RenderUnindented(R"(
        # Knobs
        [imgui-knobs](https://github.com/altschuler/imgui-knobs) provides knobs for ImGui.
        )");
    static float knob_float_value = 0.f;
    static int knob_int_value = 0;

    std::vector<std::pair<ImGuiKnobVariant, std::string>> knob_types = {
        {ImGuiKnobVariant_Tick, "tick"},
        {ImGuiKnobVariant_Dot, "dot"},
        {ImGuiKnobVariant_Space, "space"},
        {ImGuiKnobVariant_Stepped, "stepped"},
        {ImGuiKnobVariant_Wiper, "wiper"},
        {ImGuiKnobVariant_WiperDot, "wiper_dot"},
        {ImGuiKnobVariant_WiperOnly, "wiper_only"},
    };

    auto show_float_knobs = [&knob_types](float knob_size)
    {
        std::string knob_size_str = std::to_string(knob_size);
        ImGui::PushID((knob_size_str + "_float").c_str());
        for (const auto& [knob_type, knob_typename] : knob_types)
        {
            ImGuiKnobs::Knob(
                knob_typename.c_str(),
                &knob_float_value,
                /*v_min=*/   0.0f,
                /*v_max=*/   1.0f,
                /*speed=*/   0,
                /*format=*/  "%.2f",
                /*variant=*/ knob_type,
                /*size=*/    knob_size,
                /*flags=*/   0,
                /*steps=*/   100
            );
            ImGui::SameLine();
        }
        ImGui::NewLine();
        ImGui::PopID();
    };


    auto show_int_knobs = [&knob_types](float knob_size)
    {
        std::string knob_size_str = std::to_string(knob_size);
        ImGui::PushID((knob_size_str + "_int").c_str());
        for (const auto& [knob_type, knob_typename] : knob_types)
        {
            ImGuiKnobs::KnobInt(
                knob_typename.c_str(),
                &knob_int_value,
                /*v_min=*/   0.0,
                /*v_max=*/   15,
                /*speed=*/   0,
                /*format=*/  "%02i",
                /*variant=*/ knob_type,
                /*size=*/    knob_size,
                /*flags=*/   0,
                /*steps=*/   10
            );
            ImGui::SameLine();
        }
        ImGui::NewLine();
        ImGui::PopID();
    };

    float knobsSizeSmall = ImmApp::EmSize() * 2.5;
    float knobsSizeBig = knobsSizeSmall * 1.3;

    ImGui::BeginGroup();
    ImGui::Text("Some small knobs");
    show_float_knobs(knobsSizeSmall);
    ImGui::EndGroup();

    ImGui::SameLine();

    ImGui::BeginGroup();
    ImGui::Text("Some big knobs (int values)");
    show_int_knobs(knobsSizeBig);
    ImGui::EndGroup();
}


void DemoSpinner()
{
    ImGuiMd::RenderUnindented(R"(
        # Spinners
        [imspinner](https://github.com/dalerank/imspinner) provides spinners for ImGui.
    )");

    ImColor color(0.3f, 0.5f, 0.9f, 1.f);
    ImGui::Text("spinner_moving_dots");
    ImGui::SameLine();
    ImSpinner::SpinnerMovingDots("spinner_moving_dots", 20.0, 4.0, color, 20);
    ImGui::SameLine();

    float radius = ImGui::GetFontSize() / 1.8f;
    ImGui::Text("spinner_arc_rotation");
    ImGui::SameLine();
    ImSpinner::SpinnerArcRotation("spinner_arc_rotation", radius, 4.0, color);
    ImGui::SameLine();

    float radius1 = ImGui::GetFontSize() / 2.5f;
    ImGui::Text("spinner_ang_triple");
    ImGui::SameLine();
    ImSpinner::SpinnerAngTriple("spinner_ang_triple", radius1, radius1 * 1.5f, radius1 * 2.0f, 2.5f, color, color, color);
}


void DemoToggle()
{
    static bool flag = true;

    ImGuiMd::RenderUnindented(R"(
        # Toggle Switch
        [imgui_toggle](https://github.com/cmdwtf/imgui_toggle) provides toggle switches for ImGui."""
    )");

    bool changed = false;
    changed |= ImGui::Toggle("Default Toggle", &flag);
    ImGui::SameLine();

    changed |= ImGui::Toggle("Animated Toggle", &flag, ImGuiToggleFlags_Animated);
    ImGui::SameLine();

    auto toggle_config = ImGuiTogglePresets::MaterialStyle();
    toggle_config.AnimationDuration = 0.4f;
    changed |= ImGui::Toggle("Material Style (with slowed anim)", &flag, toggle_config);

    ImGui::SameLine();
    changed |= ImGui::Toggle("iOS style", &flag, ImGuiTogglePresets::iOSStyle(0.2f));

    ImGui::SameLine();
    changed |= ImGui::Toggle(
        "iOS style (light)", &flag, ImGuiTogglePresets::iOSStyle(0.2f, true));
}


void DemoPortableFileDialogs()
{
    static std::string lastFileSelection;

    ImGui::PushID("pfd");
    ImGuiMd::RenderUnindented(R"(
        # Portable File Dialogs
        [portable-file-dialogs](https://github.com/samhocevar/portable-file-dialogs) provides file dialogs
        as well as notifications and messages. They will use the native dialogs and notifications on each platform.
    )");

#ifdef __EMSCRIPTEN__
    ImGuiMd::RenderUnindented(R"(
        *Note: On Emscripten/Web, only messages dialogs (with an Ok button and an icon) are supported.
        On Windows, Linux and MacOS, everything is supported.*
    )");
#endif

    ImGui::Text("      ---   File dialogs   ---");
    auto logResult = [](std::string what) {
        lastFileSelection = what;
    };
    auto logResultList = [](const std::vector<std::string>& whats) {
        lastFileSelection = fplus::join(std::string("\n"), whats);
    };

    static std::unique_ptr<pfd::open_file> openFileDialog;
    if (ImGui::Button("Open File"))
        openFileDialog = std::make_unique<pfd::open_file>("Select file");
    if (openFileDialog.get() && openFileDialog->ready())
    {
        logResultList(openFileDialog->result());
        openFileDialog.reset();
    }

    ImGui::SameLine();


    static std::unique_ptr<pfd::open_file> openFileMultiselect;
    if (ImGui::Button("Open File (multiselect)"))
        openFileMultiselect.reset(new pfd::open_file("Select file", "", {}, pfd::opt::multiselect));
    if (openFileMultiselect.get() && openFileMultiselect->ready())
    {
        logResultList(openFileMultiselect->result());
        openFileMultiselect.reset();
    }

    ImGui::SameLine();

    static std::unique_ptr<pfd::save_file> saveFileDialog;
    if (ImGui::Button("Save File"))
        saveFileDialog = std::make_unique<pfd::save_file>("Save file");
    if (saveFileDialog.get() && saveFileDialog->ready())
    {
        logResult(saveFileDialog->result());
        saveFileDialog.reset();
    }

    ImGui::SameLine();

    static std::unique_ptr<pfd::select_folder> selectFolderDialog;
    if (ImGui::Button("Select Folder"))
        selectFolderDialog = std::make_unique<pfd::select_folder>("Select folder");
    if (selectFolderDialog.get() && selectFolderDialog->ready())
    {
        logResult(selectFolderDialog->result());
        selectFolderDialog.reset();
    }

    if (lastFileSelection.size() > 0)
        ImGui::Text("%s", lastFileSelection.c_str());


    ImGui::Text("      ---   Notifications and messages   ---");

    static pfd::icon iconType = pfd::icon::info;
    static std::optional<pfd::message> messageDialog;
    static pfd::choice messageChoiceType = pfd::choice::ok;

    // icon type
    ImGui::Text("Icon type");
    ImGui::SameLine();
    std::vector<std::pair<pfd::icon, const char*>> iconTypes = {
        {pfd::icon::info, "info"},
        {pfd::icon::warning, "warning"},
        {pfd::icon::error, "error"},
    };
    for (const auto& [notification_icon, name]: iconTypes)
    {
        if (ImGui::RadioButton(name, iconType == notification_icon))
            iconType = notification_icon;
        ImGui::SameLine();
    }
    ImGui::NewLine();

    if (ImGui::Button("Add Notif"))
        pfd::notify("Notification title", "This is an example notification", iconType);

    // messages
    ImGui::SameLine();
    // 1. Display the message
    if (ImGui::Button("Add message"))
        messageDialog = pfd::message("Message title", "This is an example message", messageChoiceType, iconType);
    // 2. Handle the message result
    if (messageDialog.has_value() && messageDialog->ready())
    {
        printf("msg ready\n"); // Get the result via messageDialog->result()
        messageDialog.reset();
    }
    // Optional: Select the message type
    ImGui::SameLine();
    std::vector<std::pair<pfd::choice, const char*>> choiceTypes = {
        {pfd::choice::ok, "ok"},
        {pfd::choice::yes_no, "yes_no"},
        {pfd::choice::yes_no_cancel, "yes_no_cancel"},
        {pfd::choice::retry_cancel, "retry_cancel"},
        {pfd::choice::abort_retry_ignore, "abort_retry_ignore"},
    };
    for (const auto& [choice_type, name]: choiceTypes)
    {
        if (ImGui::RadioButton(name, messageChoiceType == choice_type))
            messageChoiceType = choice_type;
        ImGui::SameLine();
    }
    ImGui::NewLine();

    ImGui::PopID();
}


void DemoImFileDialog()
{
#ifdef IMGUI_BUNDLE_WITH_IMFILEDIALOG
    static std::string selectedFilename;

    ImGuiMd::RenderUnindented(R"(
        # ImFileDialog
         [ImFileDialog](https://github.com/pthom/ImFileDialog.git) provides file dialogs for ImGui.
        )");
    ImGui::SameLine();
    ImGui::Text(ICON_FA_EXCLAMATION_TRIANGLE);
    ImGui::SetItemTooltip(
        "It is advised to use Portable File Dialogs instead, which offer native dialogs on each platform, "
        "as well as notifications and messages.\n\n"
        "Known limitations of ImFileDialog:\n"
        "  * Not adapted for High DPI resolution under windows\n"
        "  * No support for multi-selection\n"
        "  * Will not work under python with a pure python backend (requires to use `immapp.run()`)"
    );

    if (ImGui::Button("Open file"))
        ifd::FileDialog::Instance().Open(
            "ShaderOpenDialog",
            "Open a shader",
            "Image file (*.png*.jpg*.jpeg*.bmp*.tga).png,.jpg,.jpeg,.bmp,.tga,.*",
            true
        );
    ImGui::SameLine();
    if (ImGui::Button("Open directory"))
        ifd::FileDialog::Instance().Open("DirectoryOpenDialog", "Open a directory", "");
    ImGui::SameLine();
    if (ImGui::Button("Save file"))
        ifd::FileDialog::Instance().Save("ShaderSaveDialog", "Save a shader", "*.sprj .sprj");

    if (selectedFilename.size() > 0)
        ImGui::Text("Last file selection:\n%s", selectedFilename.c_str());

    if (ifd::FileDialog::Instance().IsDone("ShaderOpenDialog"))
    {
        if (ifd::FileDialog::Instance().HasResult())
        {
            // get_results: plural form - ShaderOpenDialog supports multi-selection
            auto results = ifd::FileDialog::Instance().GetResults();
            selectedFilename = "";
            for (auto path: results)
                selectedFilename += path.string() + "\n";
        }
        ifd::FileDialog::Instance().Close();
    }

    if (ifd::FileDialog::Instance().IsDone("DirectoryOpenDialog"))
    {
        if (ifd::FileDialog::Instance().HasResult())
            selectedFilename = ifd::FileDialog::Instance().GetResult().string();
        ifd::FileDialog::Instance().Close();
    }

    if (ifd::FileDialog::Instance().IsDone("ShaderSaveDialog"))
    {
        if (ifd::FileDialog::Instance().HasResult())
            selectedFilename = ifd::FileDialog::Instance().GetResult().string();
        ifd::FileDialog::Instance().Close();
    }
#endif // #ifdef IMGUI_BUNDLE_WITH_IMFILEDIALOG
}


void DemoCommandPalette()
{
    static bool wasInited = false;
    static bool showCommandPalette = false;
    static ImCmd::Context * commandPaletteContext = nullptr;
    static int counter = 0;

    auto initCommandPalette = []()
    {
        commandPaletteContext = ImCmd::CreateContext();
        ImVec4 highlight_font_color(1.0f, 0.0f, 0.0f, 1.0f);
        ImCmd::SetStyleColor(ImCmdTextType_Highlight, ImGui::ColorConvertFloat4ToU32(highlight_font_color));

        // Add theme command: a two steps command, with initial callback + SubsequentCallback
        {
            ImCmd::Command select_theme_cmd;
            select_theme_cmd.Name = "Select theme";
            select_theme_cmd.InitialCallback = [&]() {
                ImCmd::Prompt(std::vector<std::string>{
                    "Classic",
                    "Dark",
                    "Light",
                });
            };
            select_theme_cmd.SubsequentCallback = [&](int selected_option) {
                switch (selected_option) {
                    case 0: ImGui::StyleColorsClassic(); break;
                    case 1: ImGui::StyleColorsDark(); break;
                    case 2: ImGui::StyleColorsLight(); break;
                    default: break;
                }
            };
            ImCmd::AddCommand(std::move(select_theme_cmd));
        }

        // Simple command that increments a counter
        {
            ImCmd::Command inc_cmd;
            inc_cmd.Name = "increment counter";
            inc_cmd.InitialCallback = [] { counter += 1; };
            ImCmd::AddCommand(inc_cmd);
        }
    };

    if (!wasInited)
    {
        initCommandPalette();
        wasInited = true;
    }

    ImGuiMd::RenderUnindented(R"(
        # Command Palette
        [imgui-command-palette](https://github.com/hnOsmium0001/imgui-command-palette.git) provides a Sublime Text or VSCode style command palette in ImGui
    )");

    auto& io = ImGui::GetIO();
    if (io.KeyCtrl && io.KeyShift && ImGui::IsKeyPressed(ImGuiKey_P))
        showCommandPalette = ! showCommandPalette;

    if (showCommandPalette)
        ImCmd::CommandPaletteWindow("CommandPalette", &showCommandPalette);

    ImGui::NewLine();
    ImGui::Text("Press Ctrl+Shift+P to bring up the command palette");
    ImGui::NewLine();
    ImGui::Text("counter=%i", counter);
}


void DemoCoolBar()
{
    auto ShowCoolBarButton = [](const std::string& label) -> bool
    {
        float w         = ImGui::GetCoolBarItemWidth();

        // Display transparent image and check if clicked
        HelloImGui::ImageFromAsset("images/bear_transparent.png", ImVec2(w, w));
        bool clicked = ImGui::IsItemHovered() && ImGui::IsMouseClicked(0);

        // Optional: add a label on the image
        {
            ImVec2 topLeftCorner = ImGui::GetItemRectMin();
            ImVec2 textPos(topLeftCorner.x + ImmApp::EmSize(1.f), topLeftCorner.y + ImmApp::EmSize(1.f));
            ImGui::GetForegroundDrawList()->AddText(textPos, 0xFFFFFFFF, label.c_str());
        }

        return clicked;
    };


    std::vector<std::string> buttonLabels {"A", "B", "C", "D", "E", "F"};
    ImGuiMd::RenderUnindented(R"(
        # ImCoolBar:
        ImCoolBar provides a dock-like Cool bar for Dear ImGui
    )");

    ImGui::ImCoolBarConfig coolBarConfig;
    coolBarConfig.anchor = ImVec2(0.5f, 0.07f); // position in the window (ratio of window size)
    if (ImGui::BeginCoolBar("##CoolBarMain", ImCoolBarFlags_Horizontal, coolBarConfig))
    {
        for (const std::string& label: buttonLabels)
        {
            if (ImGui::CoolBarItem())
            {
                if (ShowCoolBarButton(label))
                    printf("Clicked %s\n", label.c_str());
            }
        }
        ImGui::EndCoolBar();
    }

    ImGui::NewLine(); ImGui::NewLine();
}


void demo_widgets()
{
    DemoCoolBar();
    DemoPortableFileDialogs(); ImGui::NewLine();
    DemoImFileDialog(); ImGui::NewLine();
    DemoKnobs();
    DemoToggle(); ImGui::NewLine();
    DemoSpinner();
    DemoCommandPalette();
}
Click to see the widgets code in Python
# Part of ImGui Bundle - MIT License - Copyright (c) 2022-2023 Pascal Thomet - https://github.com/pthom/imgui_bundle
from typing import List
from imgui_bundle import (
    imgui,
    hello_imgui,
    imgui_md,
    imgui_toggle,
    ImVec2,
    immapp,
    ImVec4,
    im_cool_bar,
    icons_fontawesome,
)
from imgui_bundle import imgui_command_palette as imcmd
from imgui_bundle import portable_file_dialogs as pfd


@immapp.static(knob_float_value=0, knob_int_value=0)
def demo_knobs():
    static = demo_knobs
    from imgui_bundle import imgui_knobs

    imgui_md.render(
        """
# Knobs
  [imgui-knobs](https://github.com/altschuler/imgui-knobs) provides knobs for ImGui."""
    )
    knob_types = {
        "tick": imgui_knobs.ImGuiKnobVariant_.tick,
        "dot": imgui_knobs.ImGuiKnobVariant_.dot,
        "space": imgui_knobs.ImGuiKnobVariant_.space,
        "stepped": imgui_knobs.ImGuiKnobVariant_.stepped,
        "wiper": imgui_knobs.ImGuiKnobVariant_.wiper,
        "wiper_dot": imgui_knobs.ImGuiKnobVariant_.wiper_dot,
        "wiper_only": imgui_knobs.ImGuiKnobVariant_.wiper_only,
    }

    def show_float_knobs(knob_size: float):
        imgui.push_id(f"{knob_size}_float")
        for knob_typename, knob_type in knob_types.items():
            changed, static.knob_float_value = imgui_knobs.knob(
                knob_typename,
                p_value=static.knob_float_value,
                v_min=0.0,
                v_max=1.0,
                speed=0,
                format="%.2f",
                variant=knob_type.value,
                size=knob_size,
                flags=0,
                steps=100,
            )
            imgui.same_line()
        imgui.new_line()
        imgui.pop_id()

    def show_int_knobs(knob_size: float):
        imgui.push_id(f"{knob_size}_int")
        for knob_typename, knob_type in knob_types.items():
            changed, static.knob_int_value = imgui_knobs.knob_int(
                knob_typename,
                p_value=static.knob_int_value,
                v_min=0,
                v_max=15,
                speed=0,
                format="%02i",
                variant=knob_type.value,
                steps=10,
                size=knob_size,
            )
            imgui.same_line()
        imgui.new_line()
        imgui.pop_id()

    knobs_size_small = immapp.em_size() * 2.5
    knobs_size_big = knobs_size_small * 1.3

    imgui.begin_group()
    imgui.text("Some small knobs")
    show_float_knobs(knobs_size_small)
    imgui.end_group()

    imgui.same_line()

    imgui.begin_group()
    imgui.text("Some big knobs (int values)")
    show_int_knobs(knobs_size_big)
    imgui.end_group()


def demo_spinner():
    from imgui_bundle import imspinner

    imgui_md.render(
        """
# Spinners
  [imspinner](https://github.com/dalerank/imspinner) provides spinners for ImGui."""
    )

    color = imgui.ImColor(0.3, 0.5, 0.9, 1.0)
    imgui.text("spinner_moving_dots")
    imgui.same_line()
    imspinner.spinner_moving_dots("spinner_moving_dots", 20.0, 4.0, color, 20)
    imgui.same_line()

    radius = imgui.get_font_size() / 1.8
    imgui.text("spinner_arc_rotation")
    imgui.same_line()
    imspinner.spinner_arc_rotation("spinner_arc_rotation", radius, 4.0, color)
    imgui.same_line()

    radius1 = imgui.get_font_size() / 2.5
    imgui.text("spinner_ang_triple")
    imgui.same_line()
    imspinner.spinner_ang_triple(
        "spinner_ang_triple",
        radius1,
        radius1 * 1.5,
        radius1 * 2.0,
        2.5,
        color,
        color,
        color,
    )


@immapp.static(flag=True)
def demo_toggle():
    static = demo_toggle
    imgui_md.render_unindented(
        """
        # Toggle Switch
          [imgui_toggle](https://github.com/cmdwtf/imgui_toggle) provides toggle switches for ImGui."""
    )

    _changed, static.flag = imgui_toggle.toggle("Default Toggle", static.flag)
    imgui.same_line()

    _changed, static.flag = imgui_toggle.toggle(
        "Animated Toggle", static.flag, imgui_toggle.ToggleFlags_.animated.value
    )
    imgui.same_line()

    toggle_config = imgui_toggle.material_style()
    toggle_config.animation_duration = 0.4
    _changed, static.flag = imgui_toggle.toggle(
        "Material Style (with slowed anim)", static.flag, config=toggle_config
    )

    imgui.same_line()
    _changed, static.flag = imgui_toggle.toggle(
        "iOS style", static.flag, config=imgui_toggle.ios_style(size_scale=0.2)
    )

    imgui.same_line()
    _changed, static.flag = imgui_toggle.toggle(
        "iOS style (light)",
        static.flag,
        config=imgui_toggle.ios_style(size_scale=0.2, light_mode=True),
    )


@immapp.static(
    open_file_dialog=None,
    open_file_multiselect=None,
    save_file_dialog=None,
    select_folder_dialog=None,
    last_file_selection="",
    # Messages and Notifications
    icon_type=pfd.icon.info,
    message_dialog=None,
    message_choice_type=pfd.choice.ok,
)
def demo_portable_file_dialogs():
    # from imgui_bundle import portable_file_dialogs as pfd
    static = demo_portable_file_dialogs


    imgui.push_id("pfd")
    imgui_md.render_unindented(
        """
        # Portable File Dialogs
         [portable-file-dialogs](https://github.com/samhocevar/portable-file-dialogs) provides file dialogs
         as well as notifications and messages. They will use the native dialogs and notifications on each platform.
    """
    )

    def log_result(what: str):
        static.last_file_selection = what

    def log_result_list(whats: List[str]):
        static.last_file_selection = "\n".join(whats)

    imgui.text("      ---   File dialogs   ---")
    if imgui.button("Open file"):
        static.open_file_dialog = pfd.open_file("Select file")
    if static.open_file_dialog is not None and static.open_file_dialog.ready():
        log_result_list(static.open_file_dialog.result())
        static.open_file_dialog = None

    imgui.same_line()

    if imgui.button("Open file (multiselect)"):
        static.open_file_multiselect = pfd.open_file(
            "Select file", options=pfd.opt.multiselect
        )
    if (
        static.open_file_multiselect is not None
        and static.open_file_multiselect.ready()
    ):
        log_result_list(static.open_file_multiselect.result())
        static.open_file_multiselect = None

    imgui.same_line()

    if imgui.button("Save file"):
        static.save_file_dialog = pfd.save_file("Save file")
    if static.save_file_dialog is not None and static.save_file_dialog.ready():
        log_result(static.save_file_dialog.result())
        static.save_file_dialog = None

    imgui.same_line()

    if imgui.button("Select folder"):
        static.select_folder_dialog = pfd.select_folder("Select folder")
    if static.select_folder_dialog is not None and static.select_folder_dialog.ready():
        log_result(static.select_folder_dialog.result())
        static.select_folder_dialog = None

    if len(static.last_file_selection) > 0:
        imgui.text(static.last_file_selection)

    imgui.text("      ---   Notifications and messages   ---")

    # icon type
    imgui.text("Icon type")
    imgui.same_line()
    for notification_icon in (pfd.icon.info, pfd.icon.warning, pfd.icon.error):
        if imgui.radio_button(notification_icon.name, static.icon_type == notification_icon):
            static.icon_type = notification_icon
        imgui.same_line()
    imgui.new_line()

    if imgui.button("Add Notif"):
        pfd.notify("Notification title", "This is an example notification", static.icon_type)

    # messages
    imgui.same_line()
    # 1. Display the message
    if imgui.button("Add message"):
        static.message_dialog = pfd.message("Message title", "This is an example message", static.message_choice_type, static.icon_type)
    # 2. Handle the message result
    if static.message_dialog is not None and static.message_dialog.ready():
        print("msg ready: " + str(static.message_dialog.result()))
        static.message_dialog = None
    # Optional: Select the message type
    imgui.same_line()
    for choice_type in (pfd.choice.ok, pfd.choice.yes_no, pfd.choice.yes_no_cancel, pfd.choice.retry_cancel, pfd.choice.abort_retry_ignore):
        if imgui.radio_button(choice_type.name, static.message_choice_type == choice_type):
            static.message_choice_type = choice_type
        imgui.same_line()
    imgui.new_line()

    imgui.pop_id()


@immapp.static(selected_filename="")
def demo_imfile_dialog():
    static = demo_imfile_dialog  # Access to static variable via static
    from imgui_bundle import has_submodule
    if not has_submodule("im_file_dialog"):
        return
    from imgui_bundle import im_file_dialog as ifd
    imgui_md.render_unindented(
        """
        # ImFileDialog
         [ImFileDialog](https://github.com/pthom/ImFileDialog.git) provides file dialogs for ImGui.
        """
    )
    # Warning / low support
    imgui.same_line()
    imgui.text(icons_fontawesome.ICON_FA_EXCLAMATION_TRIANGLE)
    imgui.set_item_tooltip("""
    It is advised to use Portable File Dialogs instead, which offer native dialogs on each platform,
    as well as notifications and messages.

    Known limitations of ImFileDialog:
    * Not adapted for High DPI resolution under windows
    * No support for multi-selection
    * Will not work under python with a pure python backend (requires to use `immapp.run()`)
    """)

    if imgui.button("Open file"):
        ifd.FileDialog.instance().open(
            "ShaderOpenDialog",
            "Open a shader",
            "Image file (*.png*.jpg*.jpeg*.bmp*.tga).png,.jpg,.jpeg,.bmp,.tga,.*",
            True,
        )
    imgui.same_line()
    if imgui.button("Open directory"):
        ifd.FileDialog.instance().open("DirectoryOpenDialog", "Open a directory", "")
    imgui.same_line()
    if imgui.button("Save file"):
        ifd.FileDialog.instance().save(
            "ShaderSaveDialog", "Save a shader", "*.sprj .sprj"
        )

    if len(static.selected_filename) > 0:
        imgui.text(f"Last file selection:\n  {static.selected_filename}")

    # file dialogs
    if ifd.FileDialog.instance().is_done("ShaderOpenDialog"):
        if ifd.FileDialog.instance().has_result():
            # get_results: plural form - ShaderOpenDialog supports multi-selection
            res = ifd.FileDialog.instance().get_results()
            filenames = [f.path() for f in res]
            static.selected_filename = "\n  ".join(filenames)

        ifd.FileDialog.instance().close()

    if ifd.FileDialog.instance().is_done("DirectoryOpenDialog"):
        if ifd.FileDialog.instance().has_result():
            static.selected_filename = ifd.FileDialog.instance().get_result().path()

        ifd.FileDialog.instance().close()

    if ifd.FileDialog.instance().is_done("ShaderSaveDialog"):
        if ifd.FileDialog.instance().has_result():
            static.selected_filename = ifd.FileDialog.instance().get_result().path()

        ifd.FileDialog.instance().close()


@immapp.static(
    was_inited=False,
    show_command_palette=False,
    counter=0,
    command_palette_context=None,
)
def demo_command_palette():
    static = demo_command_palette

    def init_command_palette():
        static.command_palette_context = imcmd.ContextWrapper()
        highlight_font_color = ImVec4(1.0, 0.0, 0.0, 1.0)
        imcmd.set_style_color(
            imcmd.ImCmdTextType.highlight,
            imgui.color_convert_float4_to_u32(highlight_font_color),
        )
        # Add theme command: a two steps command, with initial callback + SubsequentCallback
        select_theme_cmd = imcmd.Command()
        select_theme_cmd.name = "Select theme"

        def select_theme_cmd_initial_cb():
            imcmd.prompt(["Classic", "Dark", "Light"])

        def select_theme_cmd_subsequent_cb(selected_option: int):
            if selected_option == 0:
                imgui.style_colors_classic()
            elif selected_option == 1:
                imgui.style_colors_dark()
            elif selected_option == 2:
                imgui.style_colors_light()

        select_theme_cmd.initial_callback = select_theme_cmd_initial_cb
        select_theme_cmd.subsequent_callback = select_theme_cmd_subsequent_cb
        imcmd.add_command(select_theme_cmd)

        # Simple command that increments a counter
        inc_cmd = imcmd.Command()
        inc_cmd.name = "increment counter"

        def inc_counter():
            static.counter += 1

        inc_cmd.initial_callback = inc_counter
        imcmd.add_command(inc_cmd)

    if not static.was_inited:
        init_command_palette()
        static.was_inited = True

    imgui_md.render_unindented(
        """
        # Command Palette
        [imgui-command-palette](https://github.com/hnOsmium0001/imgui-command-palette.git) provides a Sublime Text or VSCode style command palette in ImGui
        """
    )

    io = imgui.get_io()
    if io.key_ctrl and io.key_shift and imgui.is_key_pressed(imgui.Key.p):
        static.show_command_palette = not static.show_command_palette

    if static.show_command_palette:
        static.show_command_palette = imcmd.command_palette_window(
            "CommandPalette", True
        )

    imgui.new_line()
    imgui.text("Press Ctrl+Shift+P to bring up the command palette")
    imgui.new_line()
    imgui.text(f"{static.counter=}")


def demo_cool_bar():
    # Function to show a CoolBar button
    def show_cool_bar_button(label):
        w = im_cool_bar.get_cool_bar_item_width()

        # Display transparent image and check if clicked
        hello_imgui.image_from_asset("images/bear_transparent.png", ImVec2(w, w))
        clicked = imgui.is_item_hovered() and imgui.is_mouse_clicked(0)

        # Optional: add a label on the image
        top_left_corner = imgui.get_item_rect_min()
        text_pos = ImVec2(
            top_left_corner.x + immapp.em_size(1.0),
            top_left_corner.y + immapp.em_size(1.0),
        )
        imgui.get_window_draw_list().add_text(text_pos, 0xFFFFFFFF, label)

        return clicked

    button_labels = ["A", "B", "C", "D", "E", "F"]
    imgui_md.render_unindented(
        """
        # ImCoolBar:
        ImCoolBar provides a dock-like Cool bar for Dear ImGui
        """
    )

    cool_bar_config = im_cool_bar.ImCoolBarConfig()
    cool_bar_config.anchor = ImVec2(
        0.5, 0.07
    )  #  position in the window (ratio of window size)
    if im_cool_bar.begin_cool_bar(
        "##CoolBarMain", im_cool_bar.ImCoolBarFlags_.horizontal.value, cool_bar_config
    ):
        for label in button_labels:
            if im_cool_bar.cool_bar_item():
                if show_cool_bar_button(label):
                    print(f"Clicked {label}")
        im_cool_bar.end_cool_bar()

    imgui.new_line()
    imgui.new_line()


def demo_gui():
    demo_cool_bar()
    demo_portable_file_dialogs()
    imgui.new_line()
    demo_imfile_dialog()
    imgui.new_line()
    demo_knobs()
    demo_toggle()
    imgui.new_line()
    demo_spinner()
    demo_command_palette()


if __name__ == "__main__":
    from imgui_bundle.demos_python import demo_utils
    demo_utils.set_hello_imgui_demo_assets_folder()

    from imgui_bundle import immapp
immapp.run(demo_gui, with_markdown=True, window_size=(1000, 1000)) # type: ignoreClick to see the logger code in C++
// Part of ImGui Bundle - MIT License - Copyright (c) 2022-2024 Pascal Thomet - https://github.com/pthom/imgui_bundle
#include "imgui_md_wrapper/imgui_md_wrapper.h"
#include "immapp/immapp.h"
#include "hello_imgui/hello_imgui.h"
#include "demo_utils/api_demos.h"

#include <vector>
#include <string>


void demo_logger()
{
    static std::vector<std::string> fortunes {
        "If at first you don't succeed, skydiving is not for you.",
        "You will be a winner today. Pick a fight.",
        "The world may be your oyster, but it doesn't mean you'll get its pearl.",
        "Borrow money from a pessimist, they don't expect it back.",
        "You will be hungry again in an hour.",
        "A closed mouth gathers no foot.",
        "Today, you will invent the wheel...again.",
        "If you can't convince them, confuse them.",
        "The journey of a thousand miles begins with a single step, or a really good map.",
        "You will find a pot of gold at the end of a rainbow, but it'll be someone else's.",
        "Opportunities will knock on your door, but don't worry, they'll be gone by the time you get up to answer.",
        "You will have a long and healthy life...and a very boring one.",
        "A wise man once said nothing.",
        "You will have a great day...tomorrow.",
        "The only thing constant in life is change, except for death and taxes, those are pretty constant too."
    };

    static size_t idxFortune = 0;

    auto addLogs = []()
    {
        for (int i = 0; i < 10; ++i)
        {
            HelloImGui::LogLevel logLevel = HelloImGui::LogLevel(rand() % 4);
            HelloImGui::Log(logLevel, fortunes[idxFortune].c_str());
            ++ idxFortune;
            if (idxFortune >= fortunes.size())
                idxFortune = 0;
        }
    };
    static bool addedLogs = false;
    if (! addedLogs)
    {
        addLogs();
        addedLogs = true;
    }

    ImGuiMd::RenderUnindented(R"(
        # Graphical logger for ImGui
        This logger is adapted from [ImGuiAl](https://github.com/leiradel/ImGuiAl)

        Its colors are computed automatically from the WindowBg color, in order to remain readable when the theme is changed.
    )");
    ImGui::Separator();

    if (ImGui::Button("Add logs"))
        addLogs();

    ImGui::Separator();
    HelloImGui::LogGui();
}
Click to see the logger code in Python
# Part of ImGui Bundle - MIT License - Copyright (c) 2022-2023 Pascal Thomet - https://github.com/pthom/imgui_bundle
import random
from imgui_bundle import imgui, hello_imgui, imgui_md, immapp
from imgui_bundle.demos_python.demo_utils import api_demos


@immapp.static(idx_fortune=0, added_logs=False)
def demo_gui():
    static = demo_gui
    fortunes = [
        "If at first you don't succeed, skydiving is not for you.",
        "You will be a winner today. Pick a fight.",
        "The world may be your oyster, but it doesn't mean you'll get its pearl.",
        "Borrow money from a pessimist, they don't expect it back.",
        "You will be hungry again in an hour.",
        "A closed mouth gathers no foot.",
        "Today, you will invent the wheel...again.",
        "If you can't convince them, confuse them.",
        "The journey of a thousand miles begins with a single step, or a really good map.",
        "You will find a pot of gold at the end of a rainbow, but it'll be someone else's.",
        "Opportunities will knock on your door, but don't worry, they'll be gone by the time you get up to answer.",
        "You will have a long and healthy life...and a very boring one.",
        "A wise man once said nothing.",
        "You will have a great day...tomorrow.",
        "The only thing constant in life is change, except for death and taxes, those are pretty constant too.",
    ]

    def add_logs():
        for _i in range(10):
            log_level = random.choice(
                [
                    hello_imgui.LogLevel.debug,
                    hello_imgui.LogLevel.info,
                    hello_imgui.LogLevel.warning,
                    hello_imgui.LogLevel.error,
                ]
            )
            hello_imgui.log(log_level, fortunes[static.idx_fortune])
            static.idx_fortune += 1
            if static.idx_fortune >= len(fortunes):
                static.idx_fortune = 0

    if not static.added_logs:
        add_logs()
        static.added_logs = True

    imgui_md.render_unindented(
        """
        # Graphical logger for ImGui
        This logger is adapted from [ImGuiAl](https://github.com/leiradel/ImGuiAl)

        Its colors are computed automatically from the WindowBg color, in order to remain readable when the theme is changed.
        """
    )
    imgui.separator()

    if imgui.button("Add logs"):
        for _i in range(10):
            add_logs()

    imgui.separator()
    hello_imgui.log_gui()


def main():
    api_demos.set_hello_imgui_demo_assets_folder()
    immapp.run(demo_gui, "Log", with_markdown=True)


if __name__ == "__main__":
main()Click to see the code editor code in C++
// Part of ImGui Bundle - MIT License - Copyright (c) 2022-2024 Pascal Thomet - https://github.com/pthom/imgui_bundle
#include "imgui.h"
#include "immapp/immapp.h"
#include "ImGuiColorTextEdit/TextEditor.h"
#include <fplus/fplus.hpp>

TextEditor _PrepareTextEditor()
{
    TextEditor editor;
    std::string filename = __FILE__;
#ifndef __EMSCRIPTEN__
    std::string this_file_code = fplus::read_text_file(filename)();
#else
    std::string this_file_code = fplus::read_text_file("/demos_cpp/demo_text_edit.cpp")();
#endif
    editor.SetText(this_file_code);
    editor.SetLanguageDefinition(TextEditor::LanguageDefinition::CPlusPlus());
    return editor;
}


void demo_text_edit()
{
    static TextEditor editor = _PrepareTextEditor();

    ImGuiMd::Render(R"(
# ImGuiColorTextEdit:
[ImGuiColorTextEdit](https://github.com/BalazsJako/ImGuiColorTextEdit)  is a colorizing text editor for ImGui, able to colorize C, C++, hlsl, Sql, angel_script and lua code
    )");

    auto ShowPaletteButtons = []()
    {
        if (ImGui::SmallButton("Dark palette"))
            editor.SetPalette(TextEditor::GetDarkPalette());
        ImGui::SameLine();
        if (ImGui::SmallButton("Light palette"))
            editor.SetPalette(TextEditor::GetLightPalette());
        ImGui::SameLine();
        if (ImGui::SmallButton("Retro blue palette"))
            editor.SetPalette(TextEditor::GetRetroBluePalette());
        ImGui::SameLine();
        if (ImGui::SmallButton("Mariana palette"))
            editor.SetPalette(TextEditor::GetMarianaPalette());
    };

    ShowPaletteButtons();
    ImGui::PushFont(ImGuiMd::GetCodeFont());
    editor.Render("Code");
    ImGui::PopFont();
}
Click to see the code editor code in Python
# Part of ImGui Bundle - MIT License - Copyright (c) 2022-2023 Pascal Thomet - https://github.com/pthom/imgui_bundle
from imgui_bundle import imgui, imgui_color_text_edit as ed, imgui_md
from imgui_bundle.immapp import static

TextEditor = ed.TextEditor


def _prepare_text_editor():
    with open(__file__, encoding="utf8") as f:
        this_file_code = f.read()
    editor = TextEditor()
    editor.set_text(this_file_code)
    editor.set_language_definition(TextEditor.LanguageDefinition.python())
    return editor


@static(editor=_prepare_text_editor())
def demo_gui():
    static = demo_gui
    editor = static.editor

    imgui_md.render(
        """
# ImGuiColorTextEdit:
[ImGuiColorTextEdit](https://github.com/BalazsJako/ImGuiColorTextEdit)  is a colorizing text editor for ImGui, able to colorize C, C++, hlsl, Sql, angel_script and lua code
    """
    )

    def show_palette_buttons():
        if imgui.small_button("Dark palette"):
            editor.set_palette(ed.TextEditor.get_dark_palette())
        imgui.same_line()
        if imgui.small_button("Light palette"):
            editor.set_palette(TextEditor.get_light_palette())
        imgui.same_line()
        if imgui.small_button("Retro blue palette"):
            editor.set_palette(TextEditor.get_retro_blue_palette())
        imgui.same_line()
        if imgui.small_button("Mariana palette"):
            editor.set_palette(TextEditor.get_mariana_palette())

    show_palette_buttons()
    imgui.push_font(imgui_md.get_code_font())
    editor.render("Code")
    imgui.pop_font()


def main():
    from imgui_bundle import immapp

    immapp.run(demo_gui, with_markdown=True)


if __name__ == "__main__":
main()|
Tip
|
Tip: use the interactive manual as an inspiration |
The interactive manual provides many demos, with easy access to their code. It includes all the examples that are explained here, and many more.
HelloImGui and ImmApp applications rely on the presence of an assets folder.
This folder stores
-
All the resources (images, fonts, etc.) used by the application. Feel free to add any resources there!
-
The application settings (e.g. the app icon, the app settings for macOS and iOS, etc.)
Assets folder location
-
Python: Place the assets folder in the same folder as the script
-
C++: The assets folder should be placed in the same folder as the CMakeLists.txt for the application (the one calling
imgui_bundle_add_app)
Typical layout of the assets folder
assets/
    +-- app_settings/                # Application settings
    |    +-- icon.png                # This will be the app icon, it should be square
    |    |                           # and at least 256x256. It will  be converted
    |    |                           # to the right format, for each platform (except Android)
    |    +-- apple/
    |    |         +-- Info.plist    # macOS and iOS app settings
    |    |                           # (or Info.ios.plist + Info.macos.plist)
    |    |
    |    +-- android/                # Android app settings: files here will be deployed
    |    |   |-- AndroidManifest.xml # Optional manifest
    |    |   +-- res/
    |    |       +-- mipmap-xxxhdpi/ # Optional icons for different resolutions
    |    |           +-- ...         # Use Android Studio to generate them:
    |    |                           # right click on res/ => New > Image Asset
    |    +-- emscripten/
    |      |-- shell.emscripten.html # Emscripten shell file
    |      |                         #   (this file will be cmake "configured"
    |      |                         #    to add the name and favicon)
    |      +-- custom.js             # Any custom file here will be deployed
    |                                #   in the emscripten build folder

    +-- fonts/
    |    +-- DroidSans.ttf            # Default fonts used by HelloImGui to
    |    +-- fontawesome-webfont.ttf  # improve text rendering (esp. on High DPI)
    |    |                            # if absent, a default LowRes font is used.
    |    |
    |    +-- Roboto/                  # Optional: fonts for markdown
    |         +-- LICENSE.txt
    |         +-- Roboto-Bold.ttf
    |         +-- Roboto-BoldItalic.ttf
    |         +-- Roboto-Regular.ttf
    |         +-- Roboto-RegularItalic.ttf
    |         +-- Inconsolata-Medium.ttf
    +-- images/
         +-- markdown_broken_image.png  # Optional: used for markdown
         +-- world.png                  # Add anything in the assets folder!
If needed, change the assets folder location:
-
Python: Call
hello_imgui.set_assets_folder()at startup. -
C++: Call
HelloImGui::SetAssetsFolderat startup. Or specify its location in CMake viaimgui_bundle_add_app(app_name file.cpp ASSETS_LOCATION "path/to/assets").
Where to find the default assets
Look at the folder imgui_bundle/bindings/imgui_bundle/assets to see their content.
This demonstration showcases how to:
-
Load and use assets (fonts, images, icons, etc.)
-
Use ImPlot to display various types of plots
-
Use markdown to display formatted messages
This demonstration source code is heavily documented and should be self-explanatory.
Click to see its source code in C++
#include "hello_imgui/hello_imgui.h"
#include "hello_imgui/icons_font_awesome_4.h"
#include "immapp/immapp.h"
#include "imgui_md_wrapper/imgui_md_wrapper.h"
#ifdef IMGUI_BUNDLE_WITH_IMPLOT
#include "implot/implot.h"
#endif
#include "immapp/code_utils.h"
#include "demo_utils/api_demos.h"
#include <vector>
#include <map>


// This function displays the help messages that are displayed in this demo application
void ShowDoc(const std::string& whichDoc);


// Your global application state, that will be edited during the execution
struct AppState
{
    // you can edit the ImPlot pie chart values
    std::vector<float> PlotData = {0.15f, 0.30f, 0.2f, 0.05f};

    // You can edit a demo markdown string
    char MarkdownInput[4000] = "*Welcome to the interactive markdown demo!* Try writing some markdown content here.";

    //
    // Note about AppState:
    // Inside ImGui demo code, you will often see static variables, such as in this example
    // ```cpp
    //     static int value = 10;
    //     bool changed = ImGui::SliderInt("Value", &value, 0, 10);  // edit this variable between 0 and 10
    // ```
    // In this example, `value` is a static variable whose state is preserved:
    // it merely acts as a global variable, whose scope is limited to this function.
    // Global variables should be avoided, and storing the Application State like this is preferable in production code.
    //
};


// A demo showcasing the assets usage in HelloImGui and ImmApp
void DemoAssets(AppState& appState)
{
    ImGuiMd::Render("# Demo Assets");
    ImGui::Text("Here are some icons from Font Awesome: ");
    ImGui::SameLine(); ImGui::SetCursorPosX(HelloImGui::EmSize(40.f));
    ImGui::Text(ICON_FA_INFO " " ICON_FA_EXCLAMATION_TRIANGLE " " ICON_FA_SAVE);


    ImGui::Text("Here is an image that was loaded from the assets: ");
    ImGui::SameLine(); ImGui::SetCursorPosX(HelloImGui::EmSize(40.f));

    // Prefer to specify sizes using the "em" unit: see https://en.wikipedia.org/wiki/Em_(typography)
    //     Below, imageSize is equivalent to the size of 3 lines of text
    ImVec2 imageSize = HelloImGui::EmToVec2(3.f, 3.f);
    HelloImGui::ImageFromAsset("images/world.png", imageSize);

    ImGuiMd::Render("**Read the [documentation about assets](https://pthom.github.io/imgui_bundle/quickstart.html#quickstart_about_assets)**");

    ShowDoc("AssetsDoc");
}


// A demo about the usage of the markdown renderer
void DemoMarkdown(AppState& appState)
{
    std::string markdownDemo = R"(
        # Demo markdown usage

        Let's ask GPT4 to give us some fun programming fortunes in markdown format:

        1. **Bug Hunt**: In the world of software, the best debugger was, is, and will always be a _good night's sleep_.

        2. **Pythonic Wisdom**:
            > They say if you can't explain something simply, you don't understand it well enough. Well, here's my Python code for simplicity:
            ```python
            def explain(thing):
                return "It's just a " + thing + ". Nothing fancy!"
            ```
        )";
    ImGuiMd::RenderUnindented(markdownDemo);

    // Interactive demo
    ImGui::Separator();
    ImGuiMd::Render("*Try it yourself*");
    ImGui::SameLine(HelloImGui::EmSize(30.f));
    if (ImGui::SmallButton("Edit the fortune markdown"))
        strcpy(appState.MarkdownInput, CodeUtils::UnindentMarkdown(markdownDemo).c_str());
    ImGui::InputTextMultiline("##Markdown Input", appState.MarkdownInput, sizeof(appState.MarkdownInput), HelloImGui::EmToVec2(40.f, 5.f));
    ImGuiMd::RenderUnindented(appState.MarkdownInput);
    ImGui::Separator();

    ShowDoc("MarkdownDoc");
}


#ifdef IMGUI_BUNDLE_WITH_IMPLOT
// A demo showcasing the usage of ImPlot
void DemoPlot(AppState& appState)
{
    ImGuiMd::Render("# Demo ImPlot");

    static const char* data_labels[]    = {"Frogs", "Hogs", "Dogs", "Logs"};

    ImGui::Text("Edit Pie Chart values");
    ImGui::SetNextItemWidth(250);
    ImGui::DragFloat4("Pie Data", appState.PlotData.data(), 0.01f, 0, 1);

    // Prefer to specify sizes using the "em" unit: see https://en.wikipedia.org/wiki/Em_(typography)
    //     Below, plotSize is equivalent to the size of 1 lines of text
    ImVec2 plotSize = ImmApp::EmToVec2(15.f, 15.f);

    if (ImPlot::BeginPlot("Pie Chart", plotSize))
    {
        ImPlot::SetupAxes("", "", ImPlotAxisFlags_NoDecorations, ImPlotAxisFlags_NoDecorations);
        ImPlot::PlotPieChart(
            data_labels,
            appState.PlotData.data(), appState.PlotData.size(), // data and count
            0.5, 0.5, // pie center position in the plot(x, y). Here, it is centered
            0.35,      // pie radius relative to plotSize
            "%.2f",   // fmt
            90        // angle
            );
            ImPlot::EndPlot();
    }

    ShowDoc("PlotDoc");
}
#else
void DemoPlot(AppState& appState) {}
#endif


// Our main function
int main(int, char**)
{
    // This call is specific to the ImGui Bundle interactive manual. In a standard application, you could write:
    //         HelloImGui::SetAssetsFolder("my_assets"); // (By default, HelloImGui will search inside "assets")
    ChdirBesideAssetsFolder();

    AppState appState;         // Our global appState

    // This is our GUI function:
    //     it will display the widgets
    //     it captures the appState, since it can modify it
    auto gui = [&appState]()
    {
        DemoAssets(appState);
        ImGui::NewLine();
        DemoMarkdown(appState);
        ImGui::NewLine();
        DemoPlot(appState);
    };

    // Then, we start our application:
    //     First, we set some RunnerParams, with simple settings
    HelloImGui::SimpleRunnerParams runnerParams;
    runnerParams.windowSize = {1000, 1000};
    //     Here we set our GUI function
    runnerParams.guiFunction = gui;
    //     Then, we need to activate two addons: ImPlot and Markdown
    ImmApp::AddOnsParams addons;
    addons.withImplot = true;
    addons.withMarkdown = true;
    //     And we are ready to go!
    ImmApp::Run(runnerParams, addons);

    return 0;
}

///////////////////////////////////////////////////////////////////////////////
// End of demo code
///////////////////////////////////////////////////////////////////////////////


//
// Note: the code below only displays the help messages
//

std::string GetDoc(const std::string& whichDoc)
{
    static std::map<std::string, std::string> docs =
        {
            {
                "AssetsDoc",
                R"(
                    The icons and image were shown via this code:

                    C++
                    ```cpp
                    ImGui::Text(ICON_FA_INFO " " ICON_FA_EXCLAMATION_TRIANGLE " " ICON_FA_SAVE);
                    ImVec2 imageSize = HelloImGui::EmToVec2(3.f, 3.f);
                    HelloImGui::ImageFromAsset("images/world.png", imageSize);
                    ```

                    Python
                    ```python
                    imgui.text(icons_fontawesome.ICON_FA_INFO + " " + icons_fontawesome.ICON_FA_EXCLAMATION_TRIANGLE + " " + icons_fontawesome.ICON_FA_SAVE)
                    image_size = hello_imgui.em_to_vec2(3.0, 3.0)
                    hello_imgui.image_from_asset("images/world.png", image_size)
                    ```

                    *Note: In this code, imageSize is equivalent to the size of 3 lines of text, using the [em unit](https://en.wikipedia.org/wiki/Em_(typography))*
                )"
            },
            {
                "MarkdownDoc",
                R"(
                This markdown string was rendered by calling either:

                C++
                ```cpp
                ImGuiMd::Render(markdown_string);            // render a markdown string
                ImGuiMd::RenderUnindented(markdown_string);  // remove top-most indentation before rendering
                ```

                Python
                ```python
                imgui_md.render(markdown_string);            # render a markdown string
                imgui_md.render_unindented(markdown_string); # remove top-most indentation before rendering
                ```

                This markdown renderer is based on [imgui_md](https://github.com/mekhontsev/imgui_md), by Dmitry Mekhontsev.
                It supports the most common markdown features: emphasis, link, code blocks, etc.
                )"
            },
            {
                "PlotDoc",
                R"(
                By using ImPlot, you can display lots of different plots. See [online demo](https://traineq.org/implot_demo/src/implot_demo.html) which demonstrates lots of plot types (LinePlot, ScatterPlot, Histogram, Error Bars, Heatmaps, etc.)

                Note: in order to use ImPlot, you need to "activate" this add-on, like this:

                C++
                ```cpp
                ImmApp::AddOnsParams addons { .withImplot = true };
                ImmApp::Run(runnerParams, addons);
                ```

                Python:
                ```python
                addons = immapp.AddOnsParams(with_implot=True)
                immapp.run(runner_params, addons);
                ```
                )"
            },
        };

    return docs.at(whichDoc);
}


void ShowDoc(const std::string& whichDoc)
{
    static std::map<std::string, bool> is_doc_visible;
    if (is_doc_visible.find(whichDoc) == is_doc_visible.end())
        is_doc_visible[whichDoc] = false;

    ImGui::PushID(whichDoc.c_str());
    ImGui::Checkbox("More info", &is_doc_visible[whichDoc]);

    if (is_doc_visible[whichDoc])
    {
        ImGuiMd::RenderUnindented(GetDoc(whichDoc));
        ImGui::Dummy(HelloImGui::EmToVec2(1.f, 6.f));
        ImGui::Separator();
    }
    ImGui::PopID();
}
Click to see its source code in Python
from imgui_bundle import imgui, implot, immapp, hello_imgui, imgui_md, icons_fontawesome
from imgui_bundle.demos_python import demo_utils

import numpy as np
from typing import Dict, List
from dataclasses import dataclass, field


def show_doc(which_doc: str):
    """This function displays the help messages that are displayed in this demo application
    (implemented later in this file)"""
    ...


@dataclass
class AppState:
    """Your global application state, that will be edited during the execution."""

    # you can edit the ImPlot pie chart values
    plot_data: List[float] = field(default_factory=lambda: [0.15, 0.30, 0.2, 0.05])

    # You can edit a demo markdown string
    markdown_input: str = "*Welcome to the interactive markdown demo!* Try writing some markdown content here."

    #
    # Note about AppState:
    # Inside ImGui demo code, you will often see static variables, such as in this example
    #     static int value = 10;
    #     bool changed = ImGui::SliderInt("Value", &value, 0, 10);  // edit this variable between 0 and 10
    # In this example, `value` is a static variable whose state is preserved:
    # it merely acts as a global variable, whose scope is limited to this function.
    # Global variables should be avoided, and storing the Application State like this is preferable in production code.


def demo_assets(app_state: AppState):
    """A demo showcasing the assets usage in HelloImGui and ImmApp"""
    imgui_md.render("# Demo Assets")

    imgui.text("Here are some icons from Font Awesome: ")
    imgui.same_line()
    imgui.set_cursor_pos_x(hello_imgui.em_size(40.0))
    imgui.text(
        icons_fontawesome.ICON_FA_INFO
        + " "
        + icons_fontawesome.ICON_FA_EXCLAMATION_TRIANGLE
        + " "
        + icons_fontawesome.ICON_FA_SAVE
    )

    imgui.text("Here is an image that was loaded from the assets: ")
    imgui.same_line()
    imgui.set_cursor_pos_x(hello_imgui.em_size(40.0))

    # Prefer to specify sizes using the "em" unit: see https://en.wikipedia.org/wiki/Em_(typography)
    # Below, image_size is equivalent to the size of 3 lines of text
    image_size = hello_imgui.em_to_vec2(3.0, 3.0)
    hello_imgui.image_from_asset("images/world.png", image_size)

    imgui_md.render(
        "**Read the [documentation about assets](https://pthom.github.io/imgui_bundle/quickstart.html#quickstart_about_assets)**"
    )
    show_doc("AssetsDoc")


def demo_markdown(app_state: AppState):
    """A demo about the usage of the markdown renderer"""
    markdown_demo = """
        # Demo markdown usage

        Let's ask GPT4 to give us some fun programming fortunes in markdown format:

        1. **Bug Hunt**: In the world of software, the best debugger was, is, and will always be a _good night's sleep_.

        2. **Pythonic Wisdom**:
            > They say if you can't explain something simply, you don't understand it well enough. Well, here's my Python code for simplicity:
            ```python
            def explain(thing):
                return "It's just a " + thing + ". Nothing fancy!"
            ```
    """
    imgui_md.render_unindented(markdown_demo)

    # Interactive demo
    imgui.separator()
    imgui_md.render("*Try it yourself*")
    imgui.same_line(hello_imgui.em_size(30.0))
    if imgui.small_button("Edit the fortune markdown"):
        app_state.markdown_input = immapp.code_utils.unindent_markdown(markdown_demo)
    _, app_state.markdown_input = imgui.input_text_multiline(
        "##Markdown Input", app_state.markdown_input, hello_imgui.em_to_vec2(40.0, 5.0)
    )
    imgui_md.render_unindented(app_state.markdown_input)
    imgui.separator()

    show_doc("MarkdownDoc")


def demo_plot(app_state: AppState):
    """A demo showcasing the usage of ImPlot"""
    imgui_md.render("# Demo ImPlot")

    data_labels = ["Frogs", "Hogs", "Dogs", "Logs"]

    imgui.text("Edit Pie Chart values")
    imgui.set_next_item_width(250)
    _, app_state.plot_data = imgui.drag_float4(
        "Pie Data", app_state.plot_data, 0.01, 0, 1
    )

    # Prefer to specify sizes using the "em" unit: see https://en.wikipedia.org/wiki/Em_(typography)
    # Below, plot_size is equivalent to the size of 15 lines of text
    plot_size = hello_imgui.em_to_vec2(15.0, 15.0)

    if implot.begin_plot("Pie Chart", plot_size):
        implot.setup_axes(
            "",
            "",
            implot.AxisFlags_.no_decorations.value,
            implot.AxisFlags_.no_decorations.value,
        )
        implot.plot_pie_chart(
            data_labels, np.array(app_state.plot_data), 0.5, 0.5, 0.35, "%.2f", 90
        )
        implot.end_plot()

    show_doc("PlotDoc")


def main():
    # This call is specific to the ImGui Bundle interactive manual. In a standard application, you could write:
    #         hello_imgui.set_assets_folder("my_assets")  # (By default, HelloImGui will search inside "assets")
    demo_utils.set_hello_imgui_demo_assets_folder()

    app_state = AppState()  # Initialize our global appState

    # This is our GUI function:
    # it will display the widgets, and it can modify the app_state
    def gui():
        demo_assets(app_state)
        imgui.new_line()
        demo_markdown(app_state)
        imgui.new_line()
        demo_plot(app_state)

    # Then, we start our application:
    #     First, we set some RunnerParams, with simple settings
    runner_params = hello_imgui.SimpleRunnerParams()
    runner_params.window_size = (1000, 1000)
    runner_params.gui_function = gui
    #     We need to activate two addons: ImPlot and Markdown
    addons = immapp.AddOnsParams()
    addons.with_implot = True
    addons.with_markdown = True
    #     And we are ready to go!
    immapp.run(runner_params, addons)


# ///////////////////////////////////////////////////////////////////////////////
# // End of demo code
# ///////////////////////////////////////////////////////////////////////////////


# //
# // Note: the code below only displays the help messages
# //


def get_doc(which_doc: str) -> str:
    """Return the associated documentation string based on the key."""

    docs: Dict[str, str] = {
        "AssetsDoc": """
            The icons and image were shown via this code:

            C++
            ```cpp
            ImGui::Text(ICON_FA_INFO " " ICON_FA_EXCLAMATION_TRIANGLE " " ICON_FA_SAVE);
            ImVec2 imageSize = HelloImGui::EmToVec2(3.f, 3.f);
            HelloImGui::ImageFromAsset("images/world.png", imageSize);
            ```

            Python
            ```python
            imgui.text(icons_fontawesome.ICON_FA_INFO + " " + icons_fontawesome.ICON_FA_EXCLAMATION_TRIANGLE + " " + icons_fontawesome.ICON_FA_SAVE)
            image_size = hello_imgui.em_to_vec2(3.0, 3.0)
            hello_imgui.image_from_asset("images/world.png", image_size)
            ```

            *Note: In this code, imageSize is equivalent to the size of 3 lines of text, using the [em unit](https://en.wikipedia.org/wiki/Em_(typography))*
        """,
        "MarkdownDoc": """
            This markdown string was rendered by calling either:

            C++
            ```cpp
            ImGuiMd::Render(markdown_string);            // render a markdown string
            ImGuiMd::RenderUnindented(markdown_string);  // remove top-most indentation before rendering
            ```

            Python
            ```python
            imgui_md.render(markdown_string);            # render a markdown string
            imgui_md.render_unindented(markdown_string); # remove top-most indentation before rendering
            ```

            This markdown renderer is based on [imgui_md](https://github.com/mekhontsev/imgui_md), by Dmitry Mekhontsev.
            It supports the most common markdown features: emphasis, link, code blocks, etc.
        """,
        "PlotDoc": """
            By using ImPlot, you can display lots of different plots. See [online demo](https://traineq.org/implot_demo/src/implot_demo.html) which demonstrates lots of plot types (LinePlot, ScatterPlot, Histogram, Error Bars, Heatmaps, etc.)

            Note: in order to use ImPlot, you need to "activate" this add-on, like this:

            C++
            ```cpp
            ImmApp::AddOnsParams addons { .withImplot = true };
            ImmApp::Run(runnerParams, addons);
            ```

            Python:
            ```python
            addons = immapp.AddOnsParams(with_implot=True)
            immapp.run(runner_params, addons);
            ```
        """,
    }

    return docs[which_doc]


@immapp.static(is_doc_visible={})  # type: ignore # (ignore redef)
def show_doc(which_doc):  # noqa: F811
    # Access the 'static' variable
    is_doc_visible = show_doc.is_doc_visible

    # Check if the doc visibility entry exists, if not, add it
    if which_doc not in is_doc_visible:
        is_doc_visible[which_doc] = False

    imgui.push_id(which_doc)
    _, is_doc_visible[which_doc] = imgui.checkbox(
        "More info", is_doc_visible[which_doc]
    )

    if is_doc_visible[which_doc]:
        # The following are assumed to be valid calls within the context of your specific ImGui wrapper.
        # 'imgui_md' and 'get_doc' should correspond to your actual usage and imports.
        imgui_md.render_unindented(get_doc(which_doc))
        imgui.dummy(
            hello_imgui.em_to_vec2(1.0, 6.0)
        )  # Assumes 'hello_imgui' is available in your environment
        imgui.separator()

    imgui.pop_id()


if __name__ == "__main__":
main()The assets folder is deployed automatically during the build; so that they are available automatically whatever the platform.
The app icon is defined by the file icon.png in the assets/app_settings folder. It should be square and at least 256x256 (but 512x512 is preferred).
icon.png will define the application icon as well as the window icon. It will be converted to the right format for each platform by CMake (via imgui_bundle_add_app).
See this demo for an example showing how to package a python application.
macOS and iOS
The app settings are defined by the file Info.plist in the assets/app_settings/apple folder.
You can copy and edit this example by adding your own settings (replace ${HELLO_IMGUI_BUNDLE_XXX} by your own values).
You can also specify different settings for macOS and iOS via Info.macos.plist and Info.ios.plist
Dear ImGui is an implementation of the Immediate Gui paradigm.
Dear ImGui comes with a complete demo. It demonstrates all the widgets, together with an example code on how to use them.
|
Tip
|
To run this demo in your browser, launch
ImGui Manual. For each widget, you will see the corresponding demo code (in C++. Read the part "C++ / Python porting advices" to see how easy it is to translate Gui code from C++ to python. |
Dear ImGui’s C++ API is thoroughly documented in its header files:
The python API closely mirrors the C++ API, and its documentation is extremely easy to access from your IDE, via thoroughly documented stub (*.pyi) files.
An example is often worth a thousand words, the following code:
C++
// Display a text
ImGui::Text("Counter = %i", app_state.counter);
ImGui::SameLine(); // by default ImGui starts a new line at each widget

// The following line displays a button
if (ImGui::Button("increment counter"))
    // And returns true if it was clicked: you can *immediately* handle the click
    app_state.counter += 1;

// Input a text: in C++, InputText returns a bool and modifies the text directly
bool changed = ImGui::InputText("Your name?", &app_state.name);
ImGui::Text("Hello %s!", app_state.name.c_str());
Python
# Display a text
imgui.text(f"Counter = {app_state.counter}")
imgui.same_line()  # by default ImGui starts a new line at each widget

# The following line displays a button
if imgui.button("increment counter"):
    # And returns true if it was clicked: you can *immediately* handle the click
    app_state.counter += 1

# Input a text: in python, input_text returns a tuple(modified, new_value)
changed, app_state.name = imgui.input_text("Your name?", app_state.name)
imgui.text(f"Hello {app_state.name}!")
Displays this:
Dear ImGui Bundle includes Hello ImGui, which is itself based on ImGui. "Hello ImGui" can be compared to a starter pack that enables to easily write cross-platform Gui apps for Windows, macOS, Linux, iOS, and emscripten.
See the "Hello ImGui" API doc and Application parameter doc.
Multiplatform utilities
-
Truly multiplatform: Linux, Windows, macOS, iOS, Android, emscripten (with 4 lines of CMake code)
-
Easily embed assets on all platforms (no code required)
-
Customize app settings (icon and app name for mobile platforms, etc.- no code required)
-
Customize application icon on all platforms (including mobile and macOS - no code required)
Dear ImGui Tweaks
-
Power Save mode: reduce FPS when idling
-
High DPI support: scale UI according to DPI, whatever the platform
-
Advanced layout handling: dockable windows, multiple layouts
-
Window geometry utilities: autosize application window, restore app window position
-
Theme tweaking: extensive list of additional themes
-
Support for movable and resizable borderless windows
-
Advanced font support: icons, emojis and colored fonts
-
Integration with ImGui Test Engine: automate and test your apps
-
Save user settings: window position, layout, opened windows, theme, user defined custom settings
-
Easily add a custom 3D background to your app
Backends
-
Available platform backends: SDL2, Glfw3
-
Available rendering backends: OpenGL3, Metal, Vulkan, DirectX
|
Note
|
The usage of Hello ImGui is optional. You can also build an imgui application from scratch, in C++ or in python (see python example)
|
|
Tip
|
HelloImGui is fully configurable by POD (plain old data) structures. See their description |
See the demo named "demo_docking", which demonstrates:
-
How to handle complex layouts: you can define several layouts and switch between them: each layout which will remember the user modifications and the list of opened windows
-
How to use theming
-
How to store you own user settings in the app ini file
-
How to add a status bar and a log window
-
How to reduce the FPS when idling (to reduce CPU usage)
Links:
-
see demo_docking.py
-
see demo_docking.cpp
-
see a short video explanation about layouts on YouTube
ImGui Bundle includes a library named ImmApp (which stands for Immediate App). ImmApp is a thin extension of HelloImGui that enables to easily initialize the ImGuiBundle addons that require additional setup at startup
Click to see an example application with addons
Some libraries included by ImGui Bundle require an initialization at startup. ImmApp makes this easy via AddOnParams.
The example program below demonstrates how to run an application which will use implot (which requires a context to be created at startup), and imgui_md (which requires additional fonts to be loaded at startup).
C++
#ifdef IMGUI_BUNDLE_WITH_IMPLOT
#include "immapp/immapp.h"
#include "imgui_md_wrapper/imgui_md_wrapper.h"
#include "implot/implot.h"
#include "demo_utils/api_demos.h"
#include <vector>
#include <cmath>


int main(int, char**)
{
    // This call is specific to the ImGui Bundle interactive manual. In a standard application, you could write:
    //         HelloImGui::SetAssetsFolder("my_assets"); // (By default, HelloImGui will search inside "assets")
    ChdirBesideAssetsFolder();

    constexpr double pi = 3.1415926535897932384626433;
    std::vector<double> x, y1, y2;
    for (double _x = 0; _x < 4 * pi; _x += 0.01)
    {
        x.push_back(_x);
        y1.push_back(std::cos(_x));
        y2.push_back(std::sin(_x));
    }

    auto gui = [x,y1,y2]()
    {
        ImGuiMd::Render("# This is the plot of _cosinus_ and *sinus*");  // Markdown
        if (ImPlot::BeginPlot("Plot"))
        {
            ImPlot::PlotLine("y1", x.data(), y1.data(), x.size());
            ImPlot::PlotLine("y2", x.data(), y2.data(), x.size());
            ImPlot::EndPlot();
        }
    };

    HelloImGui::SimpleRunnerParams runnerParams { .guiFunction = gui, .windowSize = {600, 400} };
    ImmApp::AddOnsParams addons { .withImplot = true, .withMarkdown = true };
    ImmApp::Run(runnerParams, addons);

    return 0;
}
#else // #ifdef IMGUI_BUNDLE_WITH_IMPLOT
#include <cstdio>
int main(int, char**) { std::printf("This demo requires ImPlot.\n"); }
#endif
Python:
import numpy as np
from imgui_bundle import implot, imgui_md, immapp
from imgui_bundle.demos_python import demo_utils


def main():
    # This call is specific to the ImGui Bundle interactive manual. In a standard application, you could write:
    #         hello_imgui.set_assets_folder("my_assets"); # (By default, HelloImGui will search inside "assets")
    demo_utils.set_hello_imgui_demo_assets_folder()

    x = np.arange(0, np.pi * 4, 0.01)
    y1 = np.cos(x)
    y2 = np.sin(x)

    def gui():
        imgui_md.render("# This is the plot of _cosinus_ and *sinus*")  # Markdown
        if implot.begin_plot("Plot"):
            implot.plot_line("y1", x, y1)
            implot.plot_line("y2", x, y2)
            implot.end_plot()

    immapp.run(gui, with_implot=True, with_markdown=True, window_size=(600, 400))


if __name__ == "__main__":
main()By default, the settings are stored in a ini file whose named is derived from the window title (i.e. runnerParams.appWindowParams.windowTitle). This is convenient when developing, but not so much when deploying the app.
You can finely define where they are stored by filling runnerParams.iniFolderType and runnerParams.iniFilename.
runnerParams.iniFolderType
Choose between: CurrentFolder,AppUserConfigFolder, AppExecutableFolder,HomeFolder, TempFolder and DocumentsFolder.
|
Note
|
Note: AppUserConfigFolder corresponds to …\[Username]\AppData\Roaming under Windows, ~/.config under Linux, ~/Library/Application Support under macOS or iOS
|
runnerParams.iniFilename
This will be the name of the ini file in which the settings will be stored. It can include a subfolder, in which case it will be created under the folder defined by runnerParams.iniFolderType.
Note: if left empty, the name of the ini file will be derived from appWindowParams.windowTitle.
Examples
Click to expand the examples
C++ example (extract from demo_docking.cpp)
    // By default, HelloImGui will save the settings in the current folder.
    // This is convenient when developing, but not so much when deploying the app.
    // You can tell HelloImGui to save the settings in a specific folder: choose between
    //         CurrentFolder
    //         AppUserConfigFolder
    //         AppExecutableFolder
    //         HomeFolder
    //         TempFolder
    //         DocumentsFolder
    //
    // Note: AppUserConfigFolder is:
    //         AppData under Windows (Example: C:\Users\[Username]\AppData\Roaming)
    //         ~/.config under Linux
    //         "~/Library/Application Support" under macOS or iOS
    runnerParams.iniFolderType = HelloImGui::IniFolderType::AppUserConfigFolder;

    // runnerParams.iniFilename: this will be the name of the ini file in which the settings
    // will be stored.
    // In this example, the subdirectory Docking_Demo will be created under the folder defined
    // by runnerParams.iniFolderType.
    //
    // Note: if iniFilename is left empty, the name of the ini file will be derived
    // from appWindowParams.windowTitle
    runnerParams.iniFilename = "Docking_Demo/Docking_demo.ini";
Python example (extract from demo_docking.py)
    # By default, HelloImGui will save the settings in the current folder.
    # This is convenient when developing, but not so much when deploying the app.
    # You can tell HelloImGui to save the settings in a specific folder: choose between
    #         current_folder
    #         app_user_config_folder
    #         app_executable_folder
    #         home_folder
    #         temp_folder
    #         documents_folder
    #
    # Note: app_user_config_folder is:
    #         AppData under Windows (Example: C:\Users\[Username]\AppData\Roaming)
    #         ~/.config under Linux
    #         "~/Library/Application Support" under macOS or iOS
    runner_params.ini_folder_type = hello_imgui.IniFolderType.app_user_config_folder

    # runnerParams.ini_filename: this will be the name of the ini file in which the settings
    # will be stored.
    # In this example, the subdirectory Docking_Demo will be created under the folder defined
    # by runnerParams.ini_folder_type.
    #
    # Note: if ini_filename is left empty, the name of the ini file will be derived
    # from app_window_params.window_title
runner_params.ini_filename = "Docking_Demo/Docking_demo.ini"The settings file contains, standard ImGui settings (window position, size, etc.), as well as additional settings defined by HelloImGui:
-
Application status: app window location, opened windows, status bar settings, etc. See members named
remember_xxxin the Hello Imgui API for a complete list. -
Settings for each application layout (see video for an example)
You may store additional user settings in the application settings. This is provided as a convenience only, and it is not intended to store large quantities of text data. See related doc for more details.
HelloImGui and ImmApp use glfw as a default backend.
If you wish to use a different backend, it is possible to use sdl2 or pyglet, via pure python backends.
The python backends folder contains a set of python backends, that can be used as a replacement for the default glfw backend. This way you will have complete control on your application (they are inspired from pyimgui backends).
|
Note
|
In this case, you will not benefit from HelloImGui and ImmApp rapid development features (HighDPI support, layout management, automatic idling, etc…). |
See documentation in the python backends folder.
Example with a pure python sdl2 backend (click to expand)
# An example of using Dear ImGui with SDL using a *full python* backend.
# This mode is inspired from [pyimgui](https://github.com/pyimgui/pyimgui) backends, and is still experimental.
#
# See full python backends implementations here:
# https://github.com/pthom/imgui_bundle/tree/main/bindings/imgui_bundle/python_backends

# You will need to install sdl2:
#    pip install pysdl2 pysdl2-dll

from imgui_bundle import imgui
from imgui_bundle.python_backends.sdl_backend import SDL2Renderer
import OpenGL.GL as gl  # type: ignore
from sdl2 import *  # type: ignore
import ctypes
import sys


class AppState:
    text: str = """Hello, World\nLorem ipsum, etc.\netc."""
    text2: str = "Ahh"


app_state = AppState()


def main():
    window, gl_context = impl_pysdl2_init()
    imgui.create_context()
    impl = SDL2Renderer(window)

    show_custom_window = True

    running = True
    event = SDL_Event()
    while running:
        while SDL_PollEvent(ctypes.byref(event)) != 0:
            if event.type == SDL_QUIT:
                running = False
                break
            impl.process_event(event)
        impl.process_inputs()

        imgui.new_frame()

        if imgui.begin_main_menu_bar():
            if imgui.begin_menu("File", True):

                clicked_quit, selected_quit = imgui.menu_item(
                    "Quit", "Cmd+Q", False, True
                )

                if clicked_quit:
                    sys.exit(0)

                imgui.end_menu()
            imgui.end_main_menu_bar()

        if show_custom_window:
            imgui.set_next_window_size((400, 400))
            is_expand, show_custom_window = imgui.begin("Custom window", True)
            if is_expand:
                imgui.text("Example Text")
                if imgui.button("Hello"):
                    print("World")
                _, app_state.text = imgui.input_text_multiline(
                    "Edit", app_state.text, imgui.ImVec2(200, 200)
                )
                _, app_state.text2 = imgui.input_text("Text2", app_state.text2)

                io = imgui.get_io()
                imgui.text(f"""
                Keyboard modifiers:
                    {io.key_ctrl=}
                    {io.key_alt=}
                    {io.key_shift=}
                    {io.key_super=}""")
            imgui.end()

        gl.glClearColor(1.0, 1.0, 1.0, 1)
        gl.glClear(gl.GL_COLOR_BUFFER_BIT)

        imgui.render()
        impl.render(imgui.get_draw_data())
        SDL_GL_SwapWindow(window)

    impl.shutdown()
    SDL_GL_DeleteContext(gl_context)
    SDL_DestroyWindow(window)
    SDL_Quit()


def impl_pysdl2_init():
    width, height = 1280, 720
    window_name = "minimal ImGui/SDL2 example"

    if SDL_Init(SDL_INIT_EVERYTHING) < 0:
        print(
            "Error: SDL could not initialize! SDL Error: "
            + SDL_GetError().decode("utf-8")
        )
        sys.exit(1)

    SDL_GL_SetAttribute(SDL_GL_DOUBLEBUFFER, 1)
    SDL_GL_SetAttribute(SDL_GL_DEPTH_SIZE, 24)
    SDL_GL_SetAttribute(SDL_GL_STENCIL_SIZE, 8)
    SDL_GL_SetAttribute(SDL_GL_ACCELERATED_VISUAL, 1)
    SDL_GL_SetAttribute(SDL_GL_MULTISAMPLEBUFFERS, 1)
    SDL_GL_SetAttribute(SDL_GL_MULTISAMPLESAMPLES, 8)
    SDL_GL_SetAttribute(SDL_GL_CONTEXT_FLAGS, SDL_GL_CONTEXT_FORWARD_COMPATIBLE_FLAG)
    SDL_GL_SetAttribute(SDL_GL_CONTEXT_MAJOR_VERSION, 4)
    SDL_GL_SetAttribute(SDL_GL_CONTEXT_MINOR_VERSION, 1)
    SDL_GL_SetAttribute(SDL_GL_CONTEXT_PROFILE_MASK, SDL_GL_CONTEXT_PROFILE_CORE)

    SDL_SetHint(SDL_HINT_MAC_CTRL_CLICK_EMULATE_RIGHT_CLICK, b"1")
    SDL_SetHint(SDL_HINT_VIDEO_HIGHDPI_DISABLED, b"1")

    window = SDL_CreateWindow(
        window_name.encode("utf-8"),
        SDL_WINDOWPOS_CENTERED,
        SDL_WINDOWPOS_CENTERED,
        width,
        height,
        SDL_WINDOW_OPENGL | SDL_WINDOW_RESIZABLE,
    )

    if window is None:
        print(
            "Error: Window could not be created! SDL Error: "
            + SDL_GetError().decode("utf-8")
        )
        sys.exit(1)

    gl_context = SDL_GL_CreateContext(window)
    if gl_context is None:
        print(
            "Error: Cannot create OpenGL Context! SDL Error: "
            + SDL_GetError().decode("utf-8")
        )
        sys.exit(1)

    SDL_GL_MakeCurrent(window, gl_context)
    if SDL_GL_SetSwapInterval(1) < 0:
        print(
            "Warning: Unable to set VSync! SDL Error: " + SDL_GetError().decode("utf-8")
        )
        sys.exit(1)

    return window, gl_context


if __name__ == "__main__":
    main()
Example with a pure python glfw backend (click to expand)
# An example of using Dear ImGui with Glfw using a *full python* backend.
# This mode is inspired from [pyimgui](https://github.com/pyimgui/pyimgui) backends, and is still experimental.
#
# These examples also demonstrate how to use the markdown rendering feature of ImGui Bundle.
#
# See full python backends implementations here:
# https://github.com/pthom/imgui_bundle/tree/main/bindings/imgui_bundle/python_backends

from imgui_bundle.python_backends.glfw_backend import GlfwRenderer
import OpenGL.GL as gl  # type: ignore
# When using a pure python backend, prefer to import glfw before imgui_bundle (so that you end up using the standard glfw, not the one provided by imgui_bundle)
import glfw  # type: ignore
from imgui_bundle import imgui, imgui_ctx
from imgui_bundle import imgui_md
import sys


class AppState:
    text: str = """Hello, World\nLorem ipsum, etc.\netc."""


app_state = AppState()


def init_fonts_and_markdown():
    # Note:
    # The way font are loaded in this example is a bit tricky.
    # We are not using imgui.backends.opengl3_XXX anywhere else, because the rendering is done via Python.
    #
    # Howver, we will here need to:
    #     - call imgui.backends.opengl3_init(glsl_version) at startup
    #     - call imgui.backends.opengl3_new_frame() after loading the fonts, because this is how ImGui
    #       will load the fonts into a texture (using imgui.get_io().fonts.build() is not enough)

    # We need to initialize the OpenGL backend (so that we can later call opengl3_new_frame)
    imgui.backends.opengl3_init("#version 100")

    imgui.get_io().fonts.clear()
    # uncomment to keep using the default hardcoded font, or load your default font here
    # imgui.get_io().fonts.add_font_default()

    # Load markdown fonts
    imgui_md.initialize_markdown()
    font_loader = imgui_md.get_font_loader_function()
    font_loader()

    # We need to call this function to load the fonts into a texture
    imgui.backends.opengl3_new_frame()


def main():
    imgui.create_context()
    window = impl_glfw_init()
    impl = GlfwRenderer(window)
    init_fonts_and_markdown()

    show_custom_window = True
    while not glfw.window_should_close(window):
        glfw.poll_events()
        impl.process_inputs()
        imgui.new_frame()

        if imgui.begin_main_menu_bar():
            if imgui.begin_menu("File", True):

                clicked_quit, selected_quit = imgui.menu_item(
                    "Quit", "Cmd+Q", False, True
                )

                if clicked_quit:
                    sys.exit(0)

                imgui.end_menu()
            imgui.end_main_menu_bar()

        if show_custom_window:
            imgui.set_next_window_size((400, 400))

            is_expand, show_custom_window = imgui.begin("Custom window", True)
            if is_expand:
                imgui_md.render_unindented("""
                # Hello, World
                Here is some *markdown* text.
                """)

                imgui.text("Example Text")
                if imgui.button("Hello"):
                    print("World")
                _, app_state.text = imgui.input_text_multiline(
                    "Edit", app_state.text, imgui.ImVec2(200, 200)
                )
                io = imgui.get_io()
                imgui.text(f"""
                Keyboard modifiers:
                    {io.key_ctrl=}
                    {io.key_alt=}
                    {io.key_shift=}
                    {io.key_super=}""")

                if imgui.button("Open popup"):
                    imgui.open_popup("my popup")
                with imgui_ctx.begin_popup_modal("my popup") as popup:
                    if popup.visible:
                        imgui.text("Hello from popup!")
                        if imgui.button("Close popup"):
                            imgui.close_current_popup()

            imgui.end()

        gl.glClearColor(1.0, 1.0, 1.0, 1)
        gl.glClear(gl.GL_COLOR_BUFFER_BIT)

        imgui.render()
        impl.render(imgui.get_draw_data())
        glfw.swap_buffers(window)

    impl.shutdown()
    glfw.terminate()


def impl_glfw_init():
    width, height = 1280, 720
    window_name = "minimal ImGui/GLFW3 example"

    if not glfw.init():
        print("Could not initialize OpenGL context")
        sys.exit(1)

    # OS X supports only forward-compatible core profiles from 3.2
    glfw.window_hint(glfw.CONTEXT_VERSION_MAJOR, 3)
    glfw.window_hint(glfw.CONTEXT_VERSION_MINOR, 3)
    glfw.window_hint(glfw.OPENGL_PROFILE, glfw.OPENGL_CORE_PROFILE)

    glfw.window_hint(glfw.OPENGL_FORWARD_COMPAT, gl.GL_TRUE)

    # Create a windowed mode window and its OpenGL context
    window = glfw.create_window(int(width), int(height), window_name, None, None)
    glfw.make_context_current(window)

    if not window:
        glfw.terminate()
        print("Could not initialize Window")
        sys.exit(1)

    return window


if __name__ == "__main__":
main()ImmApp adds support for integration inside jupyter notebook: the application will be run in an external window, and a screenshot will be placed on the notebook after execution.
This requires a window server, and will not run on Google collab.
Below is a screenshot, that you can test by running jupyter notebook inside bindings/imgui_bundle/demos_python/notebooks
In C++, you would write:
ImGui::Begin("My Window")
ImGui::Text("Hello World");
ImGui::End(); // ImGui::End() should be called even if ImGui::Begin() returns false
In Python, the module imgui_ctx provides a lot of context managers that automatically call imgui.end(), imgui.end_child(), etc., when the context is exited, so that you can write:
from imgui_bundle import imgui, imgui_ctx

with imgui_ctx.begin("My Window"): # imgui.end() called automatically
    imgui.text("Hello World")
Of course, you can choose to use the standard API by using the module imgui:
imgui.begin("My Window")
imgui.text("Hello World")
imgui.end()imgui_fig.py is a small utility to display Matplotlib plots in ImGui.
See demo_matplotlib.py for an example.
python_backends contains pure python backends for glfw, pyglet and sdl2. They do not offer the same DPI handling as HelloImGui, but they are a good starting point if you want to use alternative backends.
See examples for more information.
ImGui is a C++ library that was ported to Python. In order to work with it, you will often refer to its manual, which shows example code in C++.
In order to translate from C++ to Python:
-
Change the function names and parameters' names from
CamelCasetosnake_case -
Change the way the output are handled.
-
in C++
ImGui::RadioButtonmodifies its second parameter (which is passed by address) and returns true if the user clicked the radio button. -
In python, the (possibly modified) value is transmitted via the return:
imgui.radio_buttonreturns aTuple[bool, str]which contains(user_clicked, new_value).
-
-
if porting some code that uses static variables, use the
@immapp.staticdecorator. In this case, this decorator simply adds a variablevalueat the function scope. It is preserved between calls. Normally, this variable should be accessed viademo_radio_button.value, however the first line of the function adds a synonym named static for more clarity. Do not overuse them! Static variable suffer from almost the same shortcomings as global variables, so you should prefer to modify an application state.
Example
C++
void DemoRadioButton()
{
    static int value = 0;
    ImGui::RadioButton("radio a", &value, 0); ImGui::SameLine();
    ImGui::RadioButton("radio b", &value, 1); ImGui::SameLine();
    ImGui::RadioButton("radio c", &value, 2);
}
Python
@immapp.static(value=0)
def demo_radio_button():
    static = demo_radio_button
    clicked, static.value = imgui.radio_button("radio a", static.value, 0)
    imgui.same_line()
    clicked, static.value = imgui.radio_button("radio b", static.value, 1)
    imgui.same_line()
clicked, static.value = imgui.radio_button("radio c", static.value, 2)In the example below, two differences are important:
imgui.input_text (Python) is equivalent to ImGui::InputText (C++)
-
In C++, it uses two parameters for the text: the text pointer, and its length.
-
In Python, you can simply pass a string, and get back its modified value in the returned tuple.
-
ImGuiInputTextFlags_(C++) corresponds toimgui.InputTextFlags_(python) and it is an enum (note the trailing underscore). -
ImGuiInputTextFlags(C++) corresponds toimgui.InputTextFlags(python) and it is an int (note: no trailing underscore)
You will find many similar enums.
The dichotomy between int and enums, enables you to write flags that are a combinations of values from the enum (see example below).
Example
C++
void DemoInputTextUpperCase()
{
    static char text[64] = "";
    ImGuiInputTextFlags flags = (
        ImGuiInputTextFlags_CharsUppercase
        | ImGuiInputTextFlags_CharsNoBlank
    );
    /*bool changed = */ ImGui::InputText("Upper case, no spaces", text, 64, flags);
}
Python
@immapp.static(text="")
def demo_input_text_decimal() -> None:
    static = demo_input_text_decimal
    flags:imgui.InputTextFlags = (
            imgui.InputTextFlags_.chars_uppercase.value
          | imgui.InputTextFlags_.chars_no_blank.value
        )
changed, static.text = imgui.input_text("Upper case, no spaces", static.text, flags)When using the glfw backend, you can set advanced callbacks on all glfw events.
Below is an example that triggers a callback whenever the window size is changed:
from imgui_bundle import glfw_utils, hello_imgui, imgui
# import glfw   # if you import glfw, do it _after_ imgui_bundle


# define a callback
def my_window_size_callback(window: glfw._GLFWwindow, w: int, h: int):
    print(f"Window size changed to {w}x{h}")


def install_glfw_callbacks():
    # Get the glfw window used by hello imgui
    glfw_win = glfw_utils.glfw_window_hello_imgui()
    glfw_utils.glfw.set_window_size_callback(glfw_win, my_window_size_callback)


# Install the callback once everything is initialized, for example:
runner_params = hello_imgui.RunnerParams()
# ...
runner_params.callbacks.post_init = install_glfw_callbacks|
Caution
|
It is important to import glfw after imgui_bundle, since - upon import - imgui_bundle informs glfw that it shall use its own version of the glfw dynamic library. |
When developing C++ applications, Hello ImGui and Dear ImGui Bundle offer an excellent support for multiplatform applications.
See this tutorial video for Hello ImGui:
|
Tip
|
The principle with Dear ImGui Bundle is the same, just use the dedicated Dear ImGui Bundle project template, and use imgui_bundle_add_app
|
ImGui Bundle provides tooling to help you debug the C++ side, when you encounter a bug that is difficult to diagnose from Python.
It can be used in two steps:
-
Edit the file
pybind_native_debug/pybind_native_debug.py. Change its content so that it runs the python code you would like to debug. Make sure it works when you run it as a python script. -
Now, debug the C++ project
pybind_native_debugwhich is defined in the directorypybind_native_debug/. This will run your python code from C++, and you can debug the C++ side (place breakpoints, watch variables, etc).
Dear ImGui Bundle aims to make applications prototyping fast and easy, in a multiplatform / multi-tooling context. The intent is to reduce the time between an idea and a first GUI prototype down to almost zero.
It is well adapted for
-
developers and researchers who want to switch easily between and research and development environment by facilitating the port of research artifacts
-
beginners and developers who want to quickly develop an application without learning a GUI framework
You should prefer a more complete framework (such as Qt for example) if your intent is to build a fully fledged application, with support for internationalization, advanced styling, etc.
Also, the library makes no guarantee of ABI stability, and its API is opened to slight adaptations and breaking changes if they are found to make the overall usage better and/or safer.
Dear ImGui Bundle would not be possible without the work of the authors of "Dear ImGui", and especially Omar Cornut.
It also includes a lot of other projects, and I’d like to thank their authors for their awesome work!
A particular mention for Evan Pezent (author of ImPlot), Cédric Guillemet (author of ImGuizmo), Balázs Jákó (author of ImGuiColorTextEdit), and Michał Cichoń (author of imgui-node-editor), and Dmitry Mekhontsev (author of imgui-md), Andy Borrel (author of imgui-tex-inspect, another image debugging tool, which I discovered long after having developed immvision).
This doc was built using Asciidoc.
Immvision was inspired by The Image Debugger, by Bill Baxter.
The MIT License (MIT)
Copyright (c) 2021-2024 Pascal Thomet
Permission is hereby granted, free of charge, to any person obtaining a copy of this software and associated documentation files (the "Software"), to deal in the Software without restriction, including without limitation the rights to use, copy, modify, merge, publish, distribute, sublicense, and/or sell copies of the Software, and to permit persons to whom the Software is furnished to do so, subject to the following conditions:
The above copyright notice and this permission notice shall be included in all copies or substantial portions of the Software.
THE SOFTWARE IS PROVIDED "AS IS", WITHOUT WARRANTY OF ANY KIND, EXPRESS OR IMPLIED, INCLUDING BUT NOT LIMITED TO THE WARRANTIES OF MERCHANTABILITY, FITNESS FOR A PARTICULAR PURPOSE AND NONINFRINGEMENT. IN NO EVENT SHALL THE AUTHORS OR COPYRIGHT HOLDERS BE LIABLE FOR ANY CLAIM, DAMAGES OR OTHER LIABILITY, WHETHER IN AN ACTION OF CONTRACT, TORT OR OTHERWISE, ARISING FROM, OUT OF OR IN CONNECTION WITH THE SOFTWARE OR THE USE OR OTHER DEALINGS IN THE SOFTWARE.
pyimgui provides battle-tested comprehensive python bindings for ImGui. I worked with this project a lot, and contributed a bit to it. In the end, I had to develop a separate project, in order to be able to add auto-generated and auto-documented python modules.
Dear PyGui (repository) provides python bindings for ImGui with a lot of addons, and a more pythonesque API, which makes it perhaps more suited for Python only projects.
Dear ImGui Bundle is developed by Pascal Thomet. I am reachable on my Github page. I sometimes blog. There is a playlist related to ImGui Bundle on YouTube.
I have a past in computer vision, and a lot of experience in the trenches between development and research teams; and I found ImGui to be a nice way to reduce the delay between a research prototype and its use in production code.
I also have an inclination for self documenting code, and the doc you are reading was a way to explore new ways to document projects.
The development of the initial version of Dear ImGui Bundle took about one year at full time.
The bindings are auto-generated thanks to an advanced parser, so that they are easy to keep up to date.
Please be tolerant if you find issues! Dear ImGui Bundle is developed for free, under a very permissive license, by one main author (and most of its API comes from external libraries).
If you need consulting about this library or about the bindings generator in the context of a commercial project, please contact me by email.
Contributions are welcome!
Three of my past projects gave me the idea to develop this library.
-
ImGui Manual, an interactive manual for Dear ImGui, which I developed in June 2020
-
implot demo which I developed in 2020.
-
imgui_datascience, a python package I developed in 2018 for image analysis and debugging. Its successor is immvision.
Developments for Dear ImGui Bundle and its related automatic binding generator began in january 2022.
Dear ImGui Bundle is a free and open-source project, and its development and maintenance require considerable efforts.
If you find it valuable for your work – especially in a commercial enterprise or a research setting – please consider supporting its development by making a donation. Your contributions are greatly appreciated!
For commercial users seeking tailored support or specific enhancements, please contact the author by email.
Quality contributions are always welcome! If you’re interested in contributing to the project, whether through code, ideas, or feedback, please refer to the development documentation.
Dear ImGui Bundle is licensed under the MIT License
See FAQ
See developer docs
Click to see a detailed explanation of this repository folder structure.
./
+-- Readme.md -> bindings/imgui_bundle/Readme.md           # doc
+-- Readme_devel.md
|
+-- _example_integration/                         # Demonstrate how to easily use
|         +-- CMakeLists.txt                      # imgui_bundle in a C++ app
|         +-- assets/                             # (this is a github template available a
|         +-- hello_world.main.cpp                # https://github.com/pthom/imgui_bundle_template
|
+-- imgui_bundle_cmake/                           # imgui_bundle_add_app() :
|         |                                       # a cmake function you can use
|         +-- imgui_bundle_add_app.cmake          # to create an app in one line
|
+-- bindings/                                     # root for the python bindings
|         +-- imgui_bundle/
|                  +-- assets/                    # assets/ folder: you need to
|                  |                              # copy this folder
|                  |                              # into your app folder if you
|                  |                              # intend to use markdown
|                  |
|                  +-- demos_assets/              # assets used by demos
|                  +-- demos_cpp/                 # lots of C++ demos
|                  +-- demos_python/              # lots of python demos
|                  +-- imgui/                     # imgui stubs
|                  |     +-- __init__.pyi
|                  |     +-- backends.pyi
|                  |     +-- internal.pyi
|                  |     +-- py.typed
|                  +-- implot.pyi                           # implot stubs
|                  +-- __init__.py
|                  +-- __init__.pyi
|                  +-- hello_imgui.pyi
|                  +-- ...                                  # lots of other libs stubs
|                  +-- ...
|                  +-- ...
|                  +-- immapp/                              # immapp: immediate app
|                  |        |                               # utilities
|                  |        +-- __init__.py
|                  |        +-- __init__.pyi
|                  |        +-- icons_fontawesome.py
|                  |        +-- immapp_cpp.pyi
|                  |        +-- immapp_utils.py
|                  |        +-- py.typed
|                  +-- _imgui_bundle.cpython-38-darwin.so  # imGui_bundle python
|                  |                                       # dynamic library
|                  +-- glfw_utils.py
|                  +-- python_backends/                   # Backends implemented in pure python
|                  +-- py.typed
|
|
+-- cmake/                                                 # Private cmake utilities
|         +-- add_imgui.cmake
|         +-- ...
|
+-- external/                                              # Root of all bound libraries
|         +-- CMakeLists.txt
|         +-- imgui/                                       # ImGui root
|         |         +-- bindings/                          # ImGui bindings
|         |         +-- imgui/                             # ImGui submodule
|         +-- ImGuizmo/
|         |         +-- bindings/                          # ImGuizmo bindings
|         |         +-- ImGuizmo/                          # ImGuizmo submodule
|         |         +-- ImGuizmoPure/                      # Manual wrappers to help
|         |                                                # bindings generation
|         |
|         +-- ... lots of other bound libraries/           # Lots of other bound libraries
|         |         +-- {lib_name}/
|         |         +-- bindings/
|         |
|         +-- _doc/
|         |
|         +-- bindings_generation/                         # Script to generate bindings
|         |         |                                      # and to facilitate external
|         |         +-- __init__.py                        # libraries update
|         |         +-- all_external_libraries.py
|         |         +-- autogenerate_all.py
|         |         +-- ...
|         |
|         +-- SDL/SDL/                                     # Linked library (without
|         |                                                # python bindings)
|         +-- fplus/fplus/                                 # Library without bindings
|         +-- glfw/glfw                                    # Library without bindings
|
+-- lg_cmake_utils/                                        # Cmake utils for bindings
|         |                                                # generation
|         +-- lg_cmake_utils.cmake
|         +-- ...
|
+-- pybind_native_debug/
|         +-- CMakeLists.txt
|         +-- Readme.md
|         +-- pybind_native_debug.cpp
|         +-- pybind_native_debug.py
|
+-- src/
|         +-- imgui_bundle/                               # main cpp library: almost empty,
                                                          # but linked to all external libraries
