gStore Workbench is a web tool developed by gStore team for online management of gStore graph database and query visualization of gStore. Currently, gStore official website provides Workbench download, the download link is http://www.gstore.cn. Select [Product] - [gStore Workbench] and after filling in the relevant information, you will get a Workbench package, but you will need to install and deploy. The steps to install and deploy are described in detail below.
- Download tomcat
Workbench is a website that requires a Web server as a Web container to run, and we recommend tomcat8 as the Web server, which can be downloaded from https://tomcat.apache.org/download-80.cgi. After downloading the zip package, unzip it.
- Put the Workbench package in tomcat's webapps directory and unzip it;
- Under the bin directory of tomcat
Start tomcat:
[root@node1 bin]# ./startup.sh
Stop tomcat:
[root@node1 bin]# ./shutdown.sh
Login address is:
http://workbench`Self-deployed servers`ip:8080/gworkbench/views/user/login.html
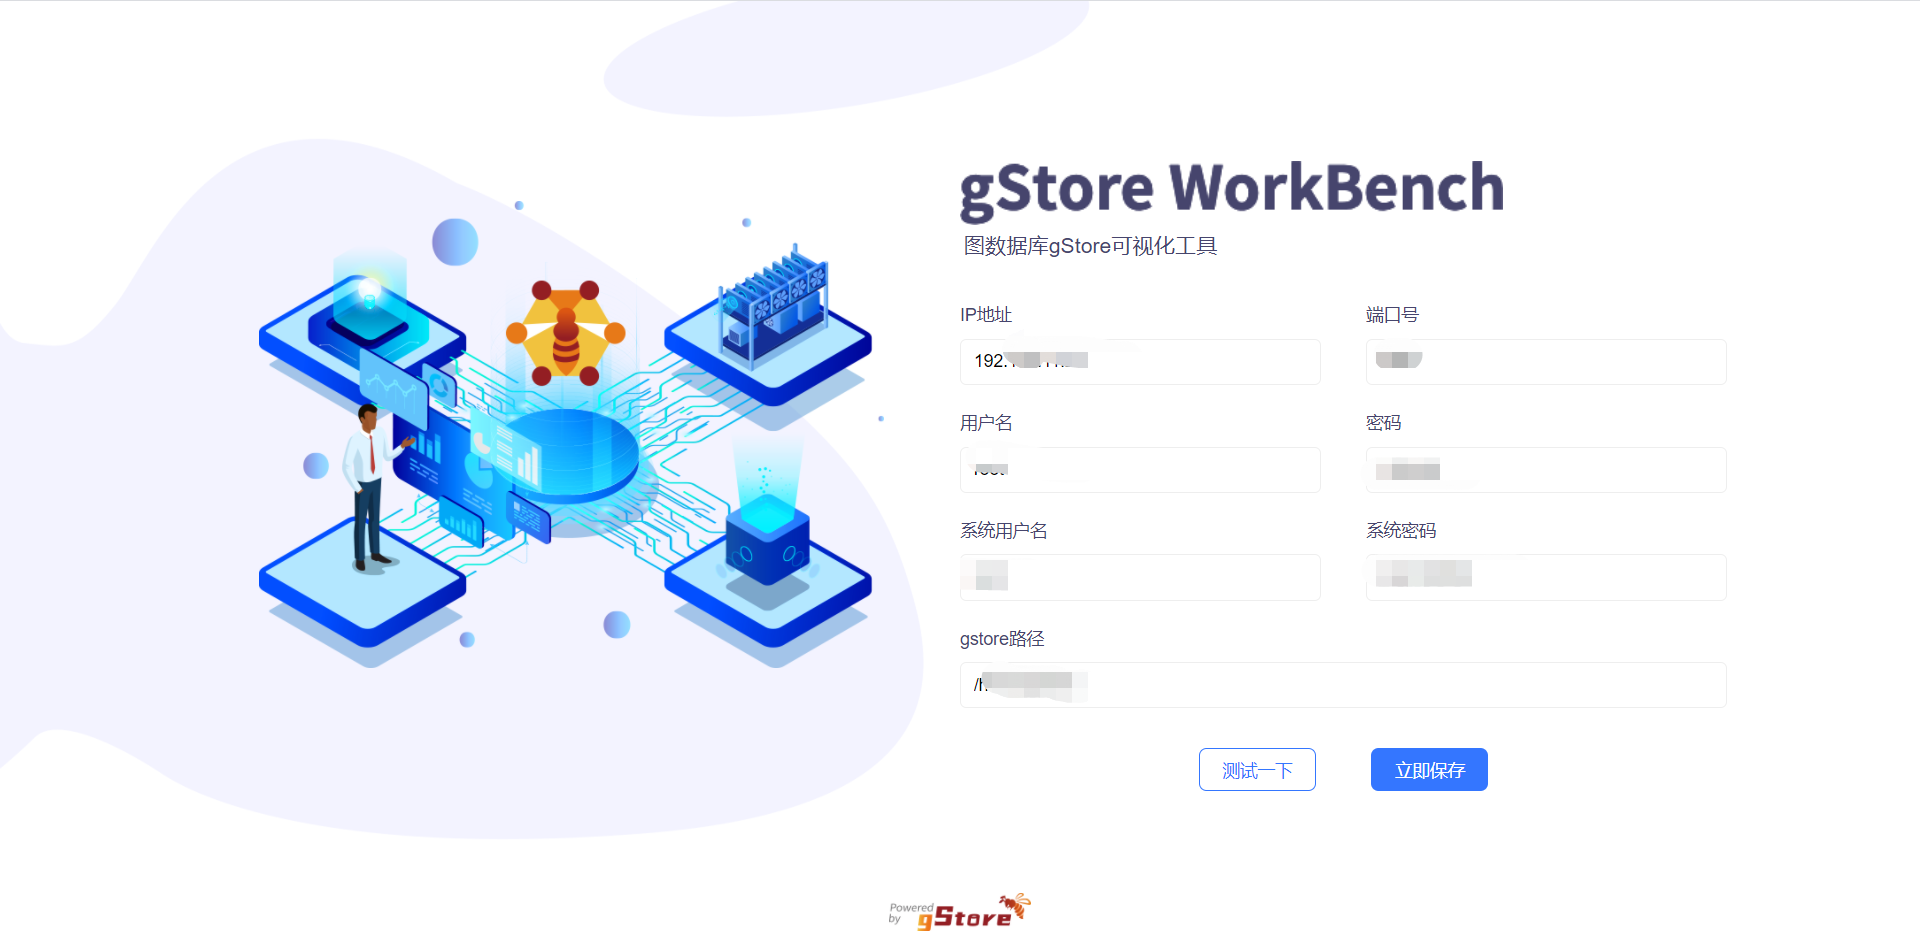
Set the IP address and port of the remote server and save the IP address and port number of the remote server to the gStore diagram database management system. Note that the remote server must install gStore and start the GHTTP service
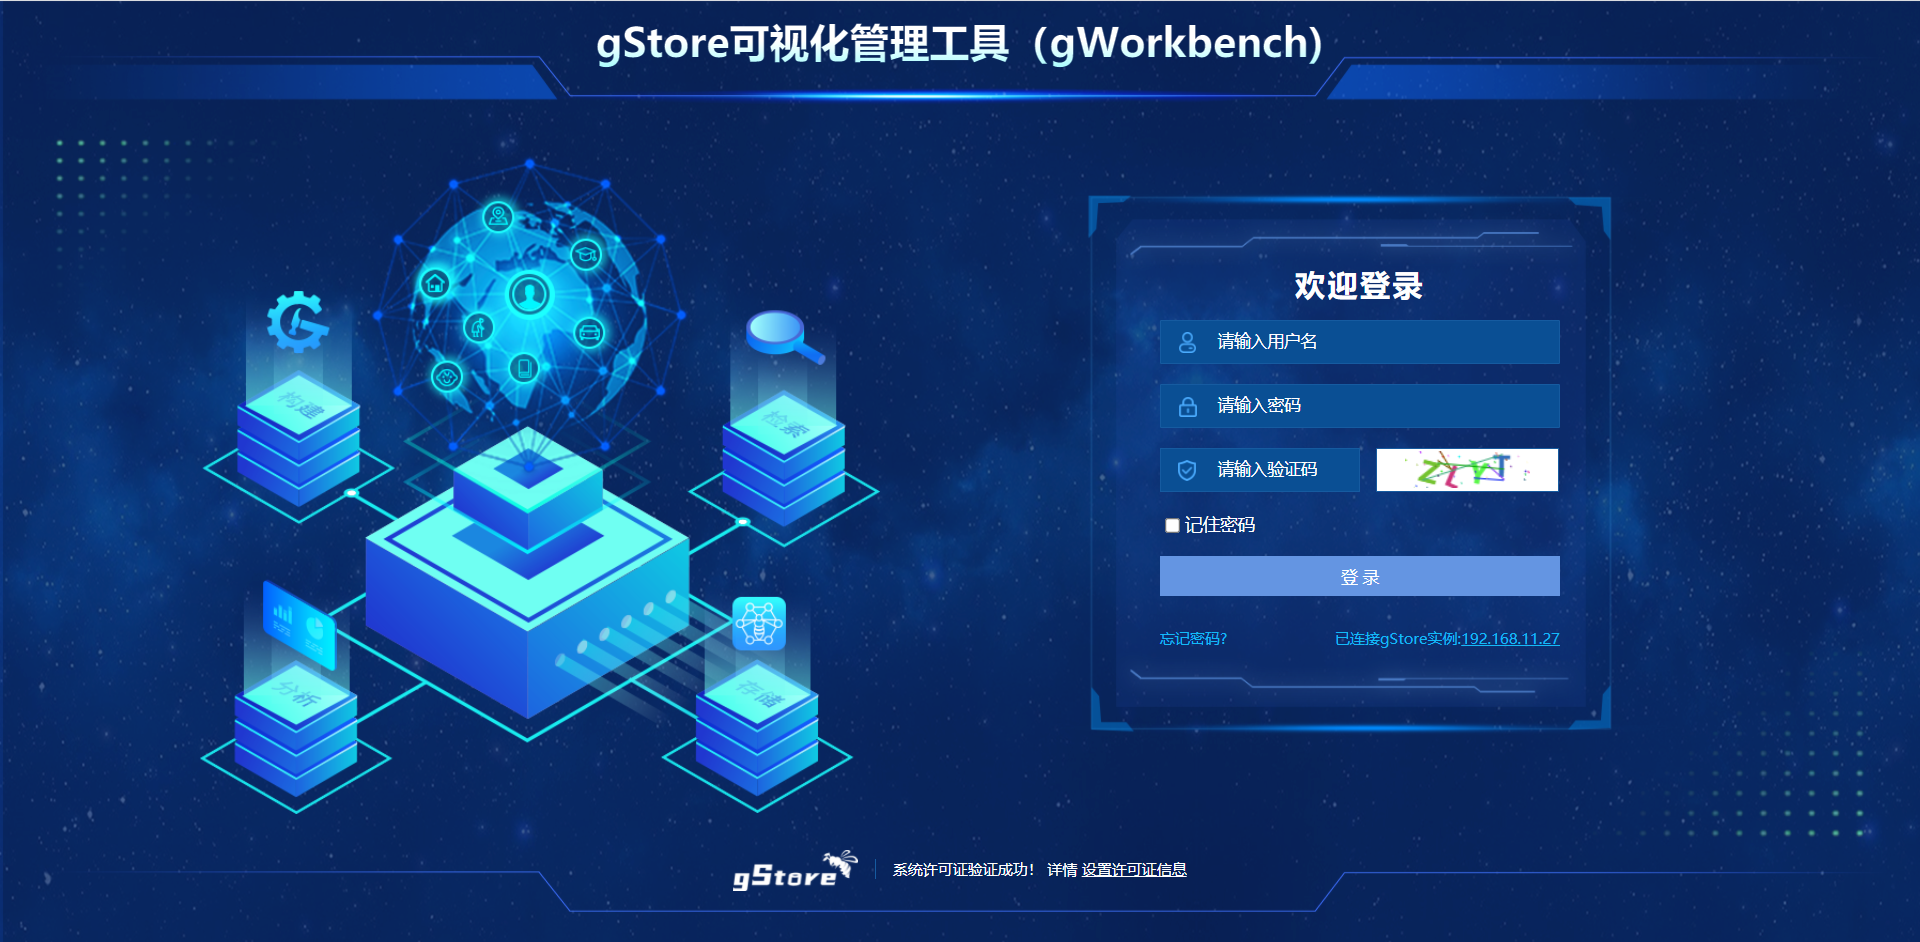
Enter the user name, password, and verification code to log in to the gStore graph database management system on the saved server (gStore default user name root, password 12345)
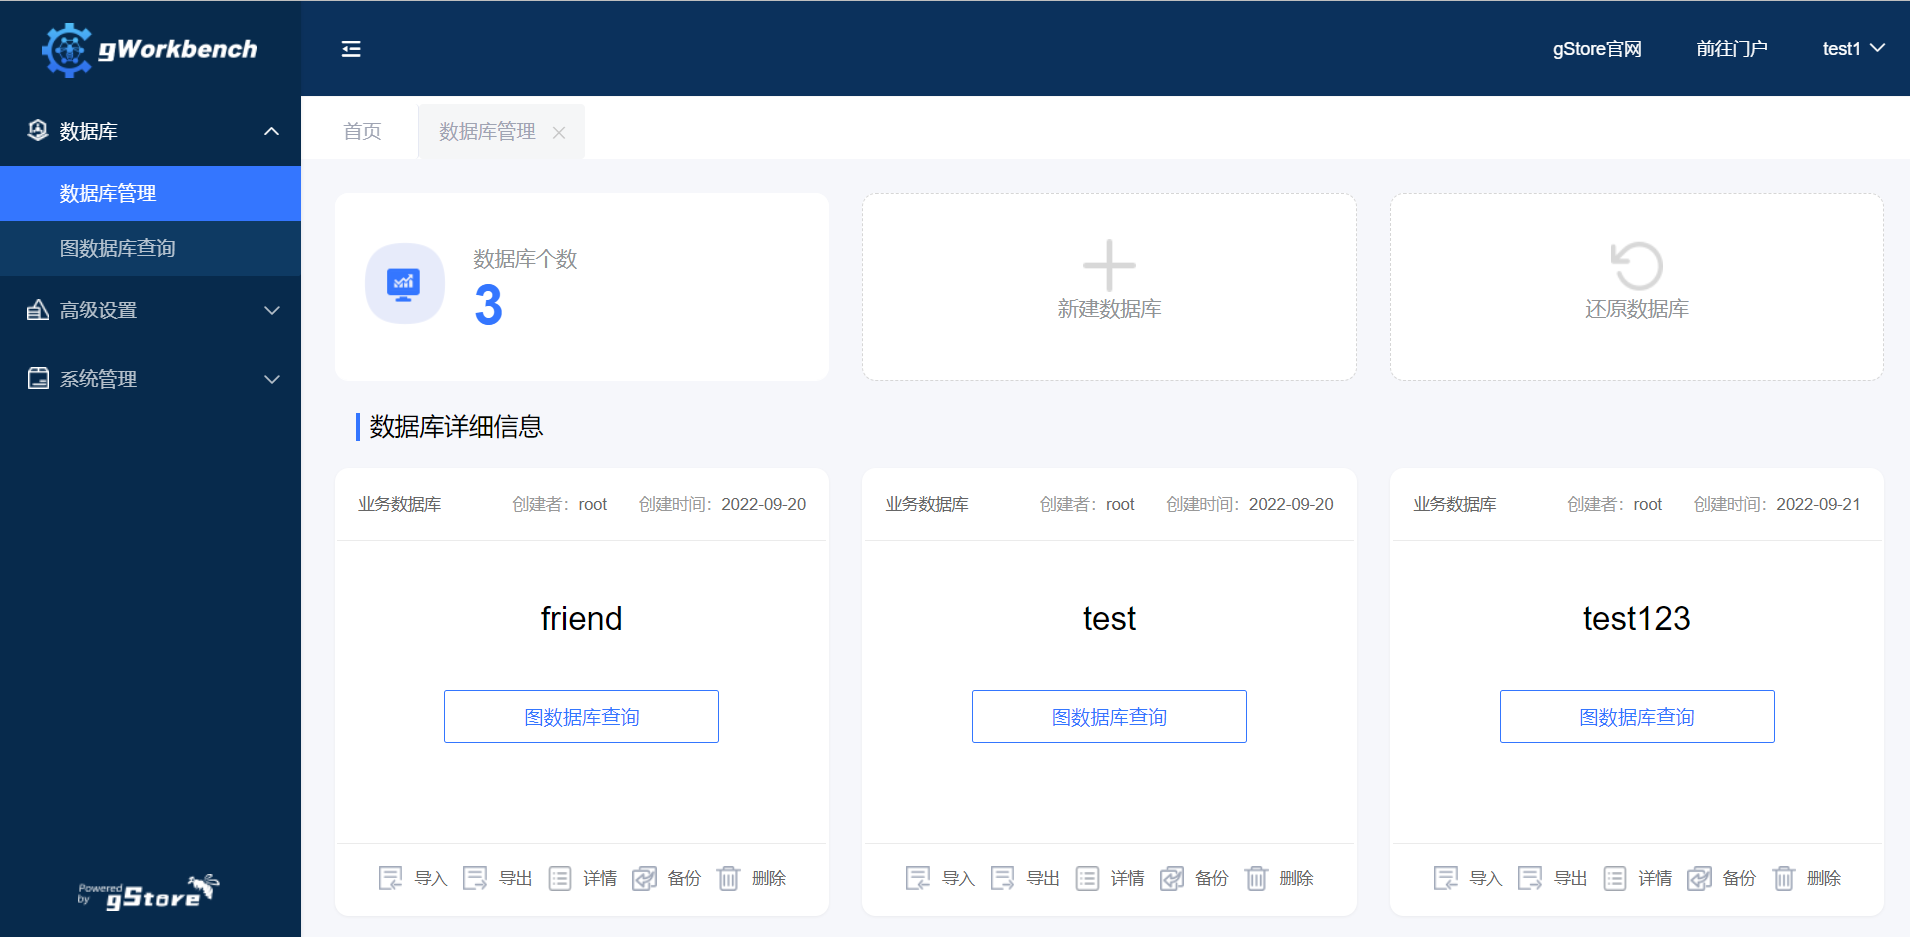
- View information about the loaded database
Select the database to view, click the "Details" button below the database, and you will see the specific information of the database.
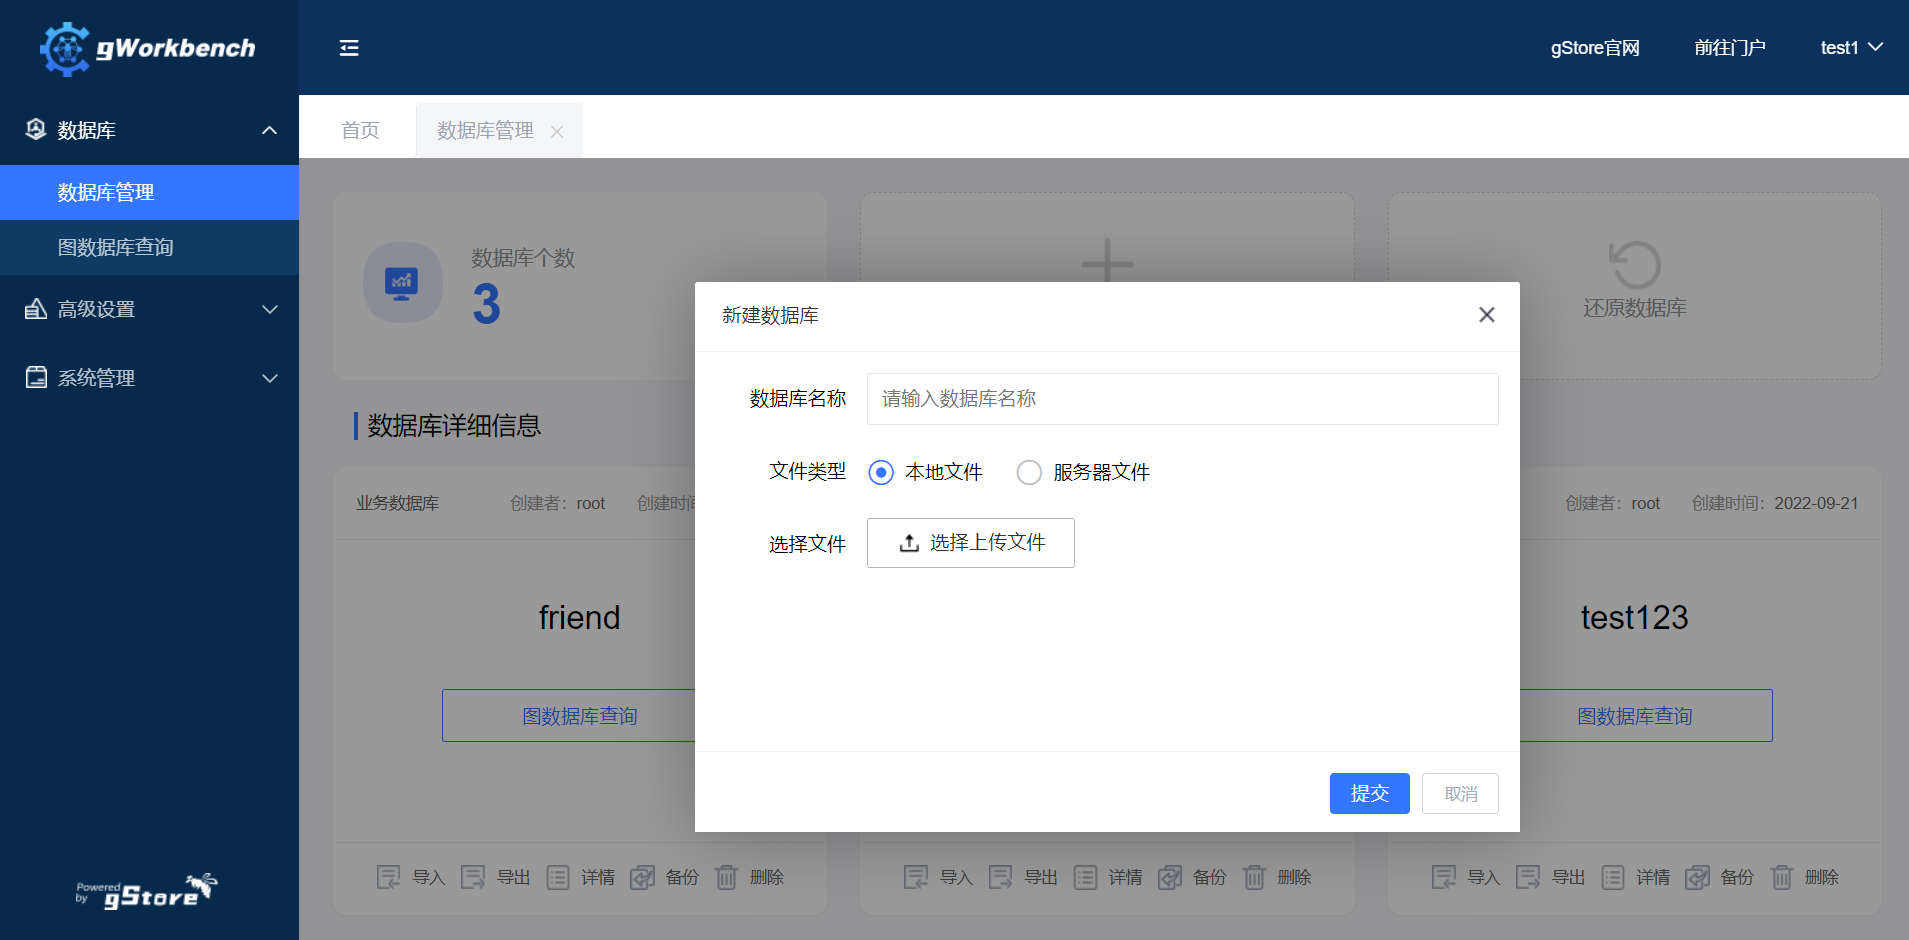
- **Create a database **
1.Enter the name of the new database, for example, lubm;
2.Upload files in one of the following two ways: One is to upload from the server. Enter the correct path of the NT file or N3 file. You can enter an absolute path or a relative path; note that a relative path should be relative to the root directory of gStore.
For example, the following two paths are equivalent:
/root/gStore/data/lubm.nt 	 //absolute path
./data/lubm.nt				//relative path
The other option is to upload from the local machine. Note that using this approach you must ensure that the Workbench server is the same server on which gStore is installed. First select the NT or N3 file locally, then click "Upload File".
3.Click on the "Submit" button.
- Database deletion
Click the delete button in the upper right corner of the database and select "Delete" or "Delete Completely" to delete the database. The system database cannot be deleted.
- Import data
Click [Database Management], select the database to import, click the "Import" icon in the upper right corner; the file type can be server file or local file. To import local files, select nt or N3 format files, click [Upload File], and then click [Import Data].
- Export data
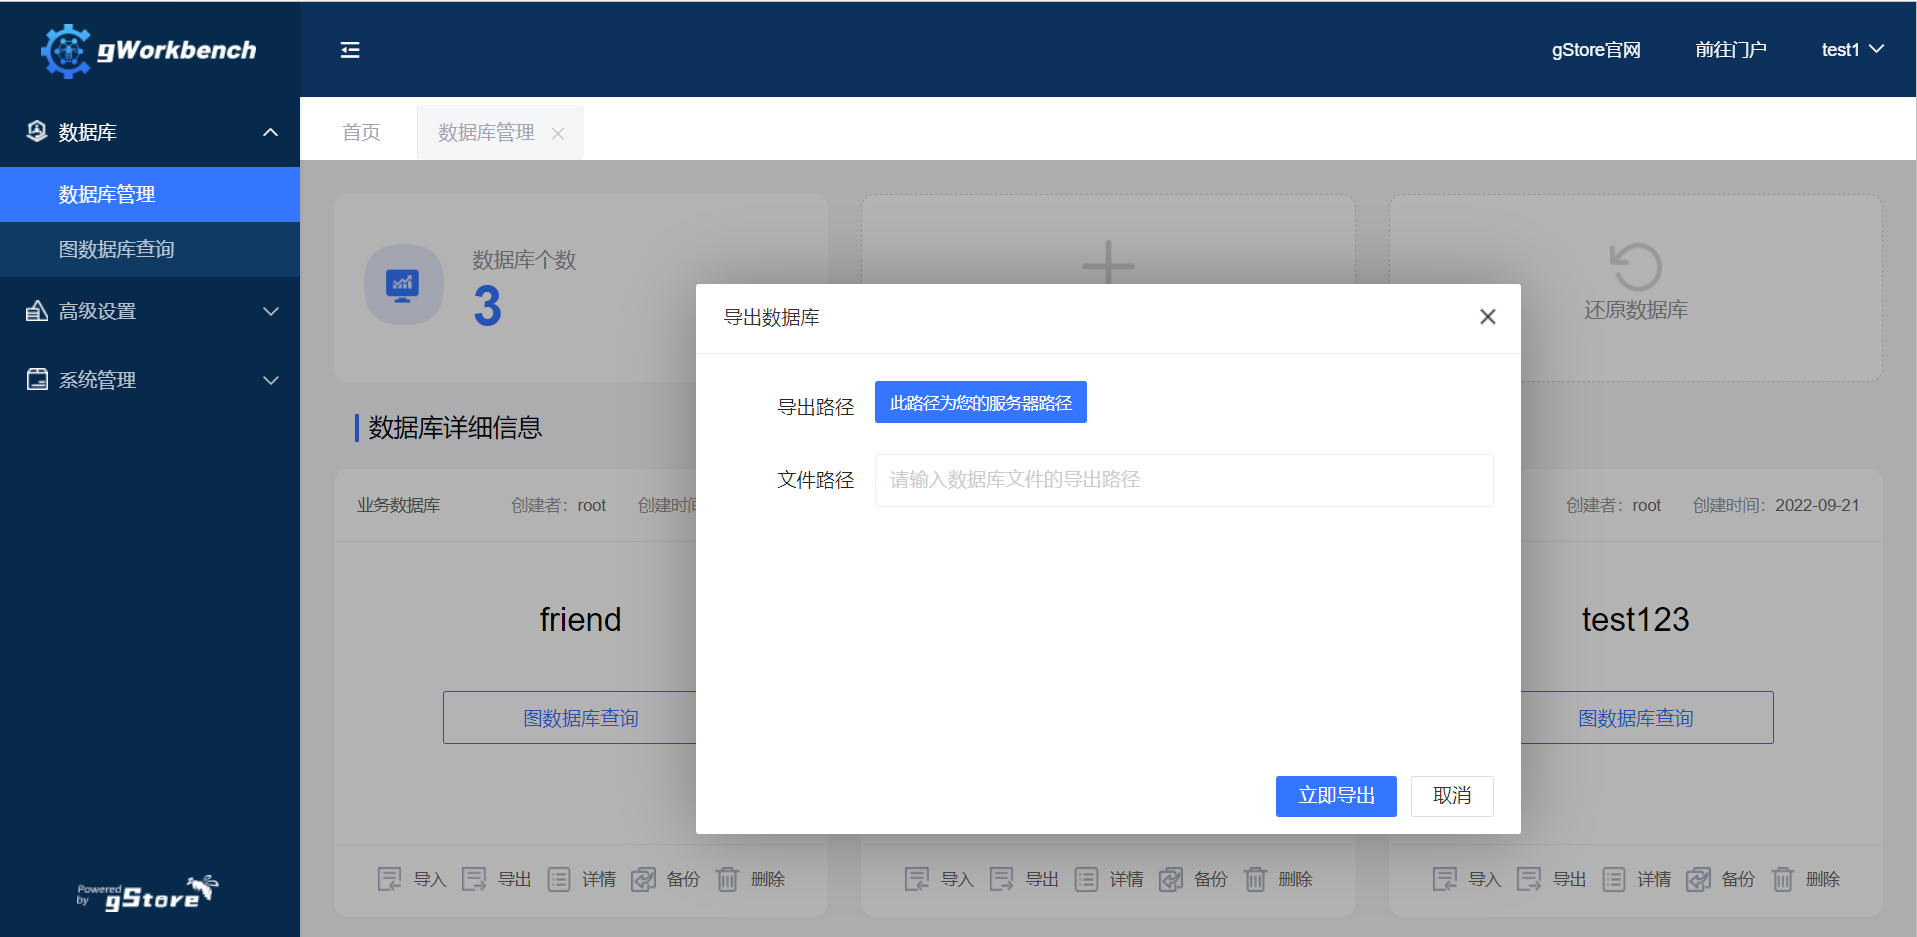
To export the database as an NT file, click the export button in the lower left corner of the database and select the directory where the exported NT file will reside. You can enter an absolute path or a relative path; note that the current path is the root directory of gStore.
For example, the following two paths are equivalent:
/root/gStore/data   //absolute path
./data 				//relative path
Enter the correct path and click "Export Now". The system database cannot be exported.
- Backup database
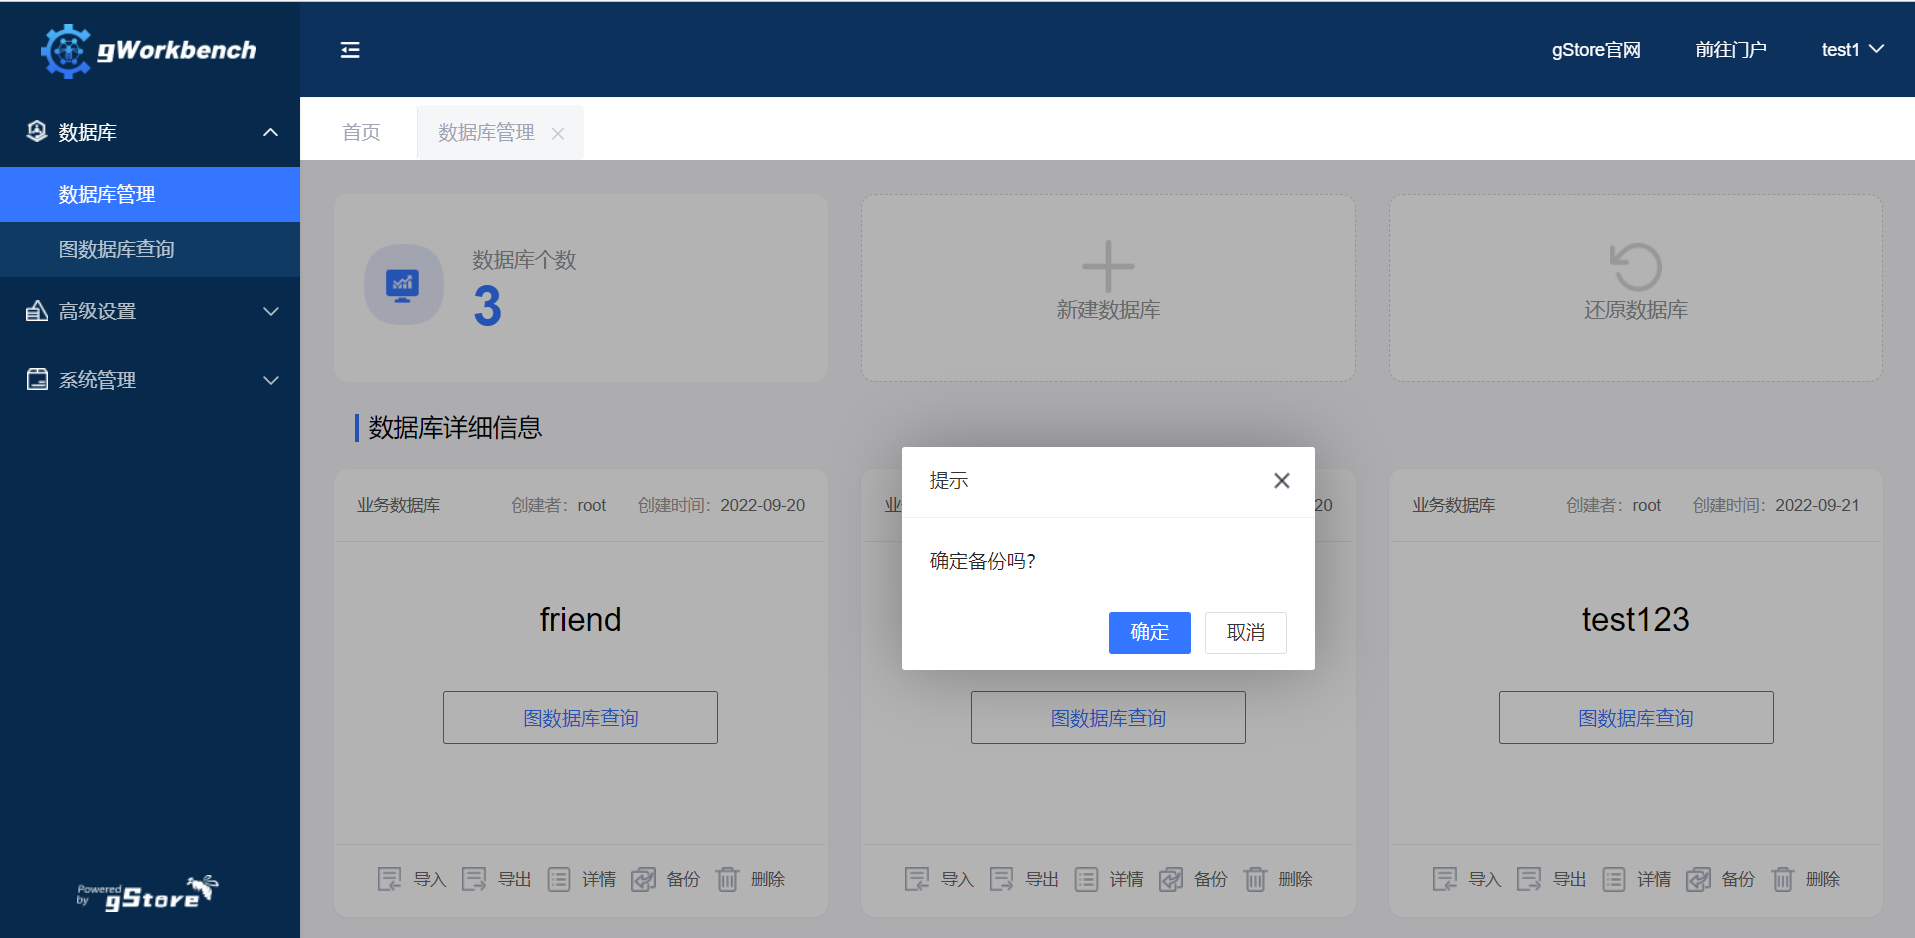
Click the [Back up] button on the database you want to back up, and the following dialog box will pop up.
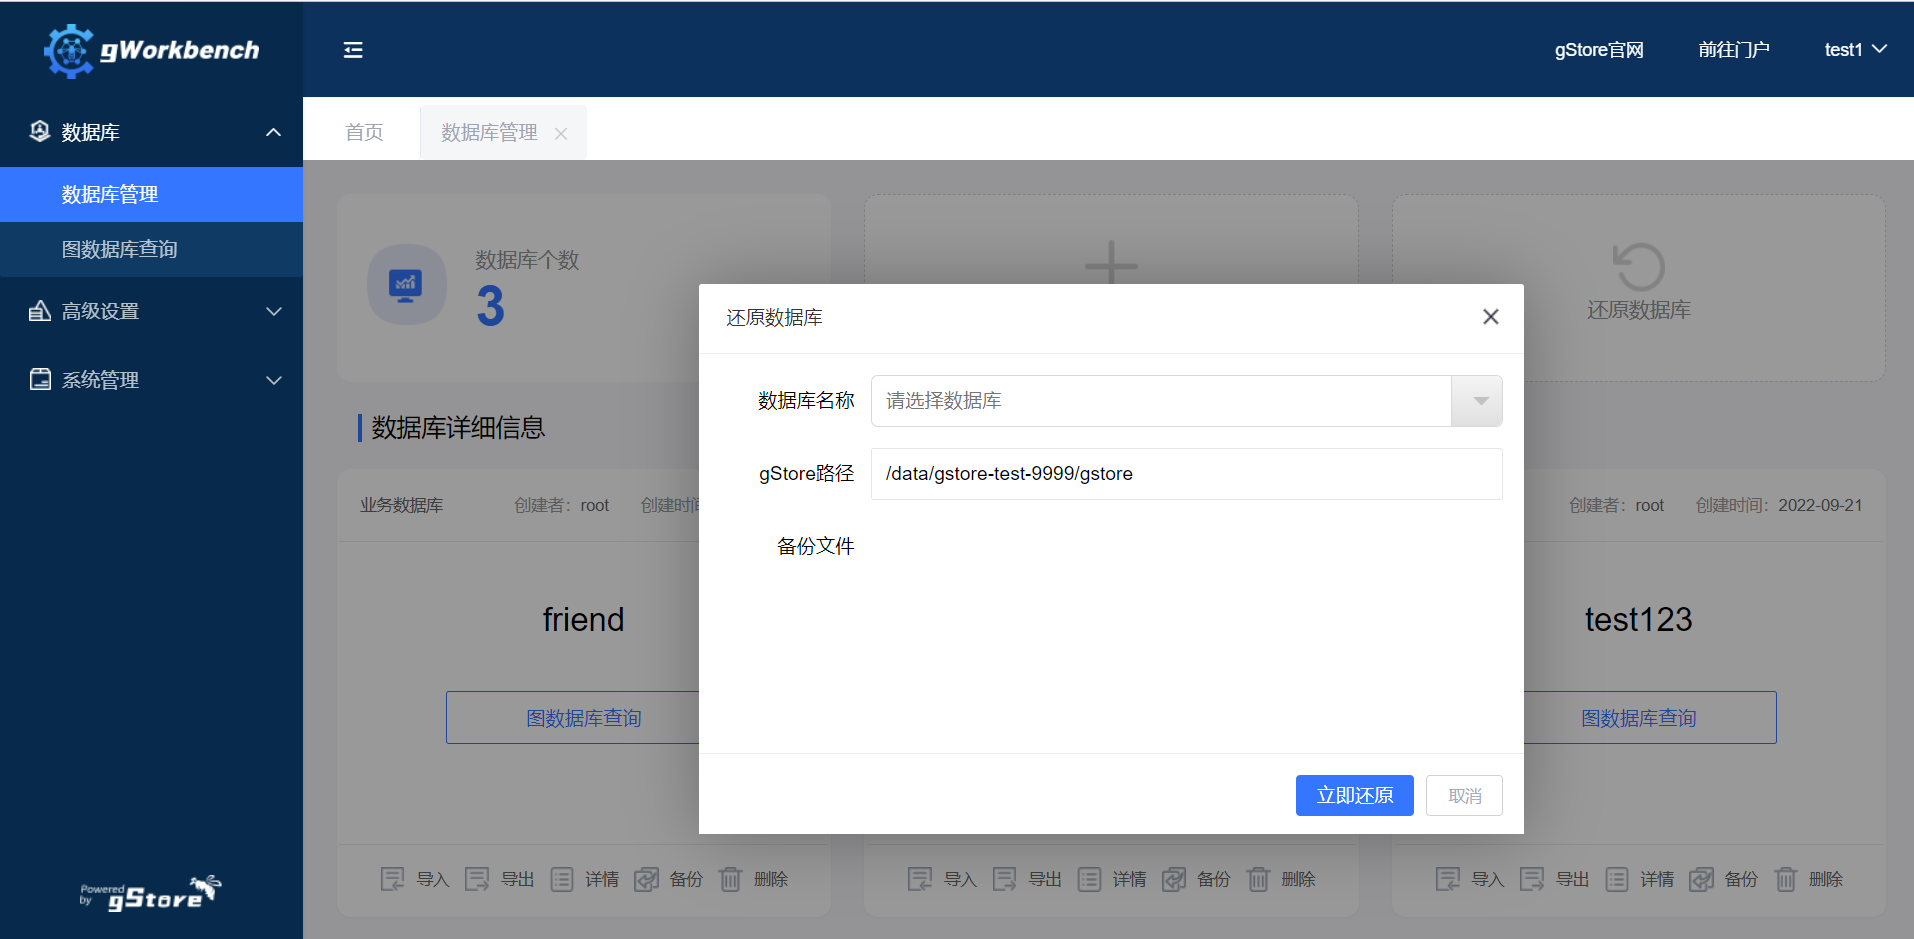
- Restore database
Click [Graph Database query], which contains three functions: ordinary query, transaction operation and advanced query.
(2) Ordinary query
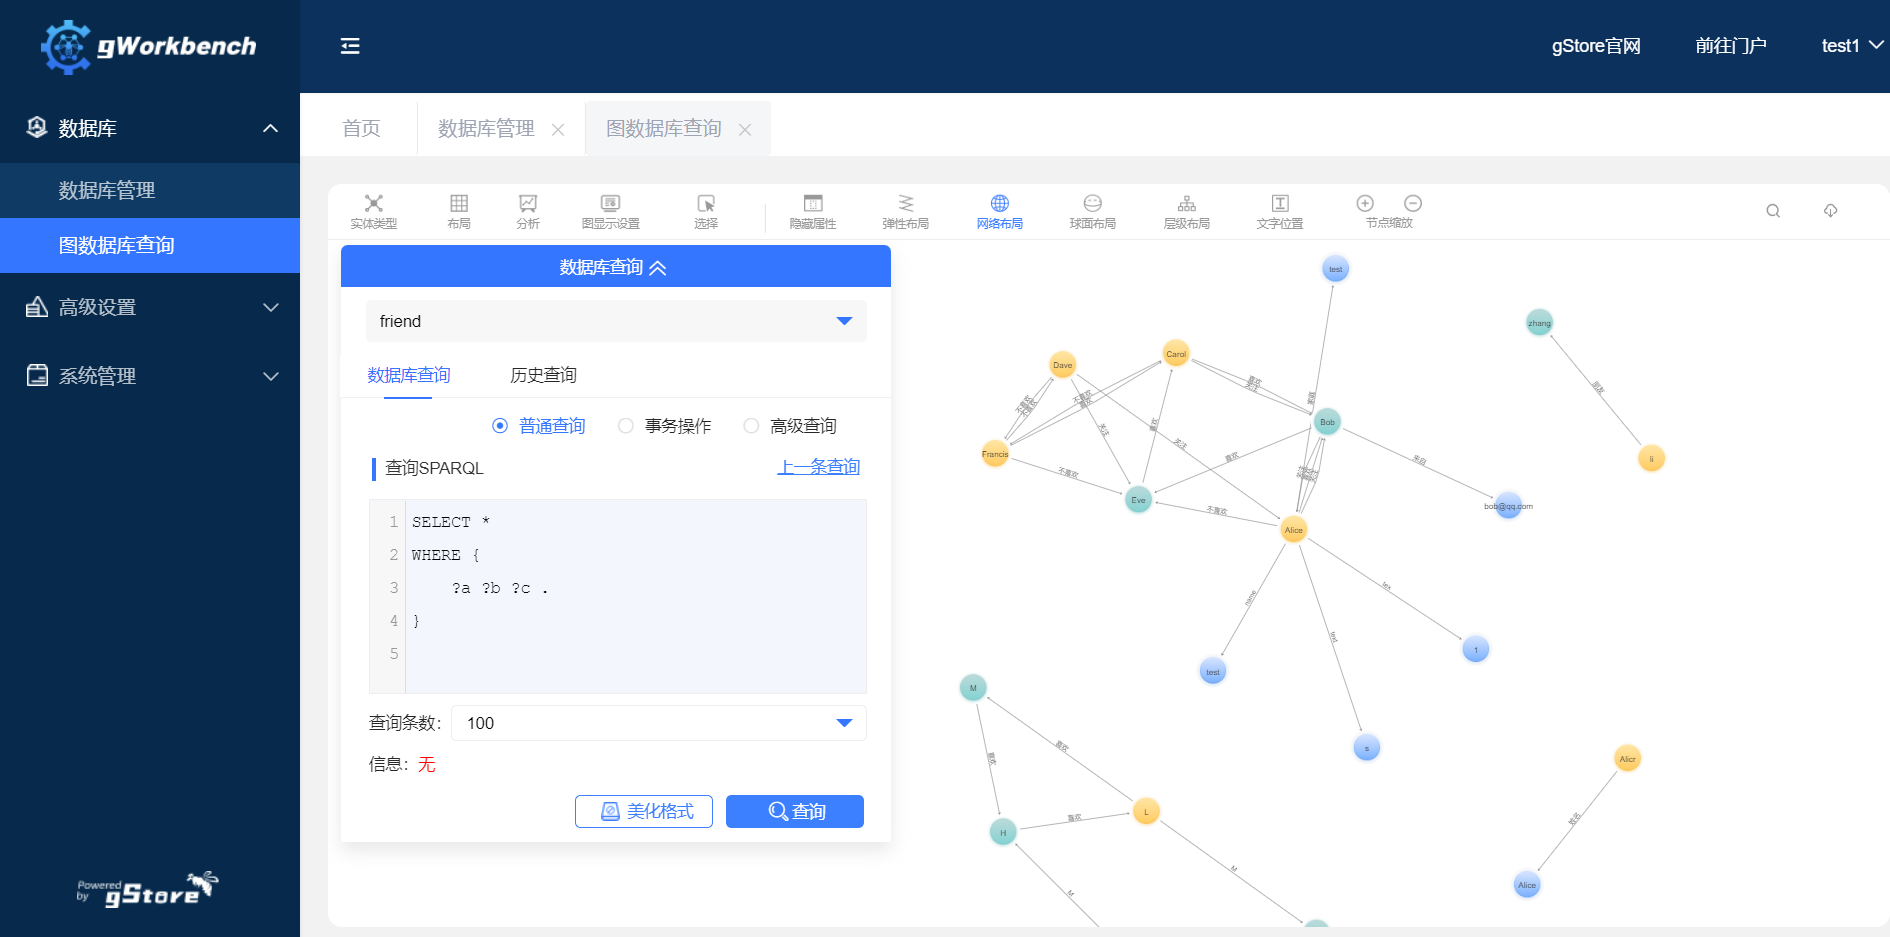
- The default interface is ordinary query. Select the database to query.
- Input the query according to the SPARQL document, then click [Query], and the detailed visual interface of the query results will be displayed on the page.
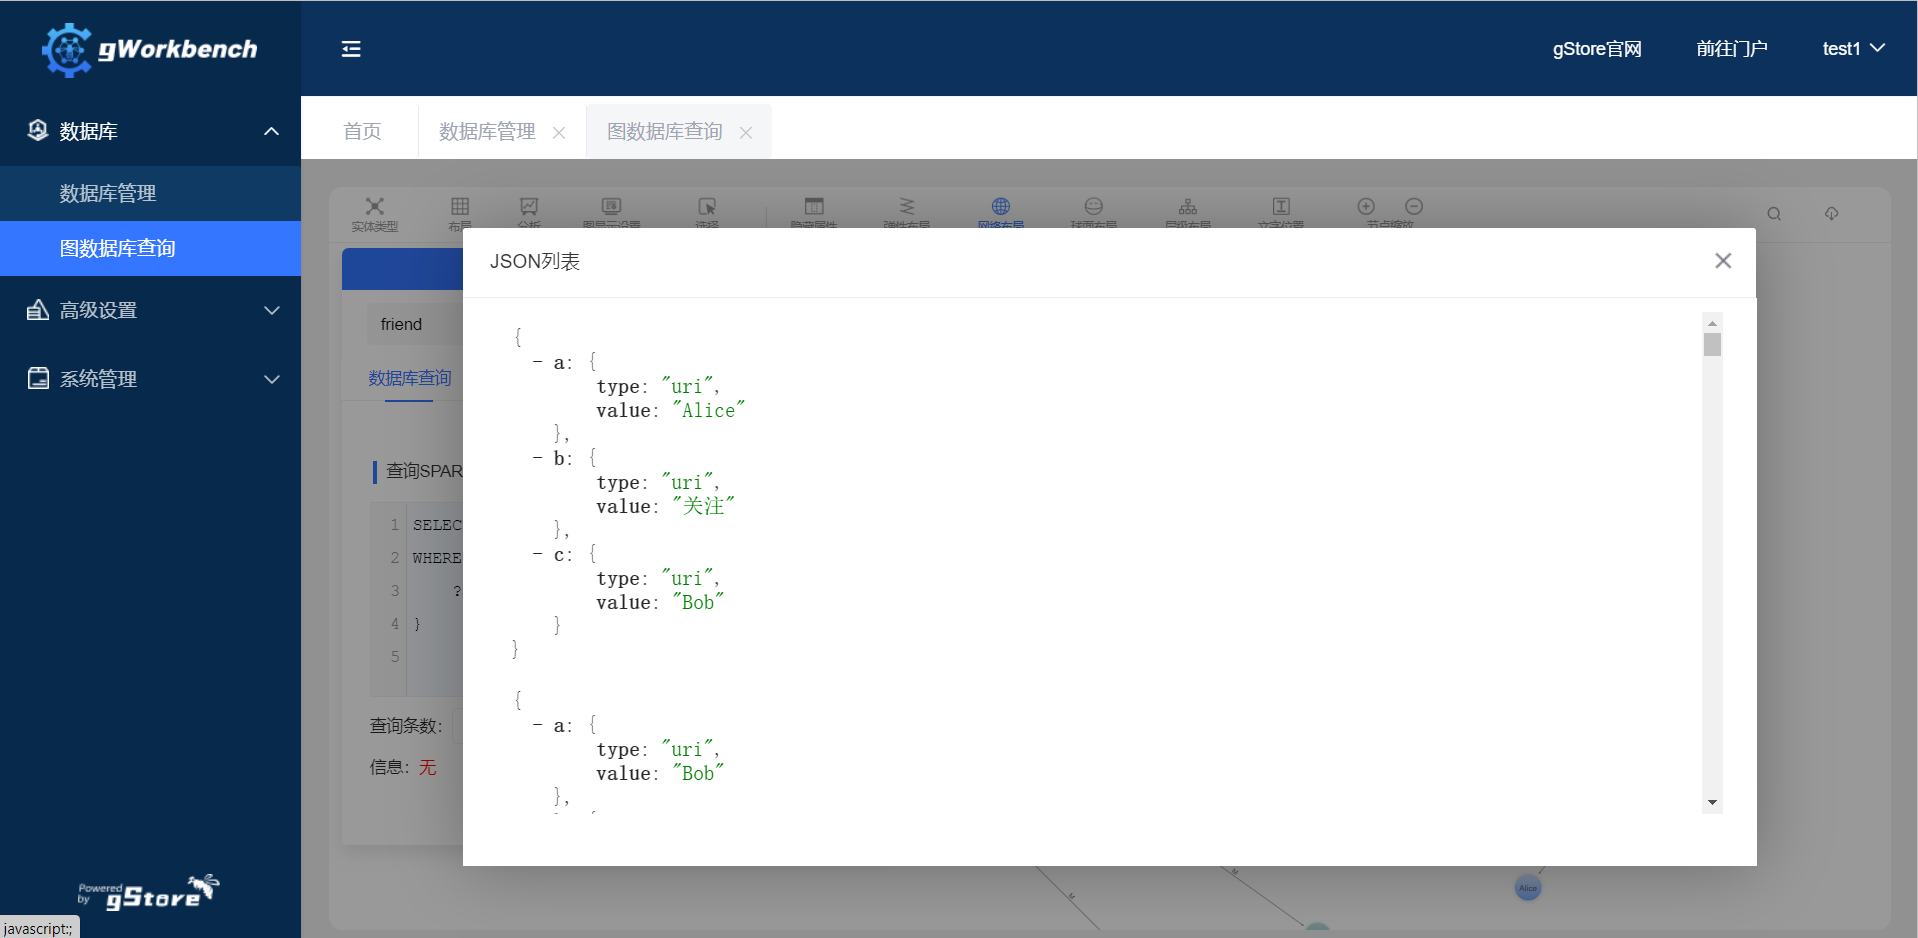
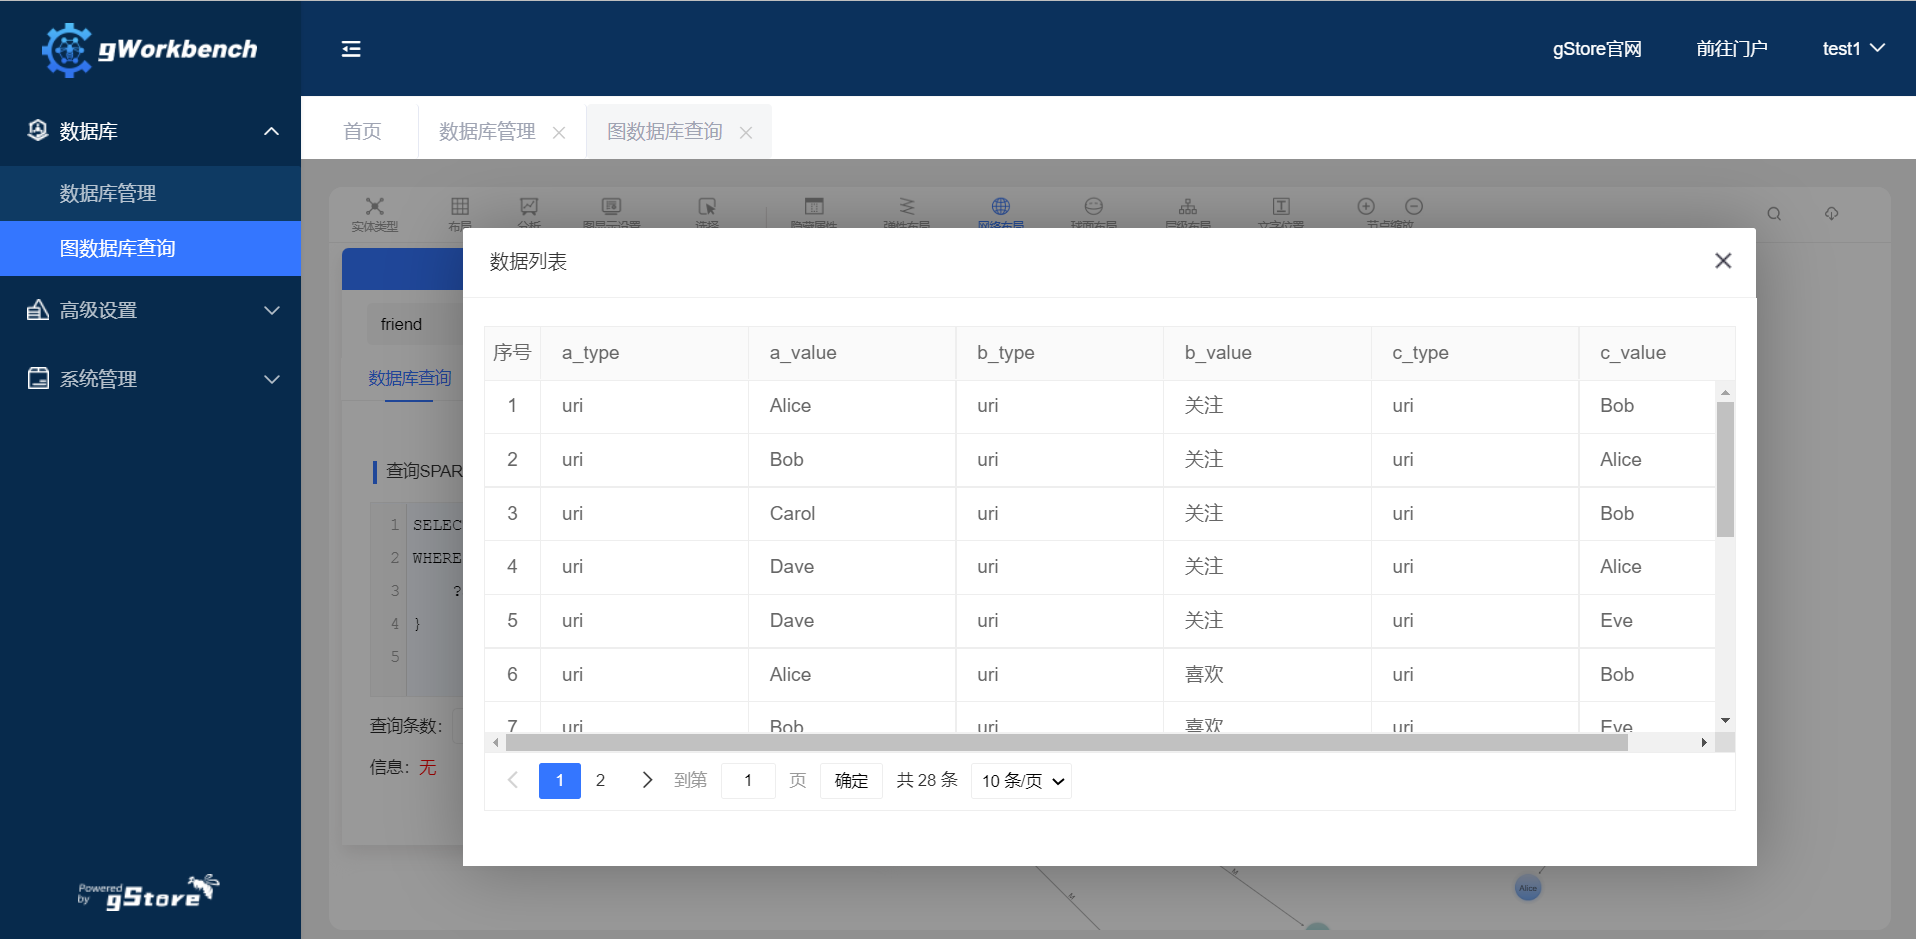
- After the query, a menu bar will be displayed, which includes functions such as entity type, layout, analysis, graph display settings, and selection. Click the download icon in the upper right corner and select JSON list/data list to view the results in the form of json/table.
Graphical display
Json display
Table display
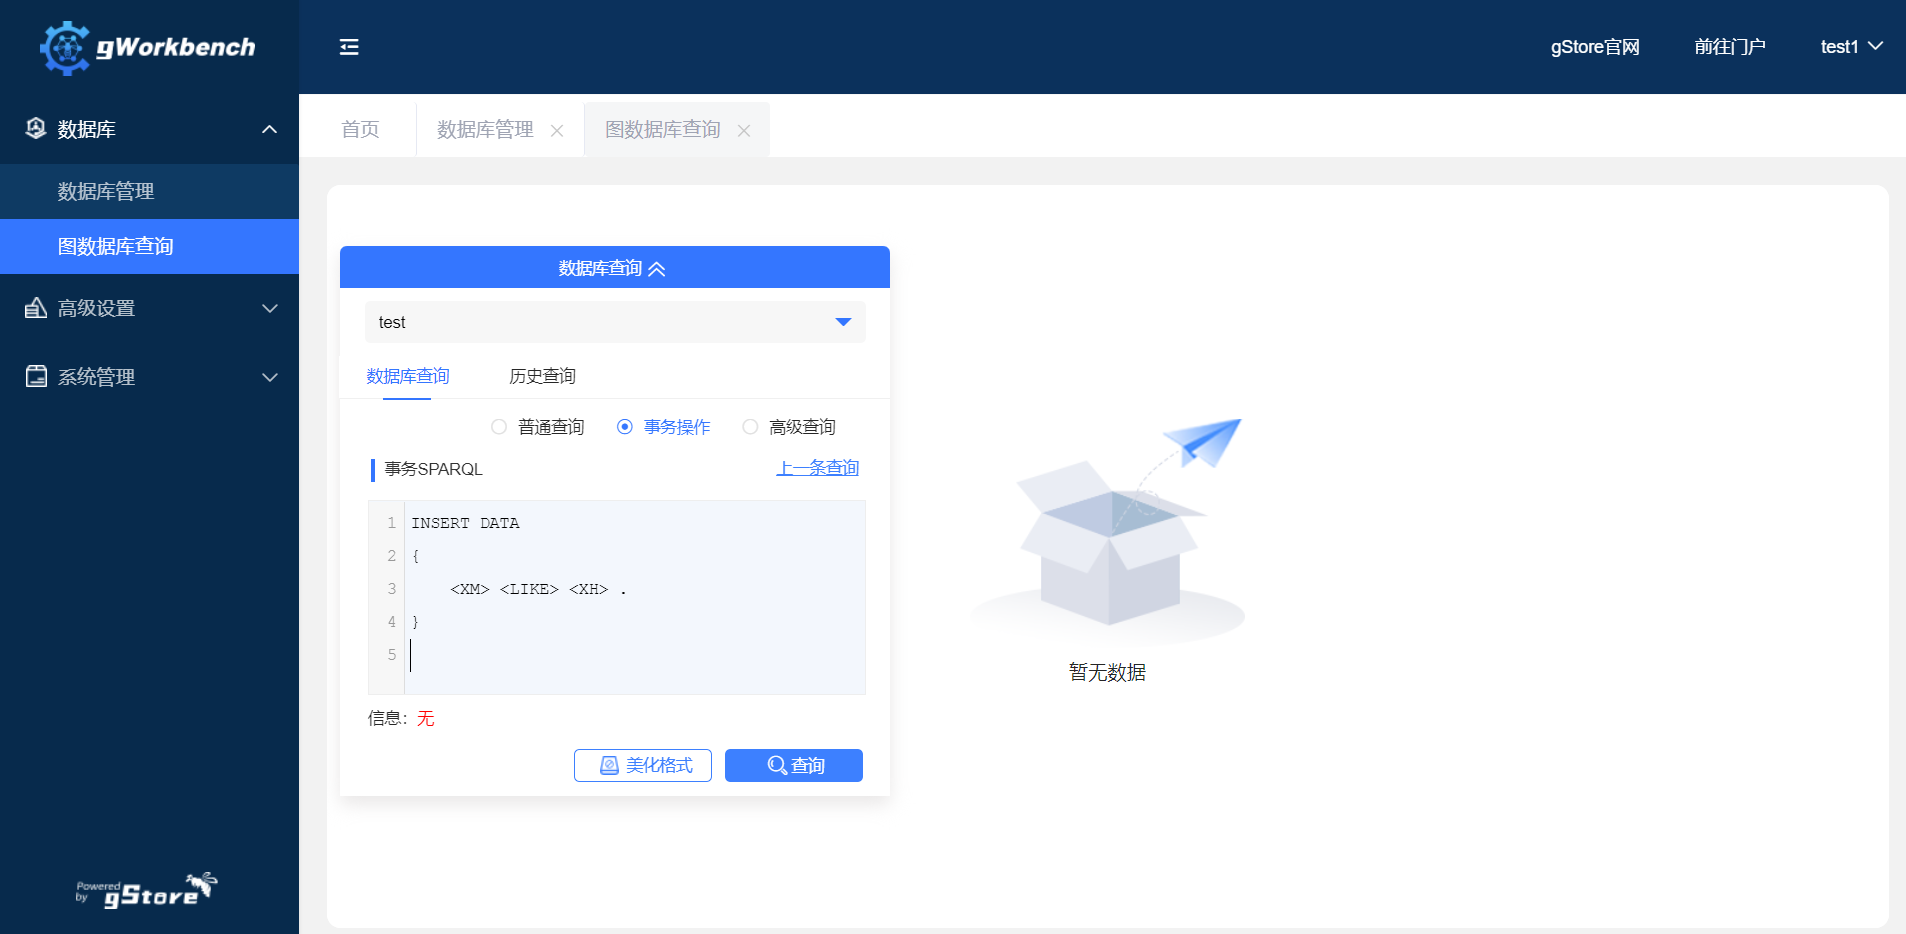
(2) Transaction operation
Click [Transaction Operation], select a database, input the SPARQL statement you want to run in transaction mode, and click [Query].
The insertion and deletion of triples can be achieved by SPARQL statements.
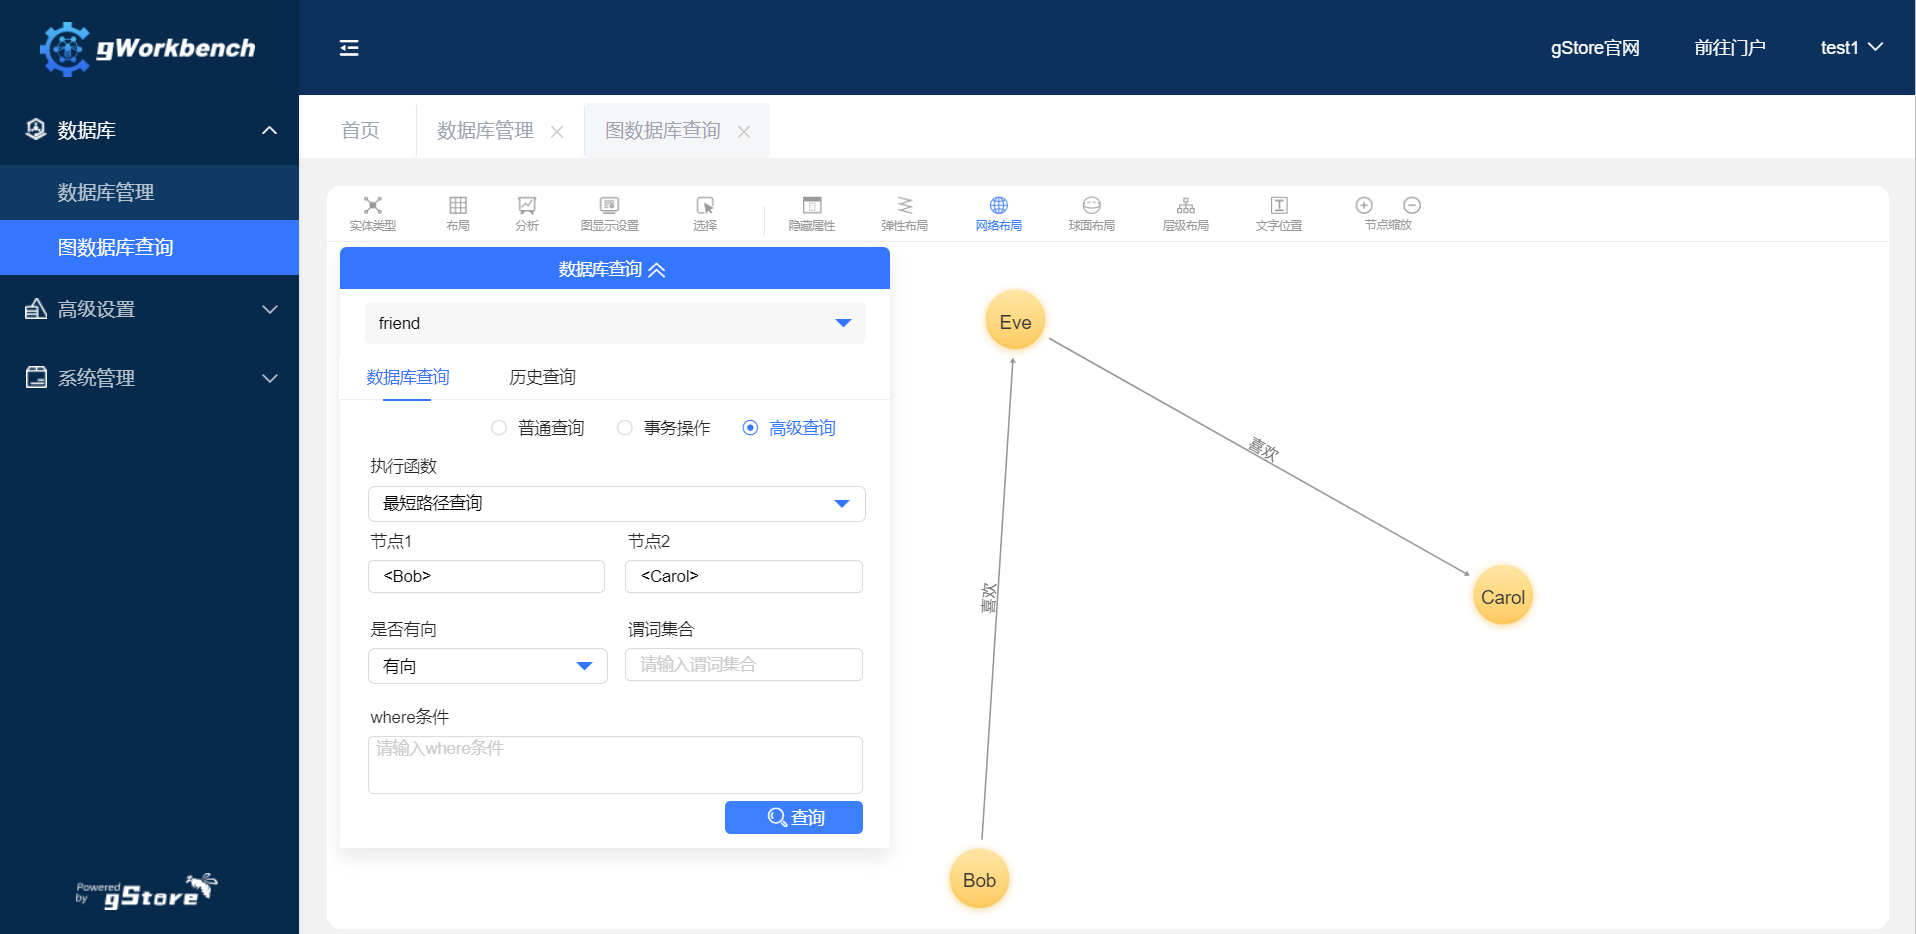
(3) Advanced query
Click [Advanced Query], select a database and a function to execute, fill in other information, and click [Query] to get the corresponding results. The advanced query module can reduce the difficulty of posing queries, since it does not require users to write a full SPARQL statement.
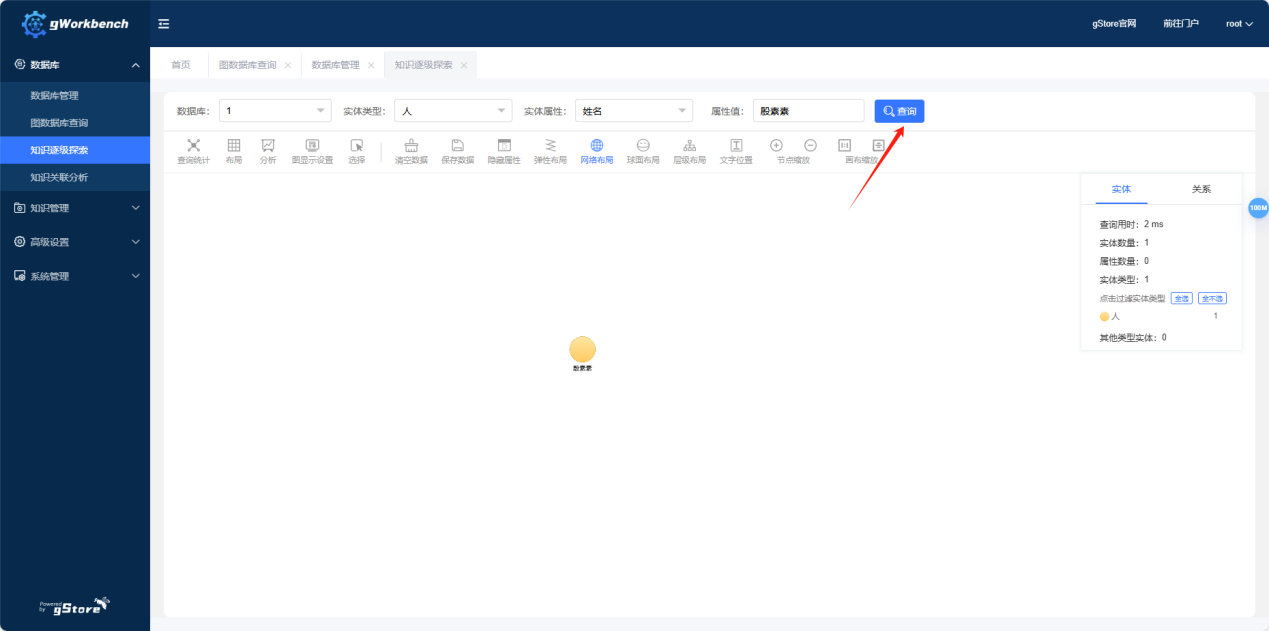
Knowledge hierarchical exploration allows users to query by selecting the database, entities, entity attributes, and attribute values, simplifying data retrieval. Except for attribute values, the other three fields are selected from dropdown menus, refining the query step by step from left to right.
After completing the information, the query can be performed as shown below (the last item is optional).
The functionality here is consistent with the one described in the basic query section, so it won't be elaborated further.
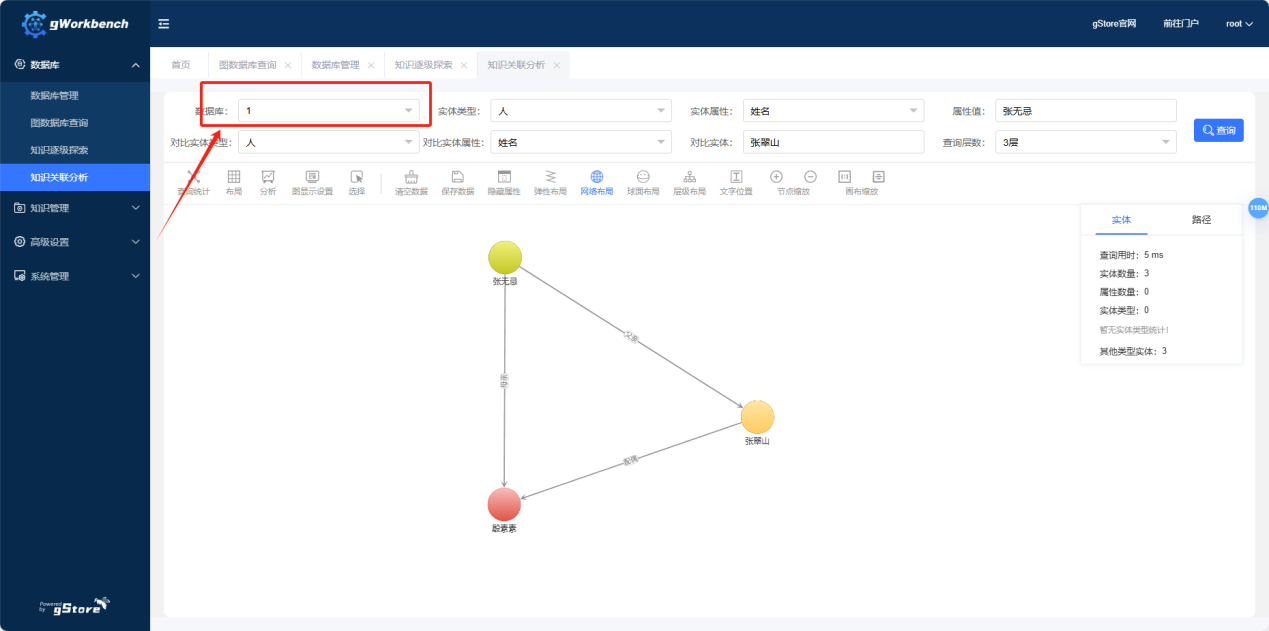
The Knowledge Association Analysis interface is designed to help you explore the complex relationships between entities, entity types, and entity attributes. Through knowledge association analysis, you can compare relationships between different entities and query the associations between two entities within a specified number of hops, revealing hidden deep relationships in the knowledge graph. For clarity, we'll refer to the two nodes being analyzed as A and B, focusing on the relationship between them.
Select the database to use:
The two nodes selected within the red boxes represent the nodes we've chosen (note that if no attribute values are entered, the relationship between the set of entities with that attribute and another node is analyzed. If both nodes are selected with attributes, you can consider it as a relationship between two sets, each containing only one element).
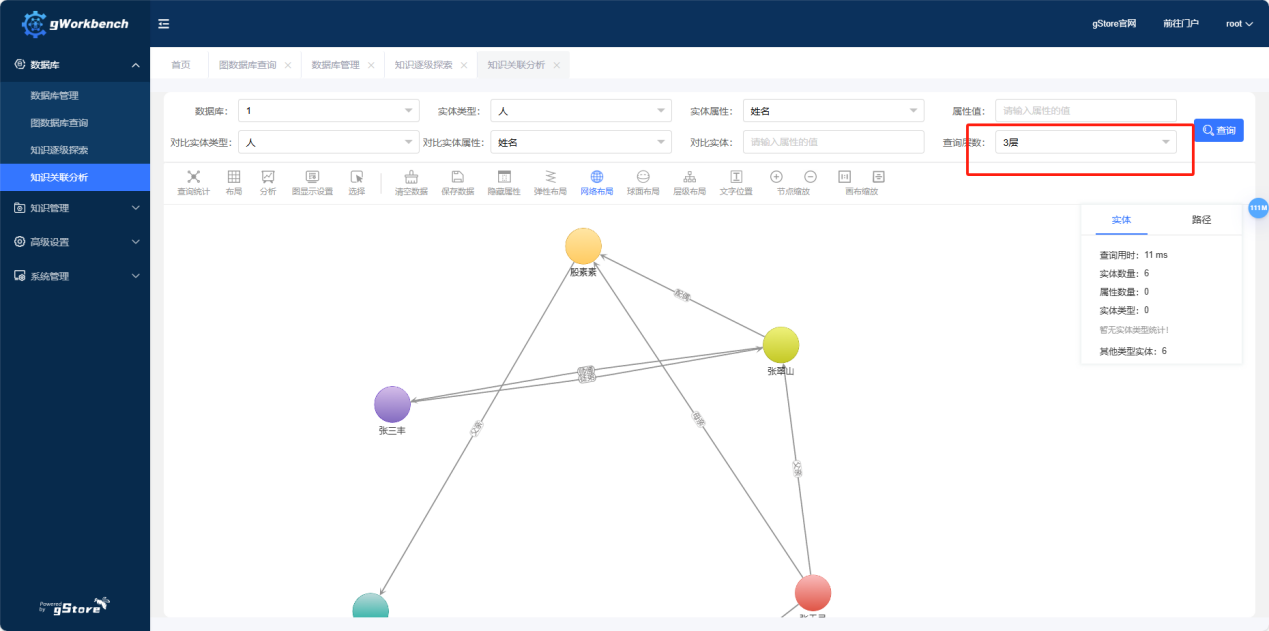
The number of hops indicates the maximum number of steps needed to reach the target node:
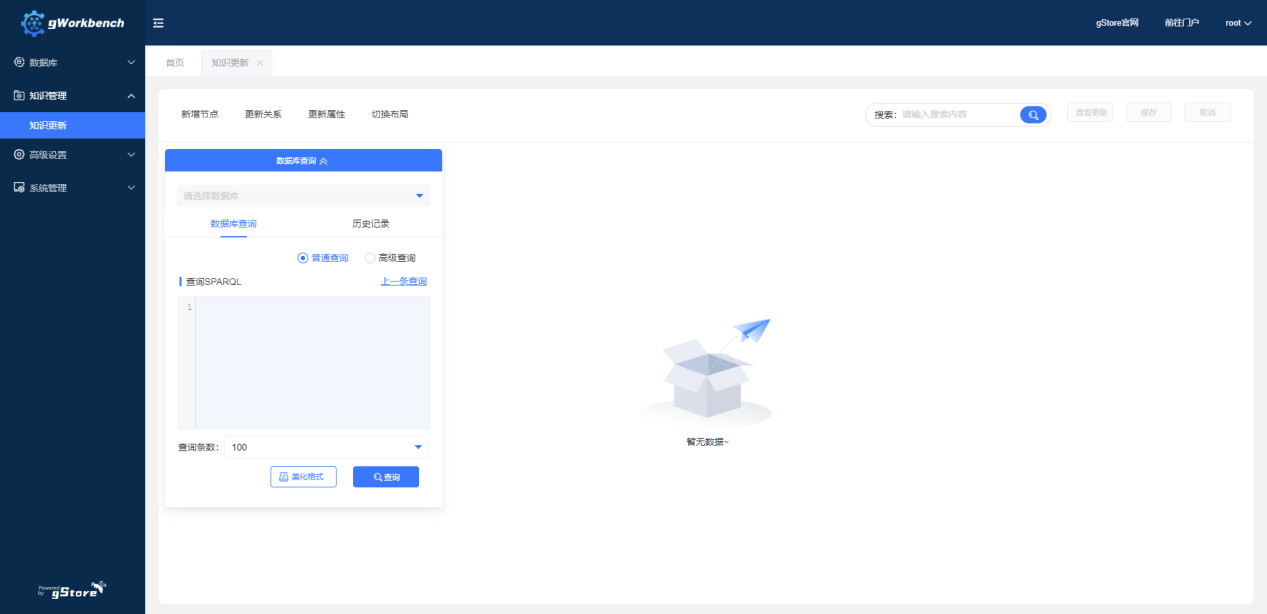
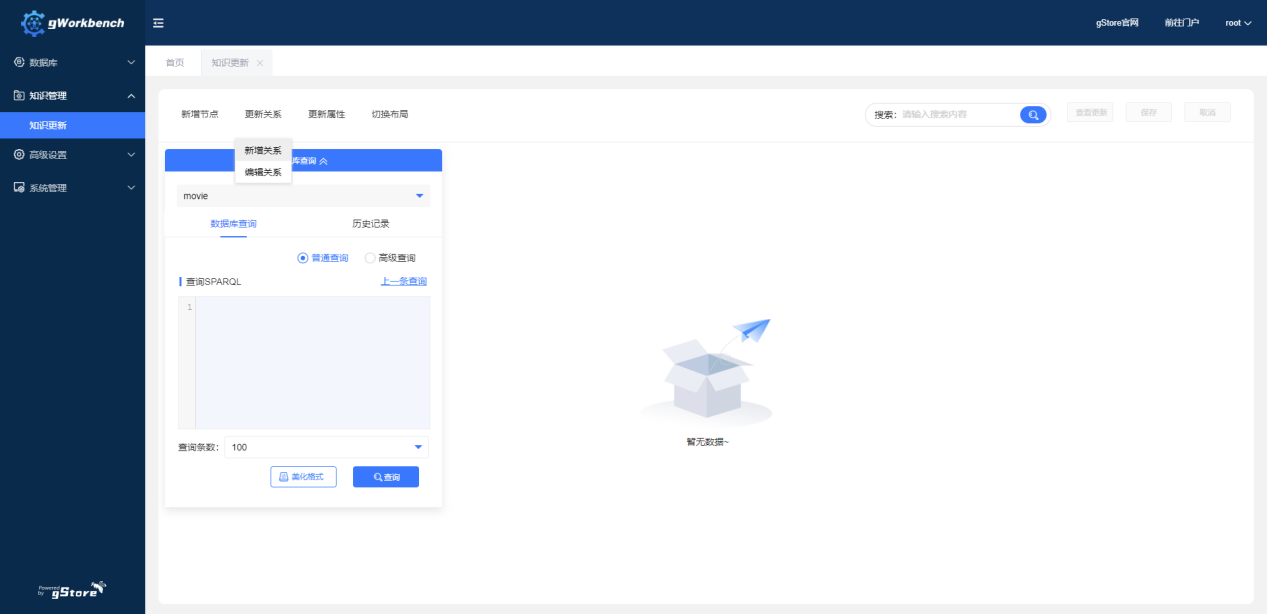
Knowledge update includes adding new nodes, updating relationships, updating attributes, and switching layouts. It also allows for database queries and viewing of historical records.
Click 'Add New Node' to add multiple node names:
Click 'Update Relationships' to select 'Add Relationship' or 'Edit Relationship'. Click 'Add Relationship' to add multiple node relationships:
In 'Edit Relationships,' you can edit the nodes, relationships, and node information in the queried database:
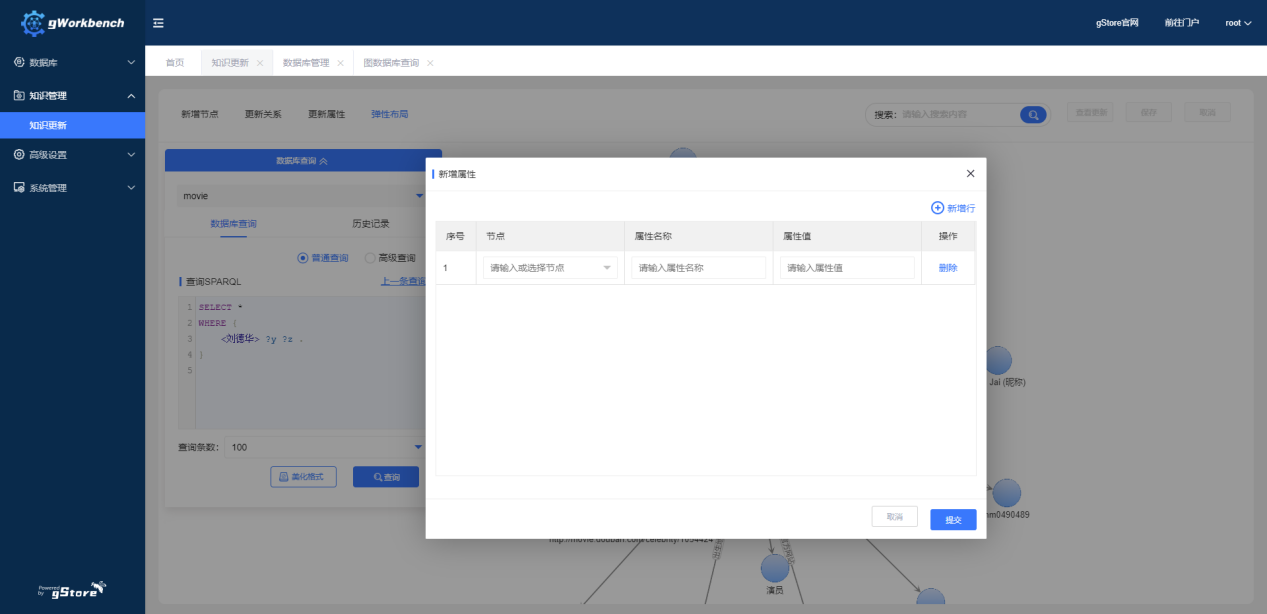
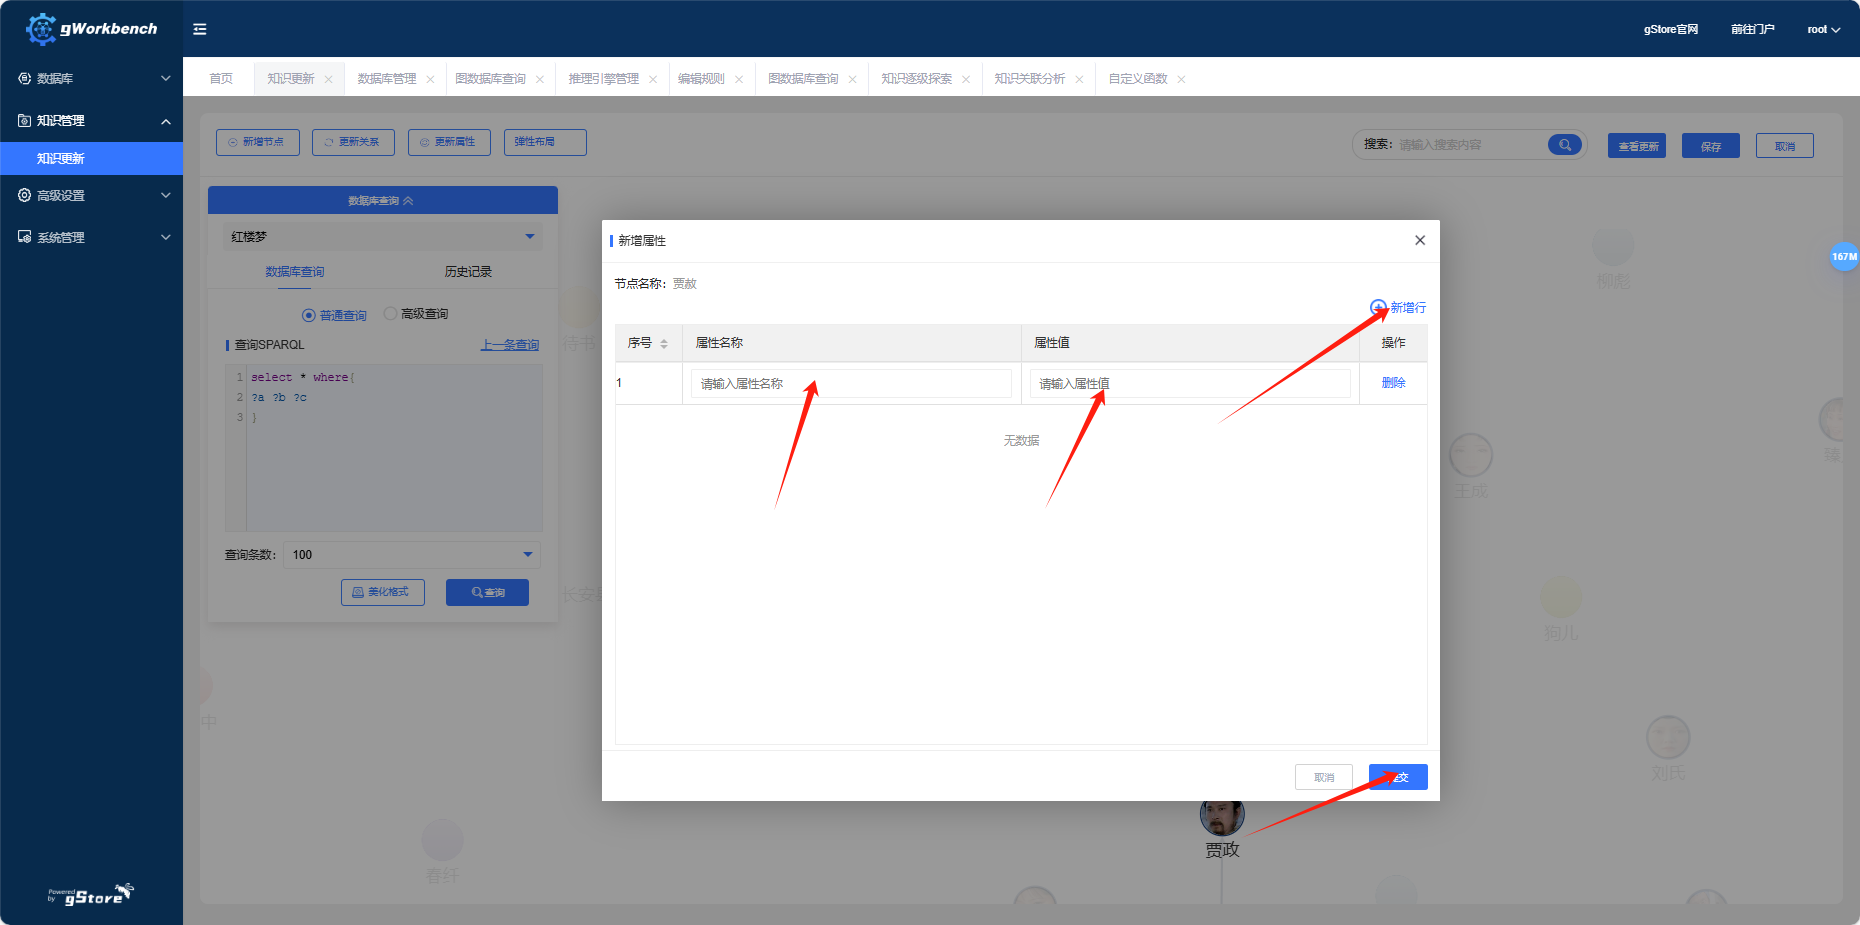
Click 'Update Attributes' to select 'Add Attributes' or 'Edit Attributes.' Click 'Add Attributes' to add multiple nodes, attribute names, and attribute values:
Click 'Update Attributes' to edit attributes, allowing you to query, modify, and delete nodes, attribute names, and attribute values:
The elastic layout supports various graph layout forms:
Right-click on an entity node to access the following functions:
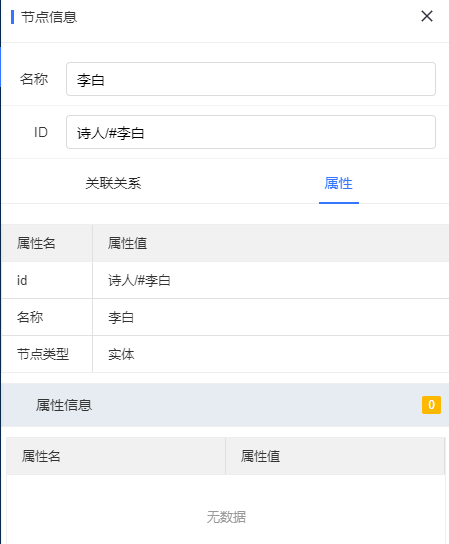
(1)Node Information:
(2)Edit Node (Modify Node Name):
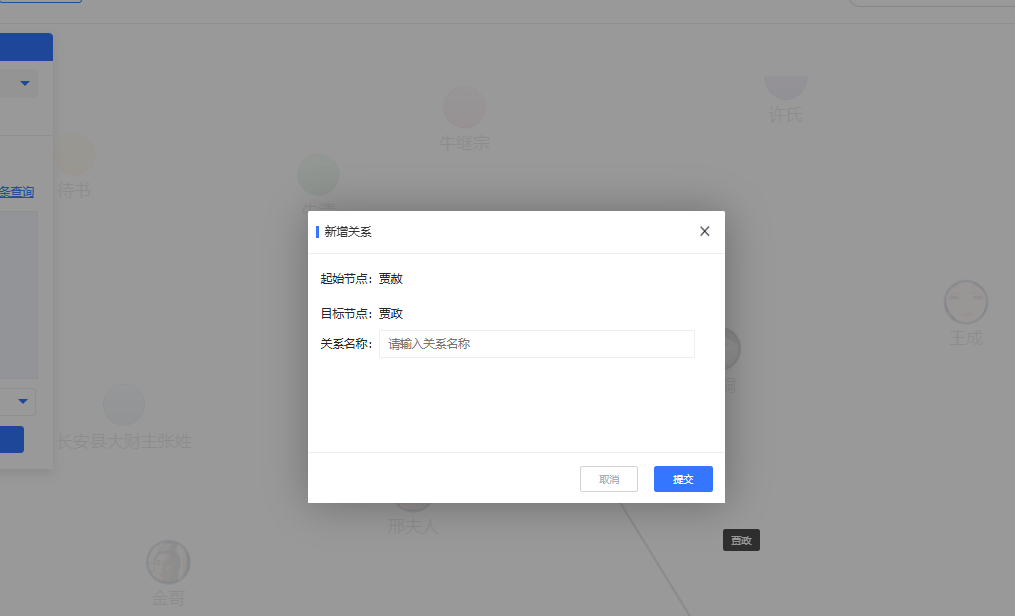
(3)Add Relationship (Draw a line pointing to another entity node):
Enter the relationship name and submit to save.
(4)Add Attribute (Same as the 'Add Attributes' operation described above):
(5)Delete Node (Remove the entity node)
(6)Expand Relationships (Display nodes related to the selected node):
(7)Expand Attributes (Show the attributes of the selected node):
Right-click on an entity node's attribute to access the following functions:
(1)Edit Attribute (Change the attribute name and value):
(2)Delete Attribute (Remove the attribute from the node):
Search (Enter a node name to find its location on the graph):
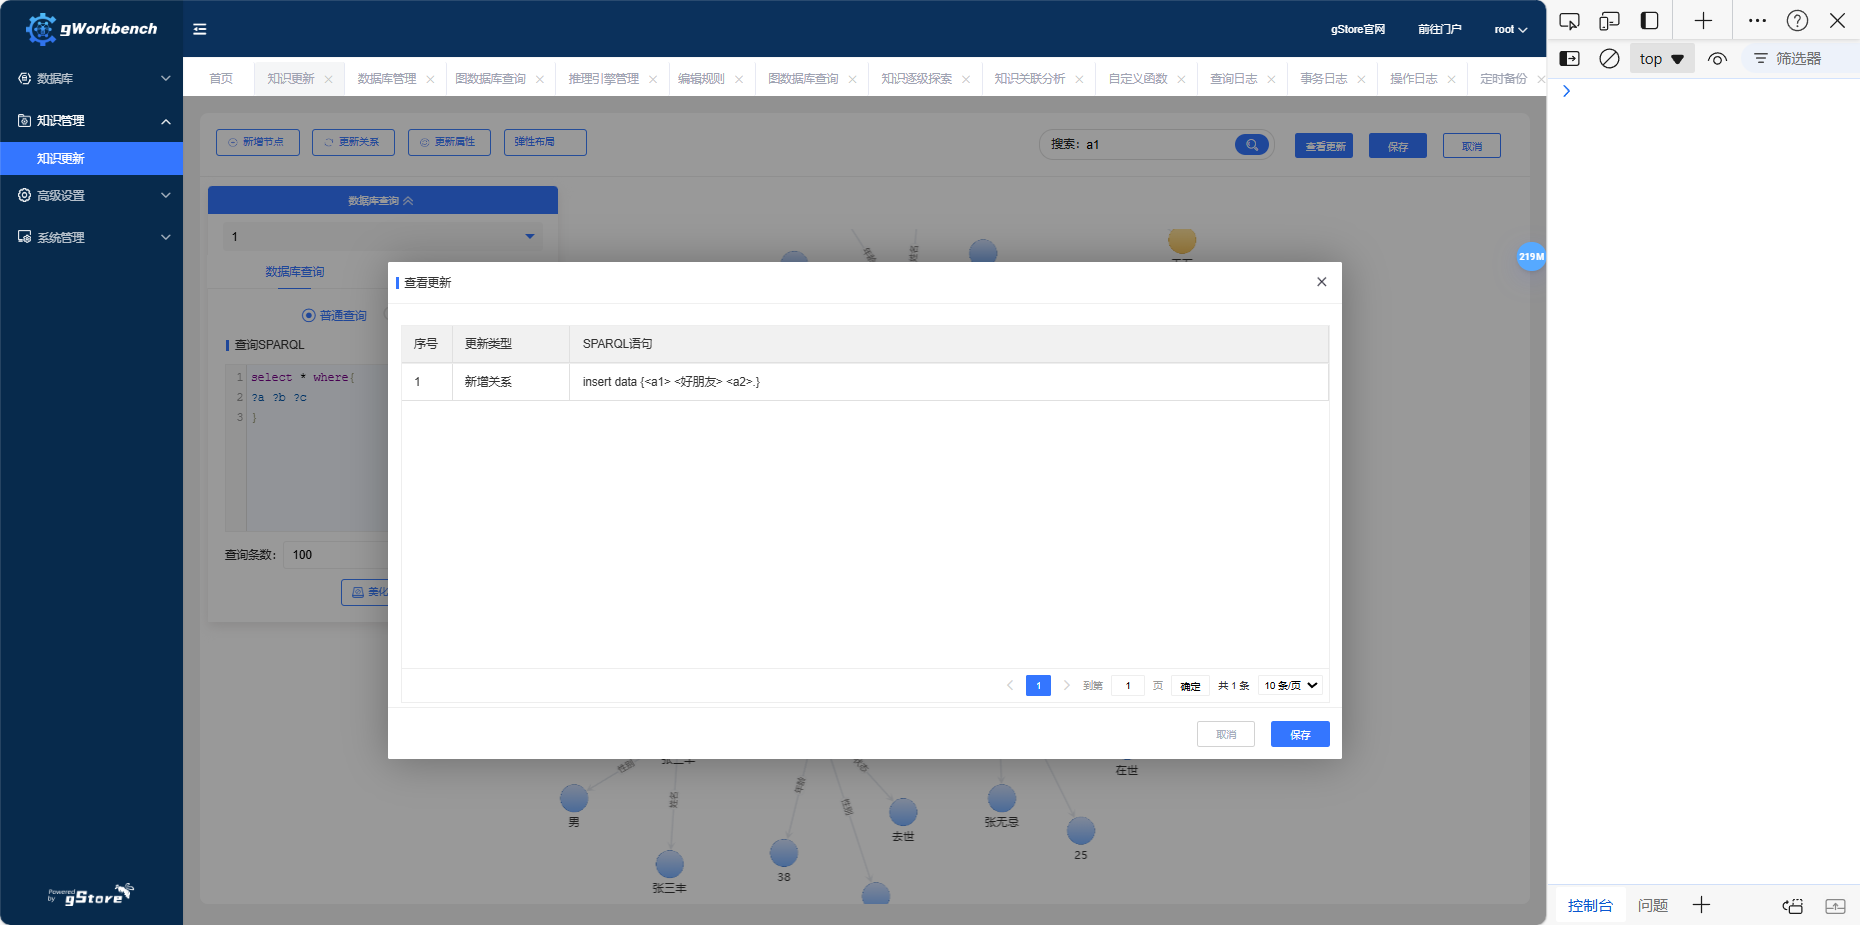
Check Updates:
(1)Where the action buttons are located:
(2)Displayed content:
(3)Save:
Save Knowledge Updates:
Cancel Knowledge Updates (Revert unsaved update operations):
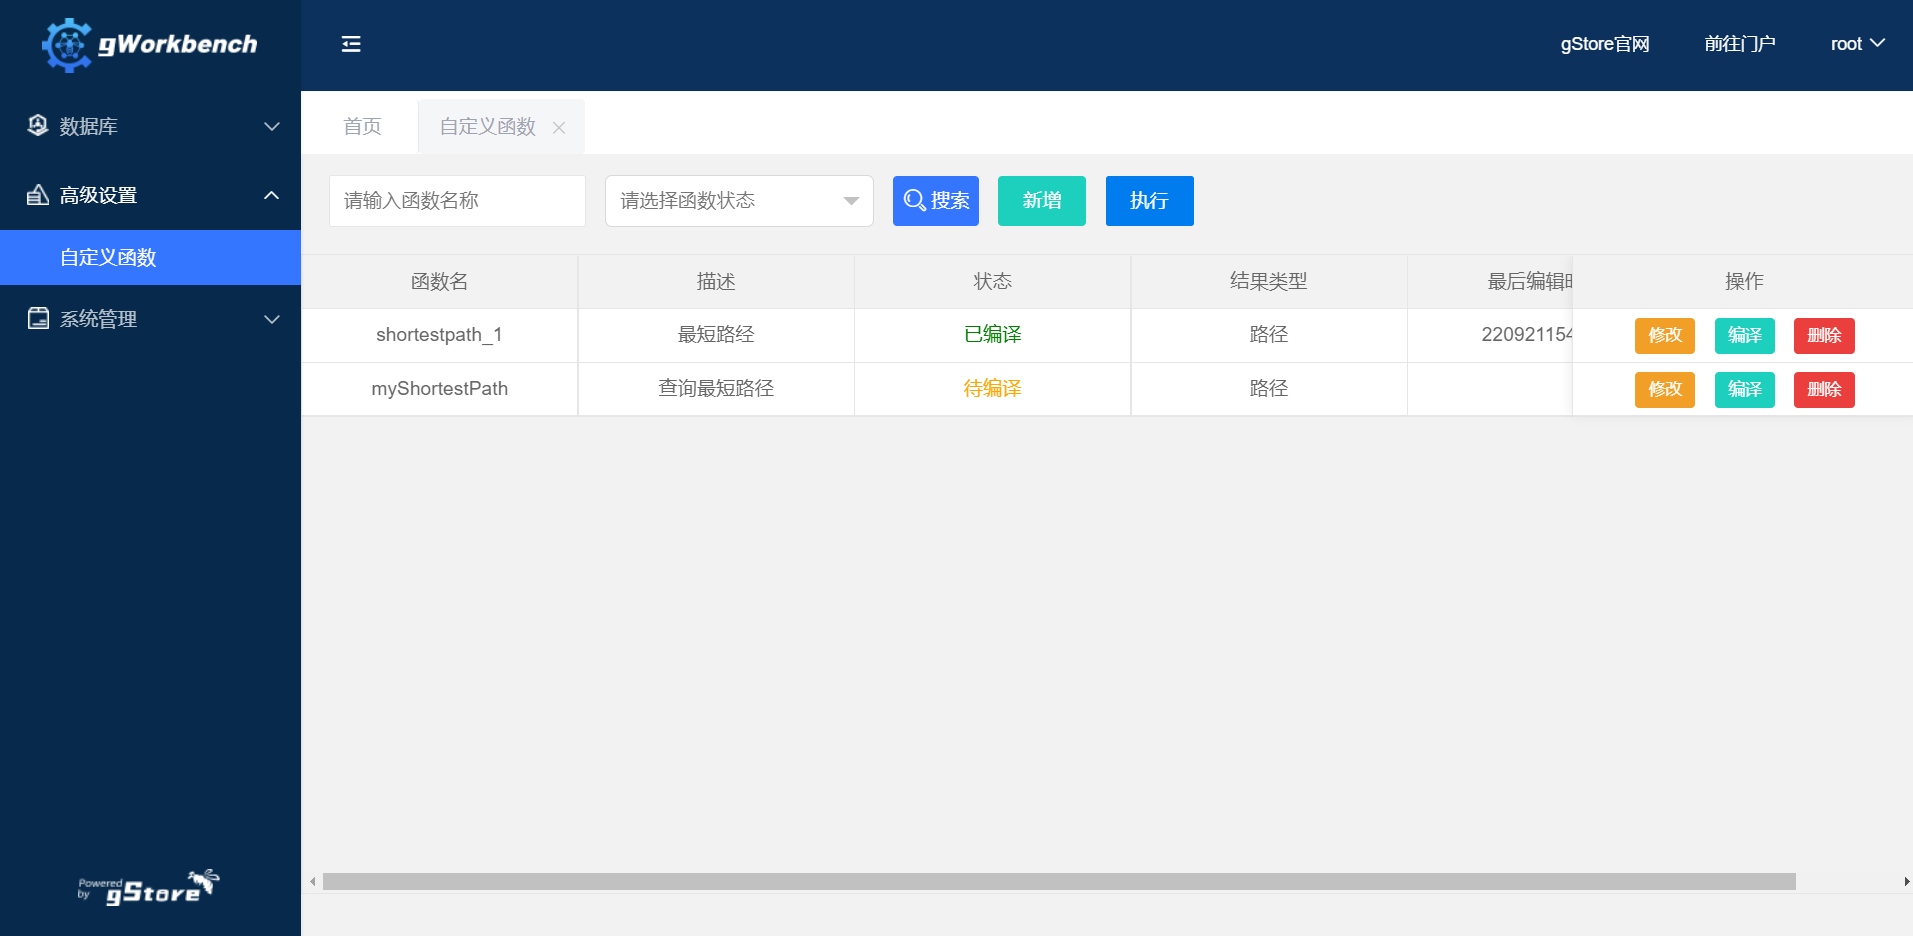
Users can define custom graph analysis functions through the advanced settings module, which, after definition, can also be called directly from the graph database query module.
Find existing custom function
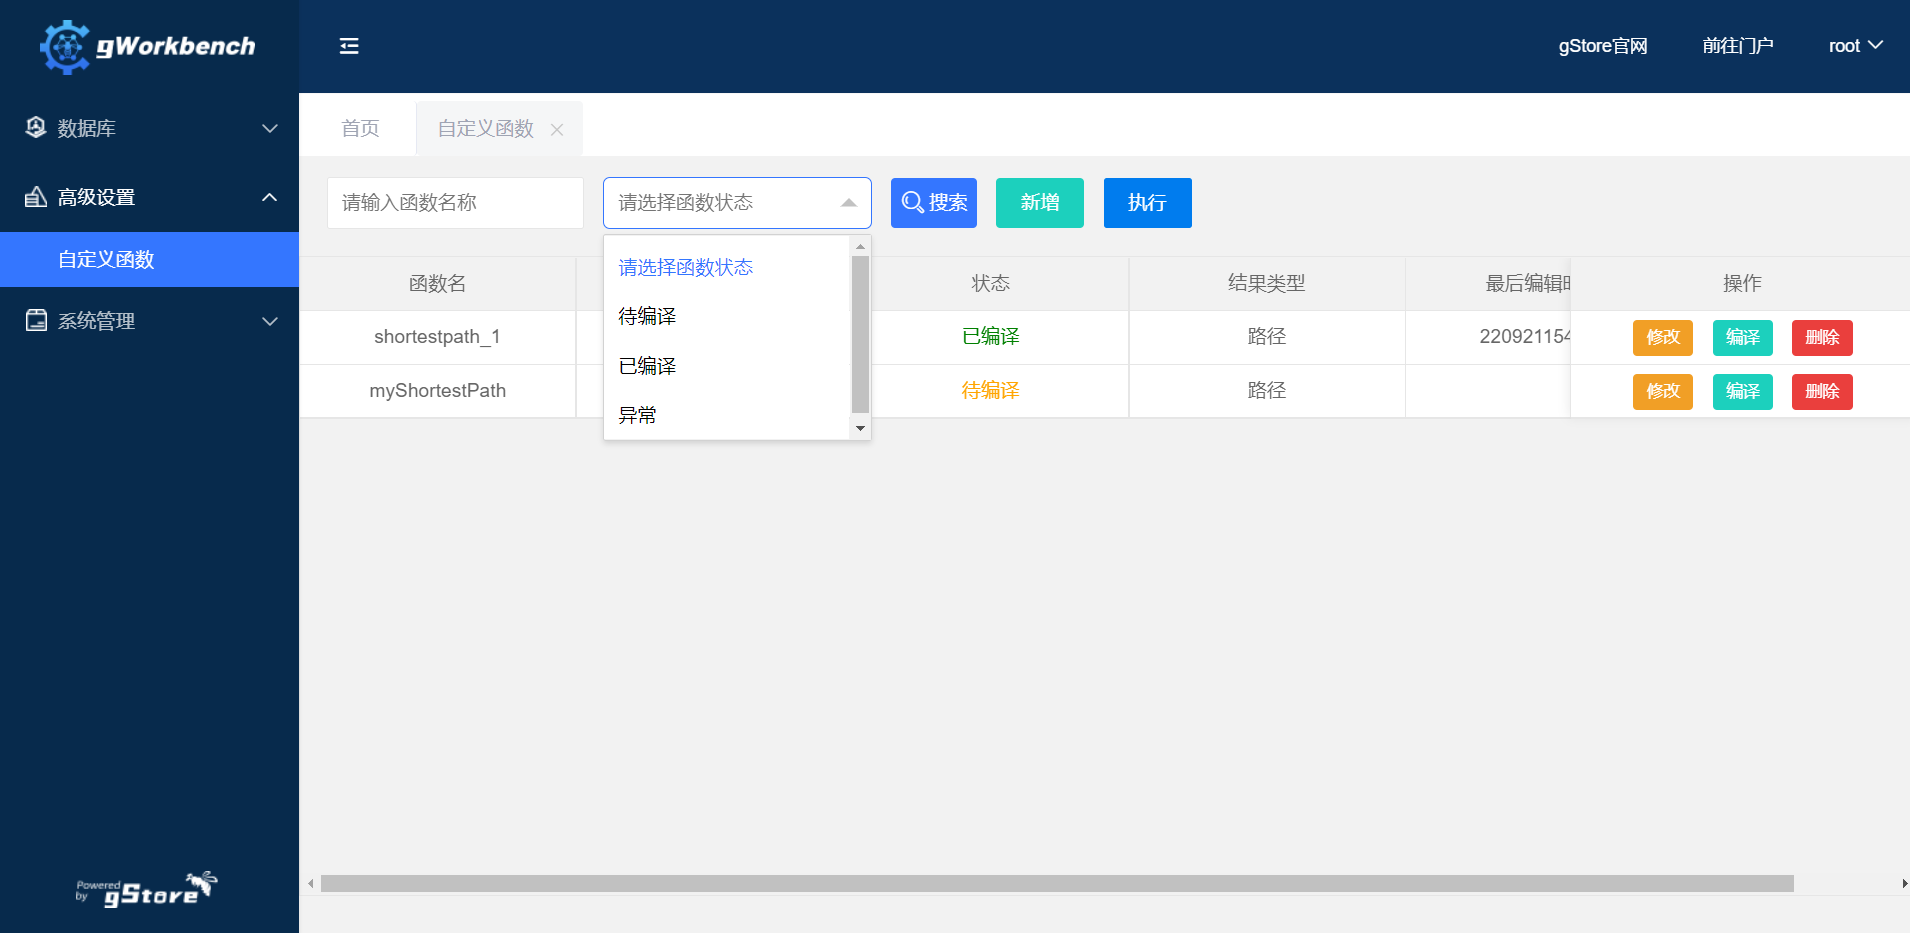
Click the [Advanced Settings] - [Customized Function] module, enter the name of the custom function to be queried, select the function status, and click [Search] to find the target custom function.
Create new custom function
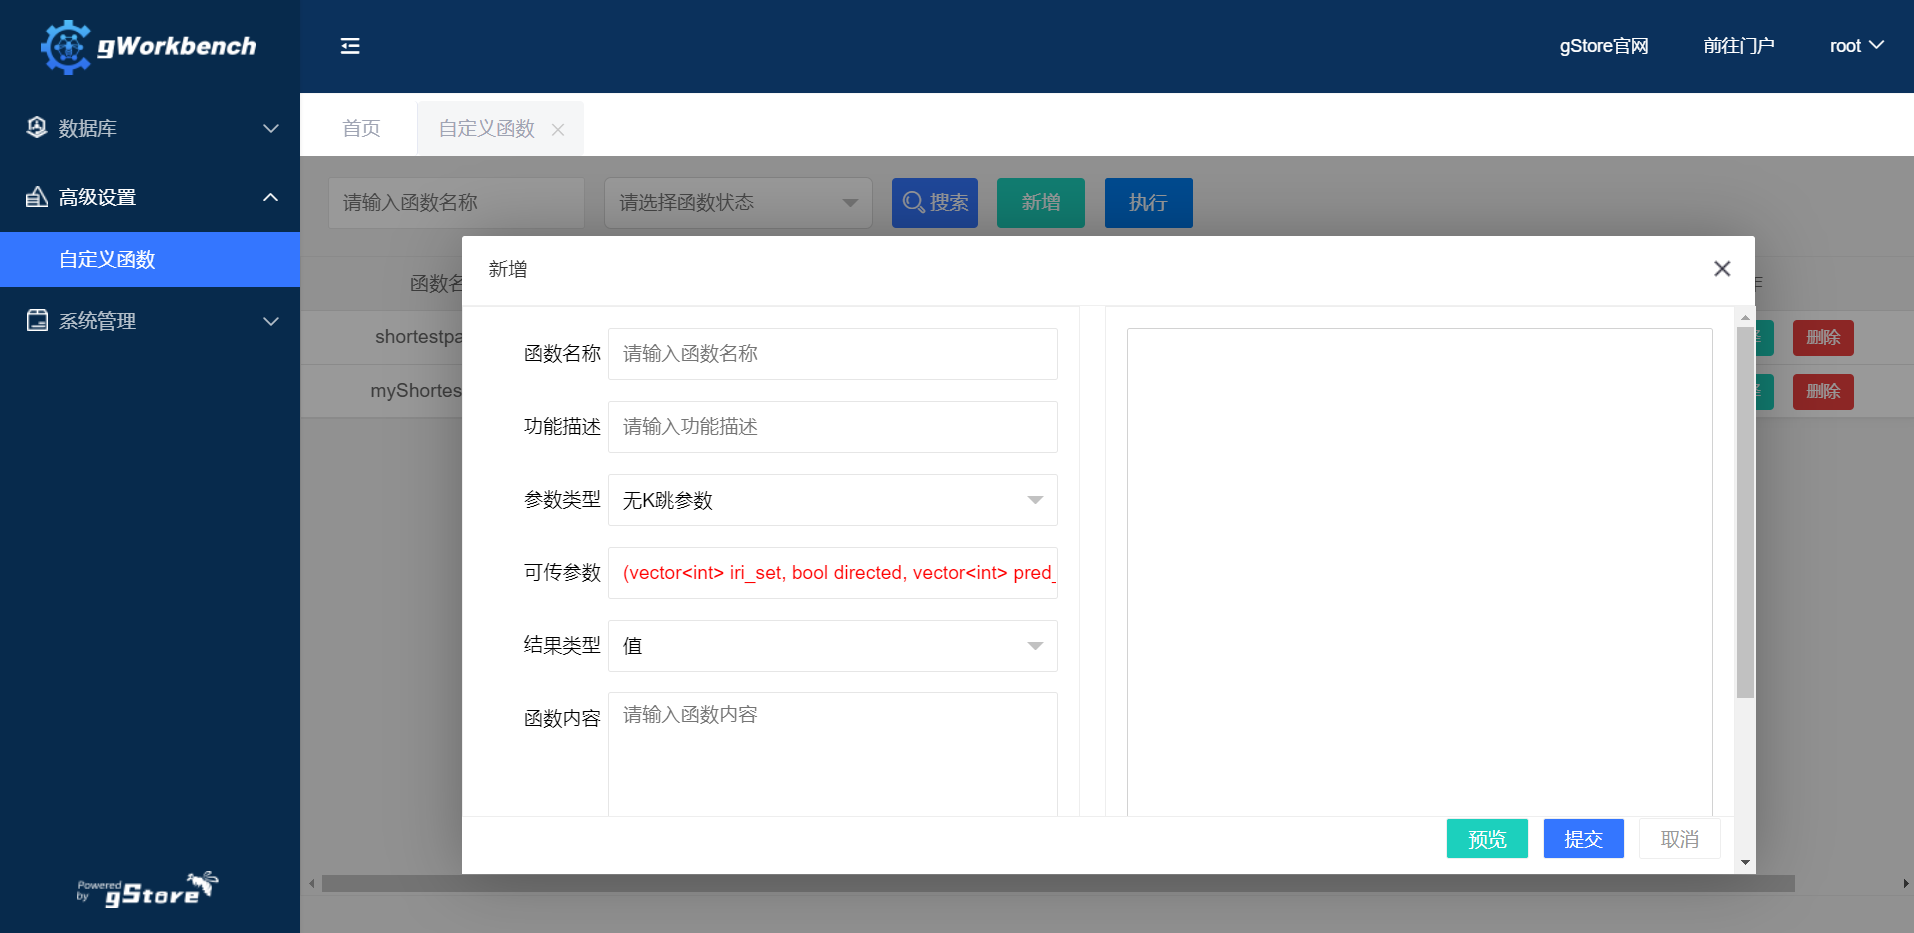
Click the [Advanced Settings] - [Custom Function] module, and then click [New].
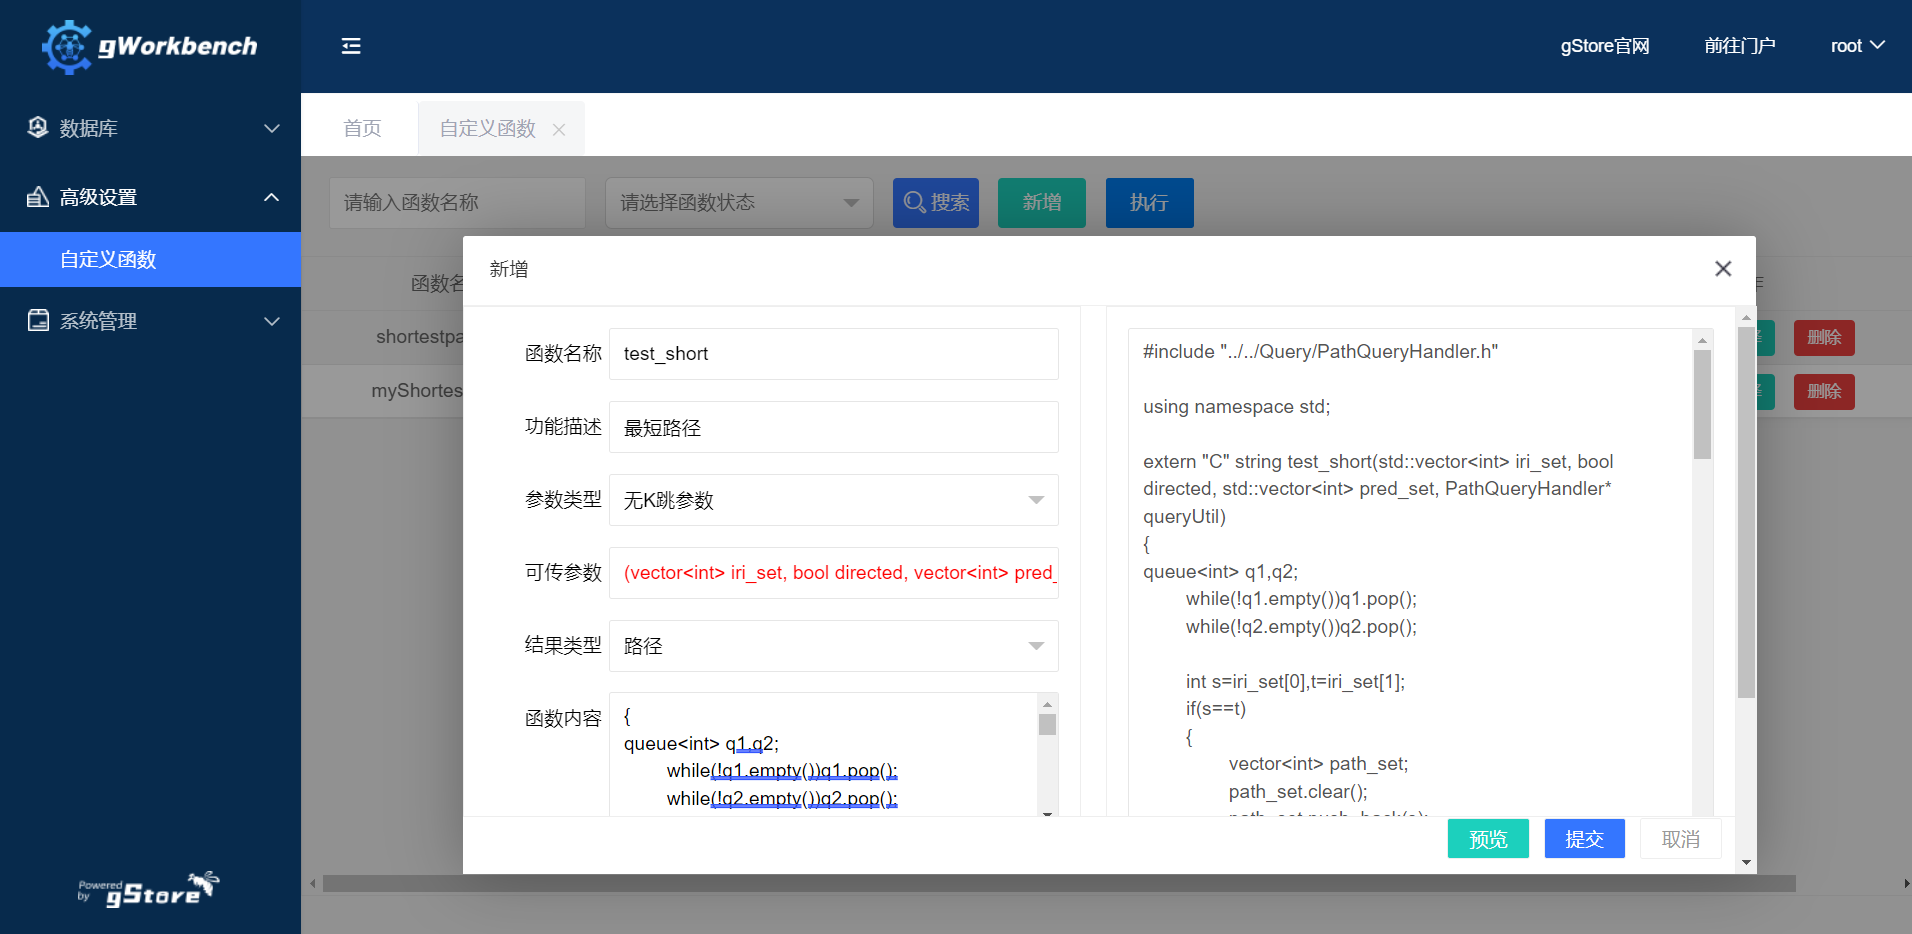
Enter the function name, function description, and parameter type.
Click [Preview] to view the whole function.
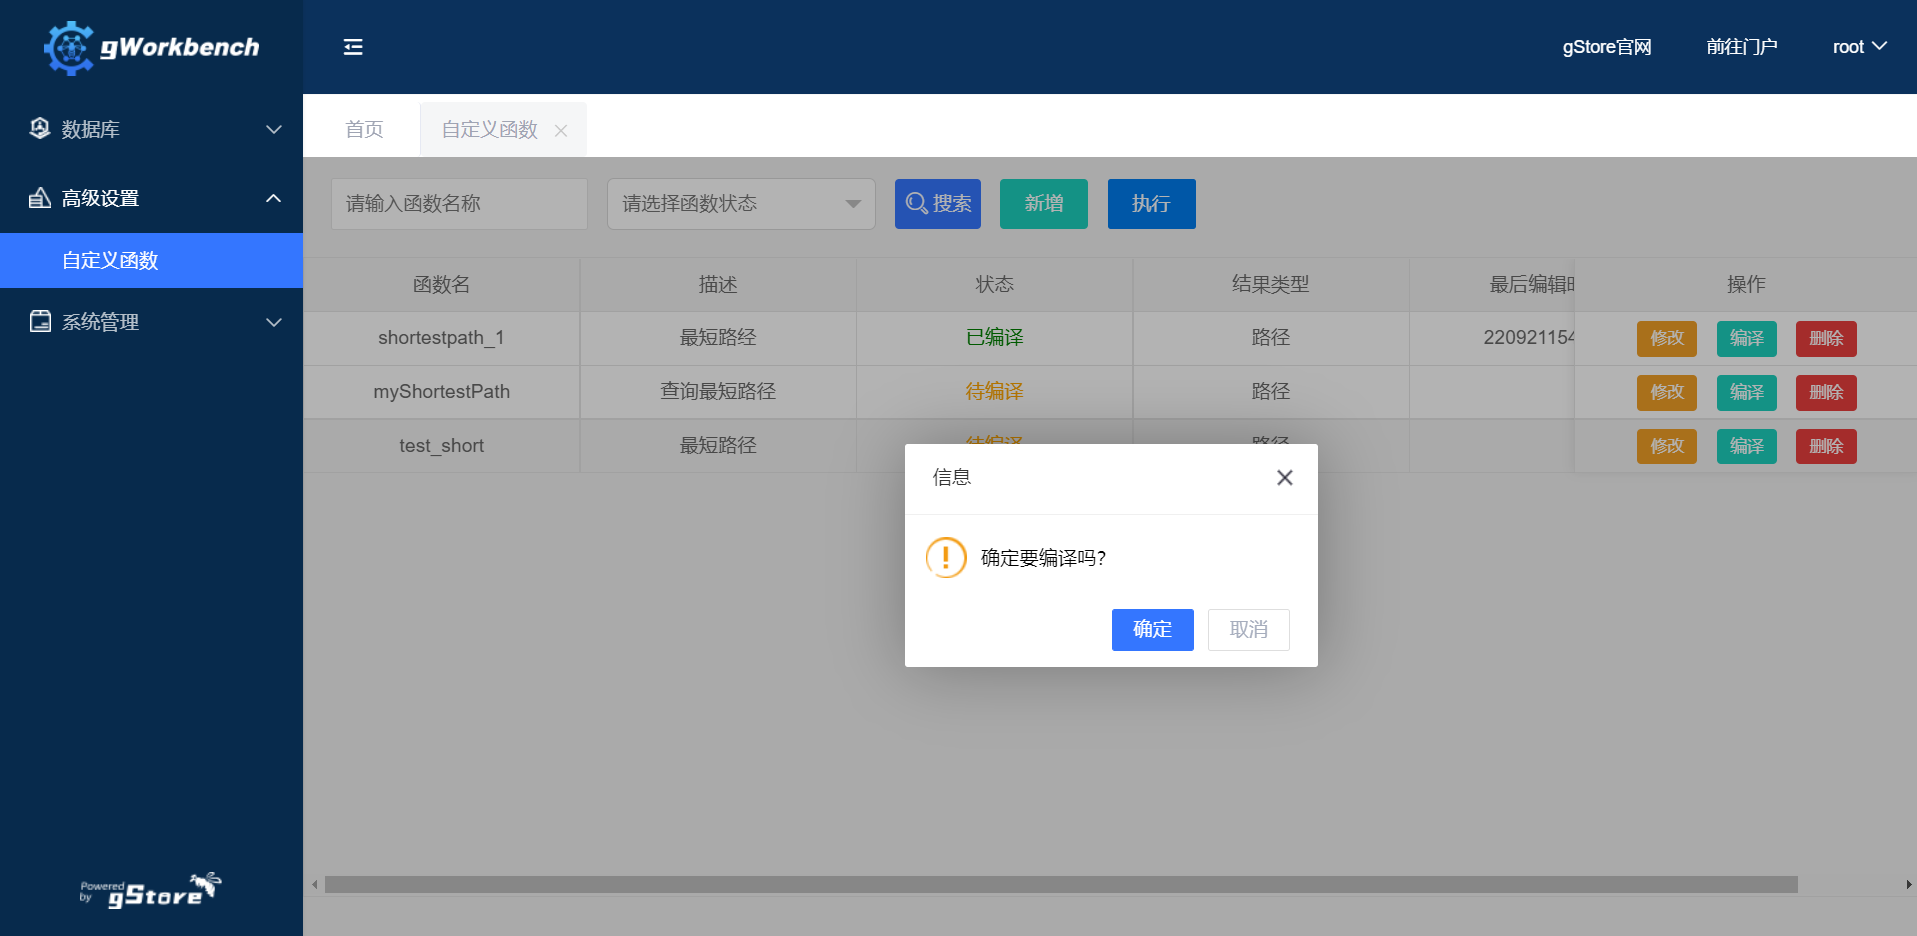
Click [Compile] to compile the custom function.
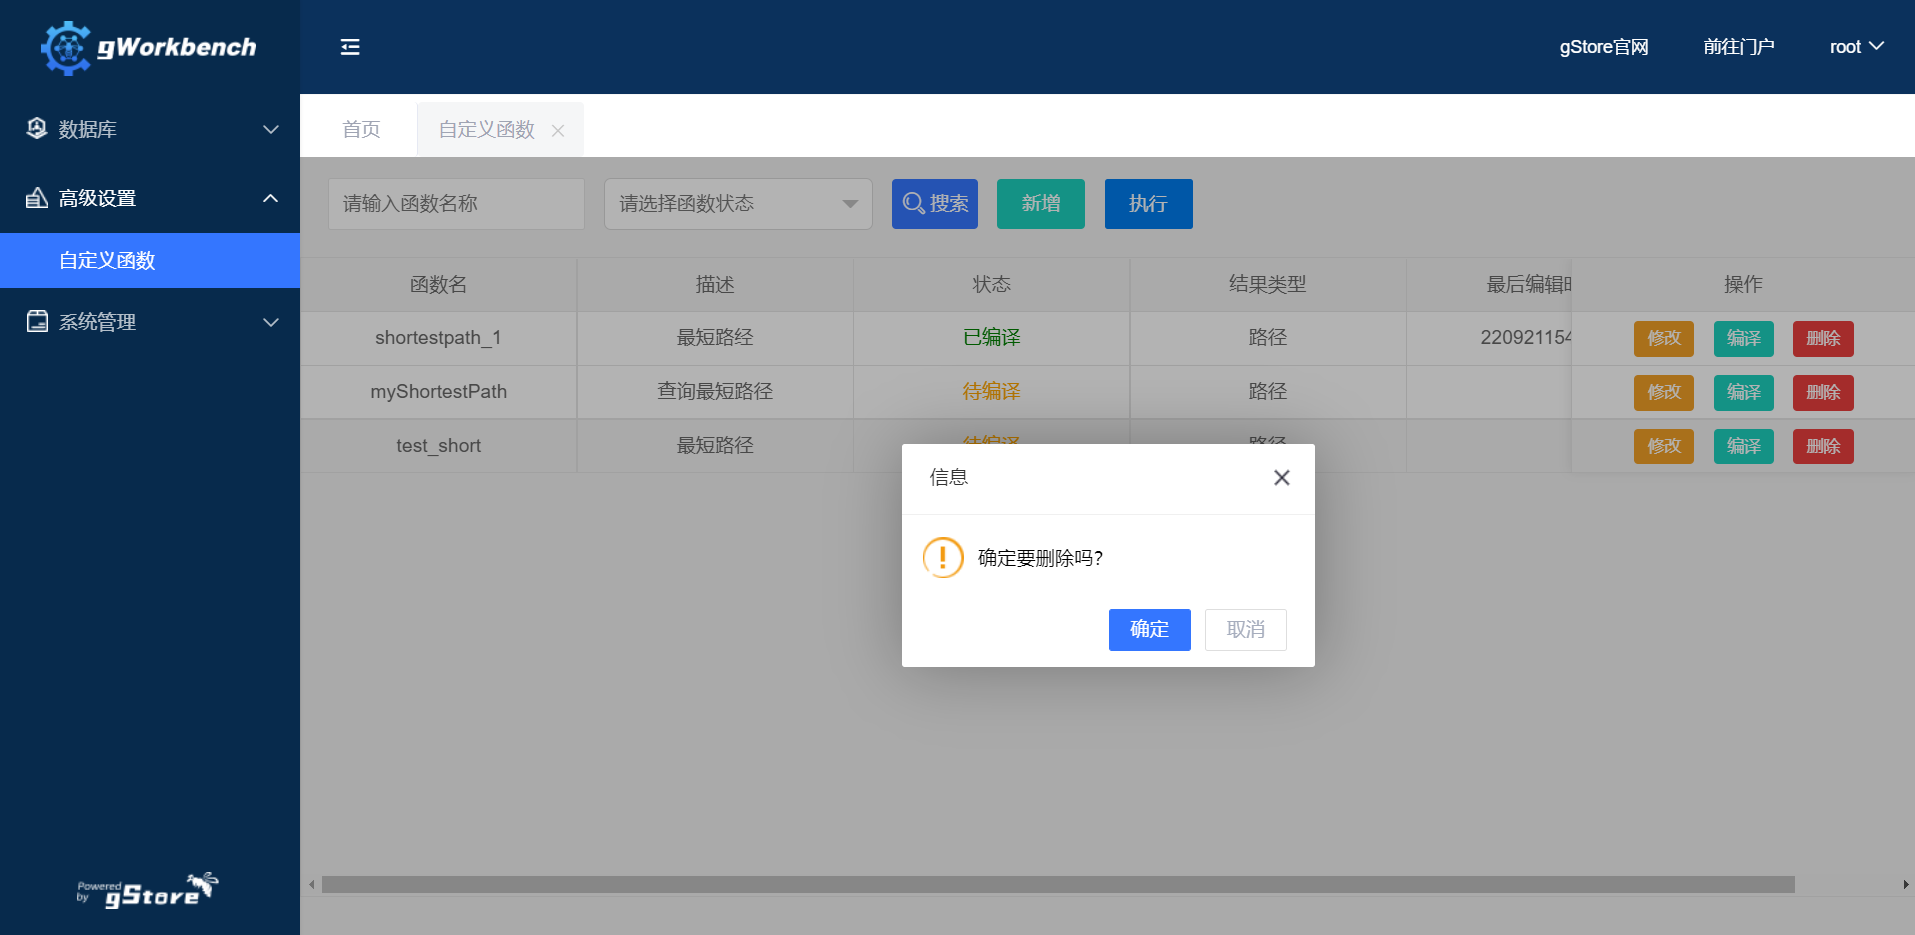
Users can also click [Delete] to delete custom functions.
Execute custom function
Click [Advanced Settings] - [Custom Function] module, click [Execute], input the database, function to be executed, source and/or destination nodes, K-hop value and other information, then click [Execute] to get the result.
The inference engine automatically updates the database based on the information we input into the rules. I will provide an example below. I have prepared the following data:
Select a database:
Add a new rule:
The functions of the first three options are as follows:
Relationship Inference Rules
(1)AND (both inference conditions must be met)
Compile here first, and a statement to be executed will be generated:
Preview:
Execute:
The result is as follows:
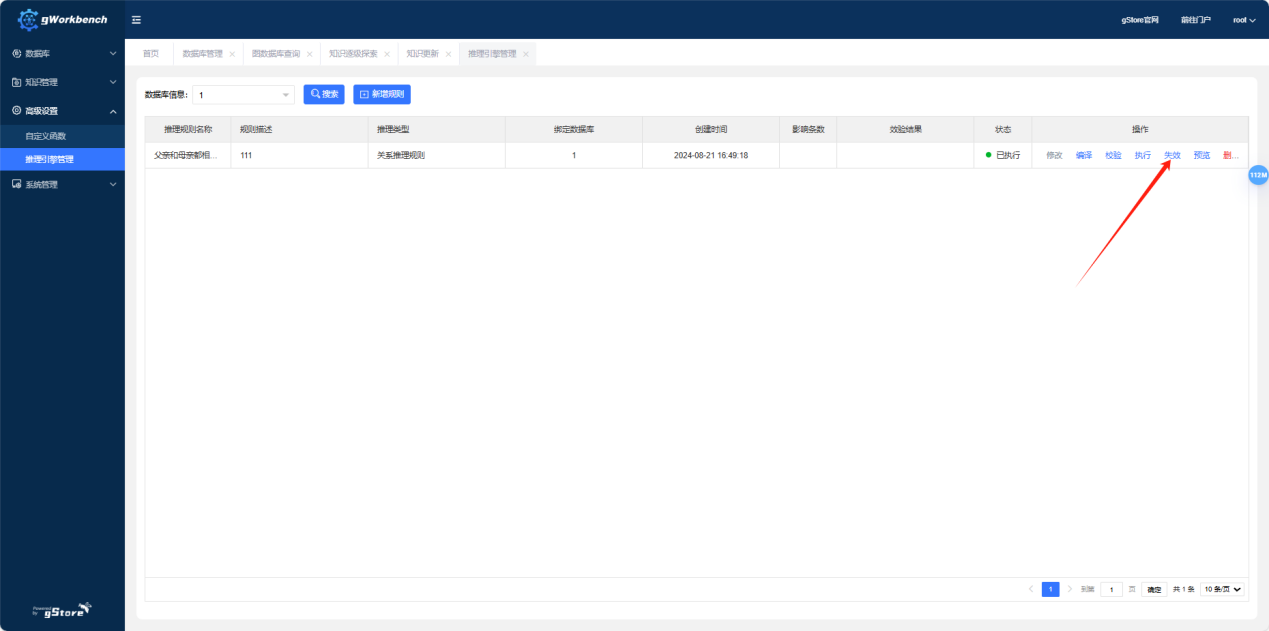
Click "Invalidate" to undo this operation:
(2)OR (only one of the inference conditions needs to be met)
Simply modify this part of the previous rule:
The remaining steps are the same as for AND.
The result is as follows:
Attribute Rules
Attribute rules change or add the specified properties of the corresponding node when conditions are met. The other steps are the same as in the previous inference rules, so I will only show the modified pages and results.
Select inference type, input inference conditions, and specify return results.
This is the original data:
This is the rule:
The result is as follows:
Using a filter condition, for example, where y can only be Zhang Cuishan:
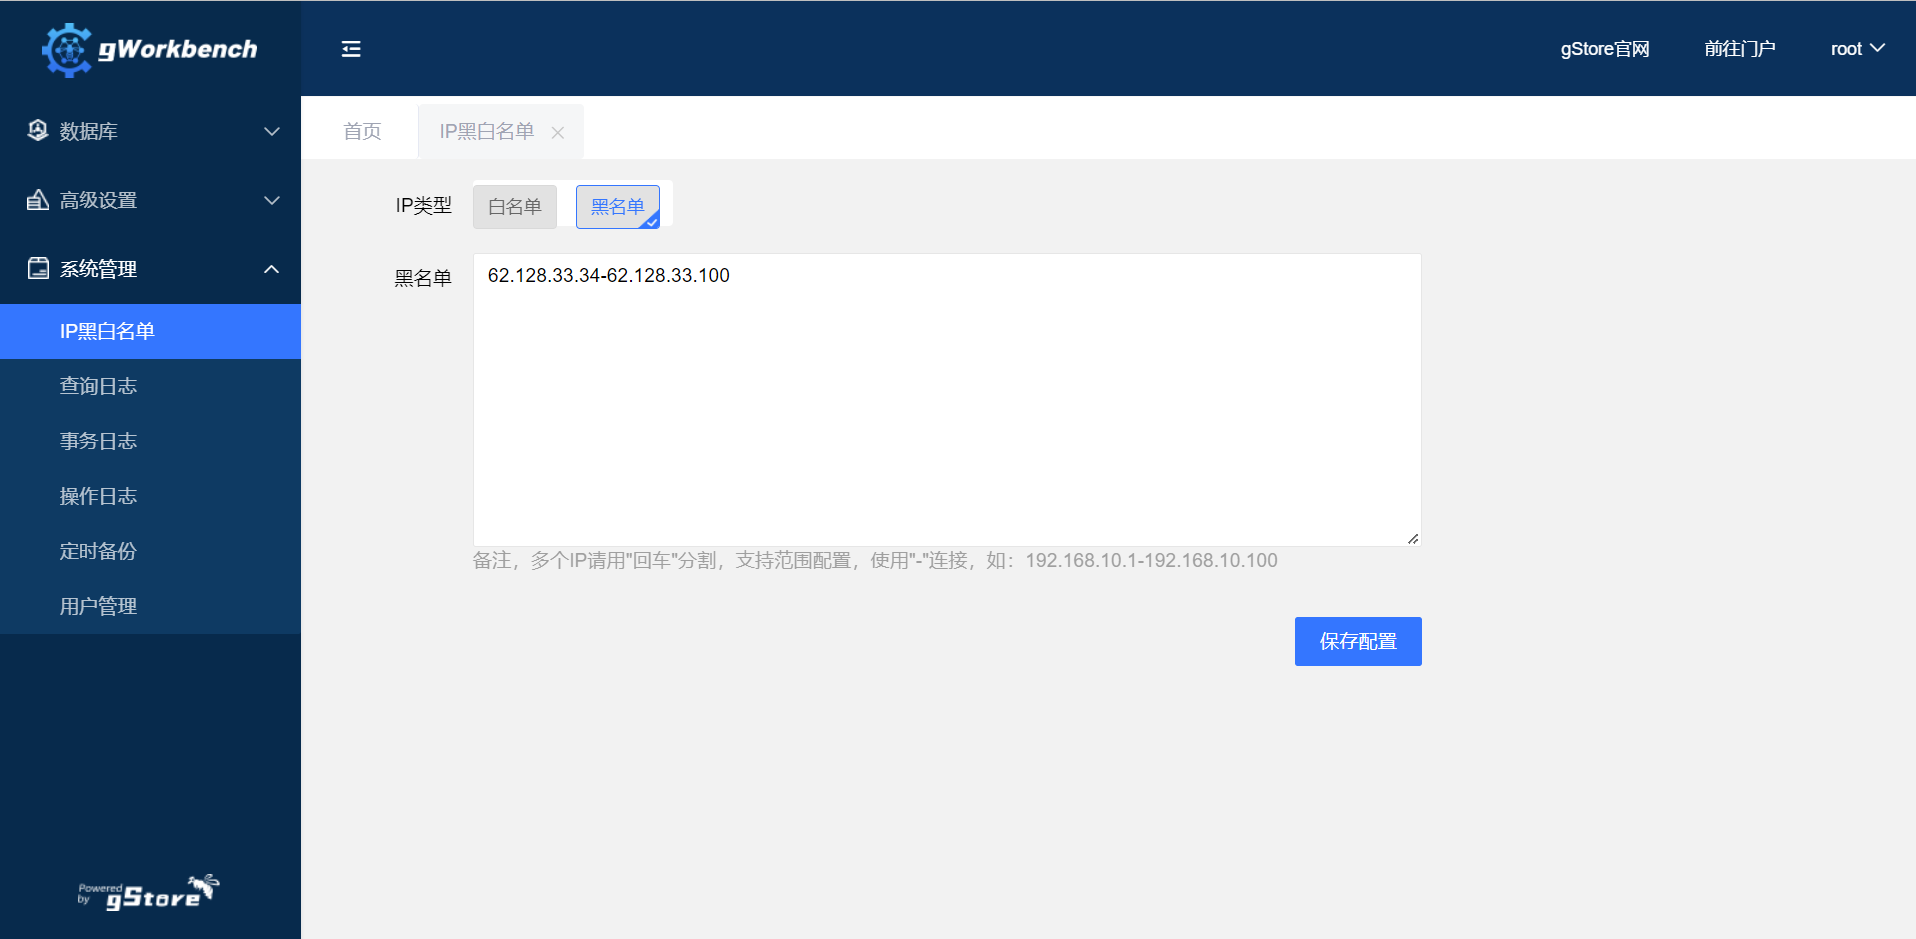
- Users can use the IP blacklist and whitelist function to limit the IP addresses that can initiate accesses. Users can use the blacklist function to prevent blacklisted users from using the system, or you can use the whitelist function to allow accessible IP addresses.
Enter the blacklist and whitelist IP address, separated by commas (,). Range configuration is supported using "-", such as: IP1-1P2.
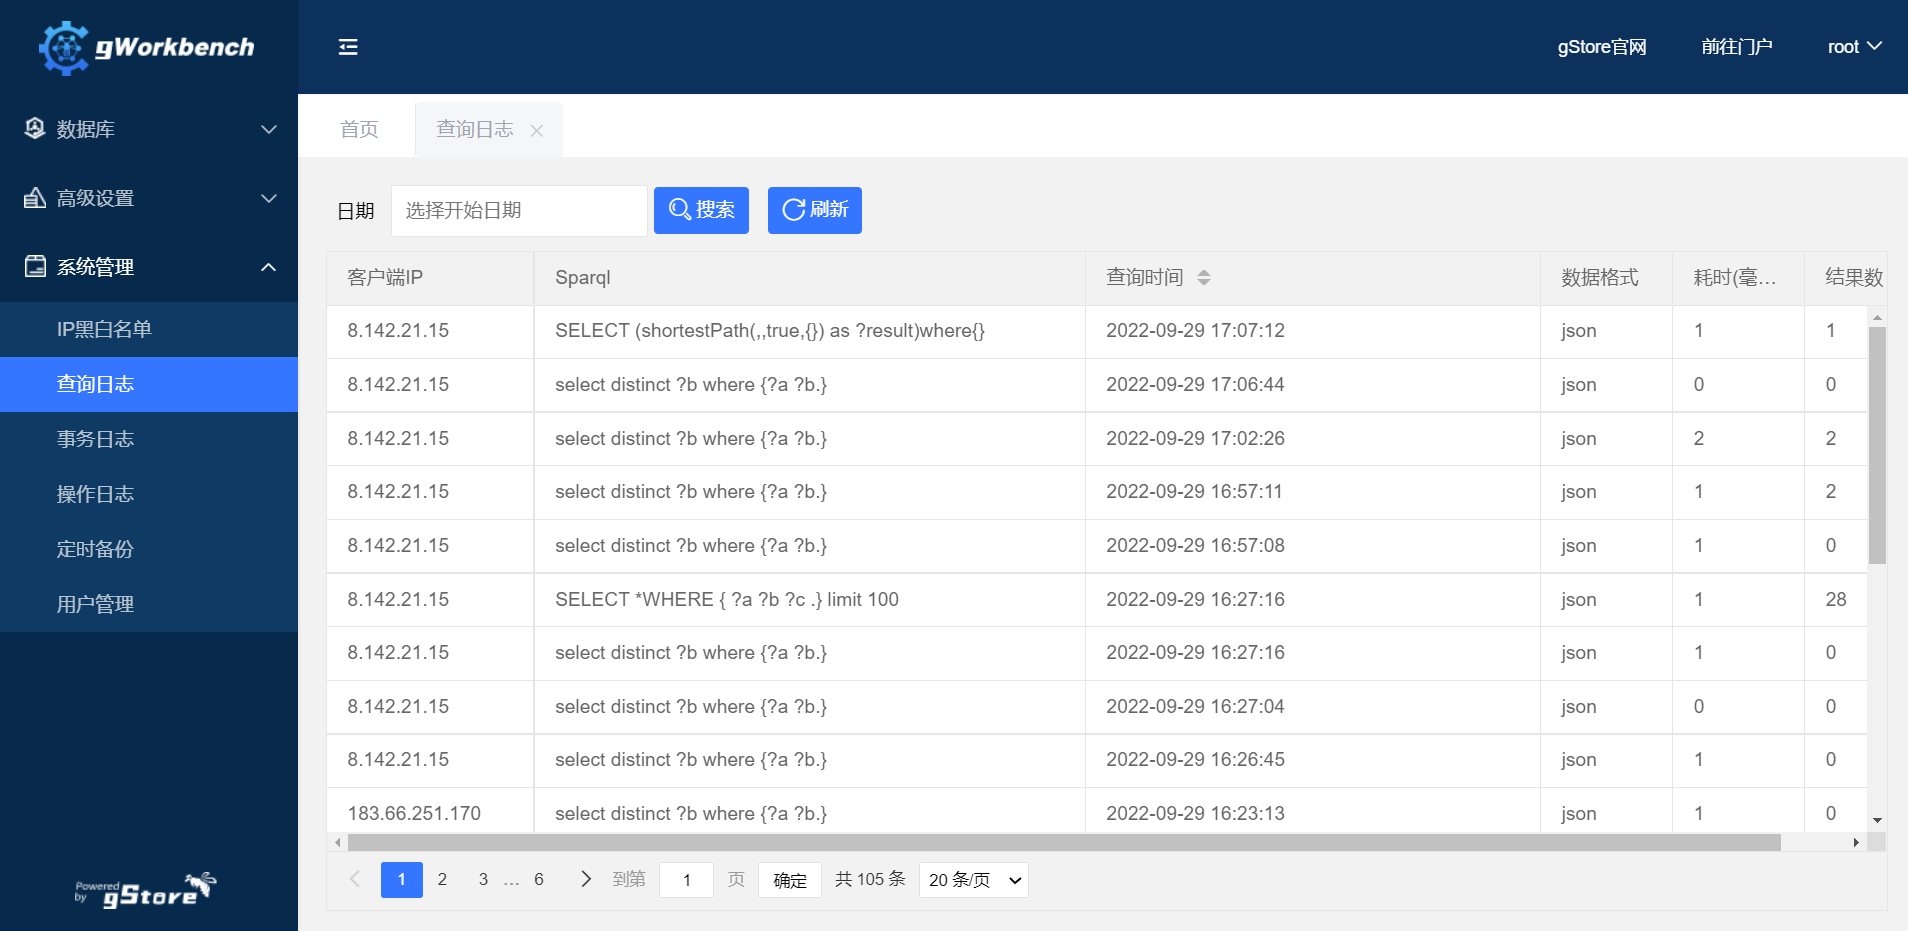
- User can view system logs on the web UI.
Click on the [system management] - [log management], select a specific date in the search bar, and click "Search" to view the specific log information of this date, including name of the log file, the client IP, SPARQL, query time, data format, the execution time (ms), and the number of results.
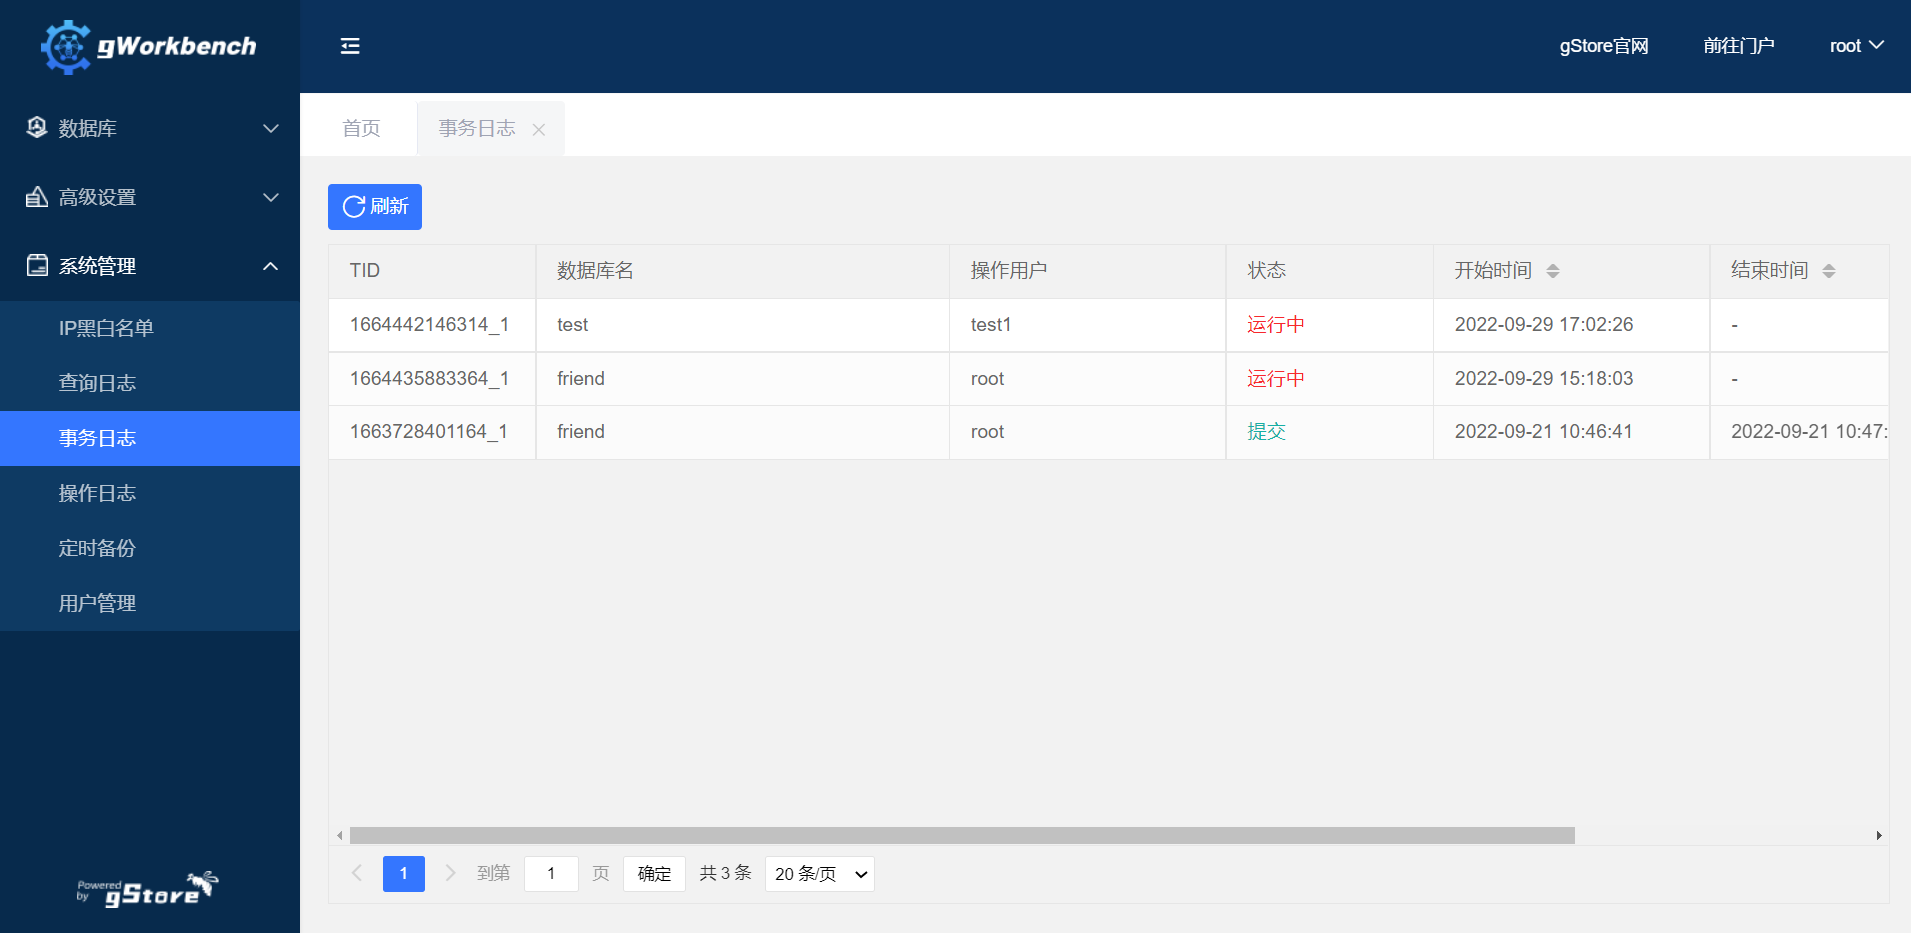
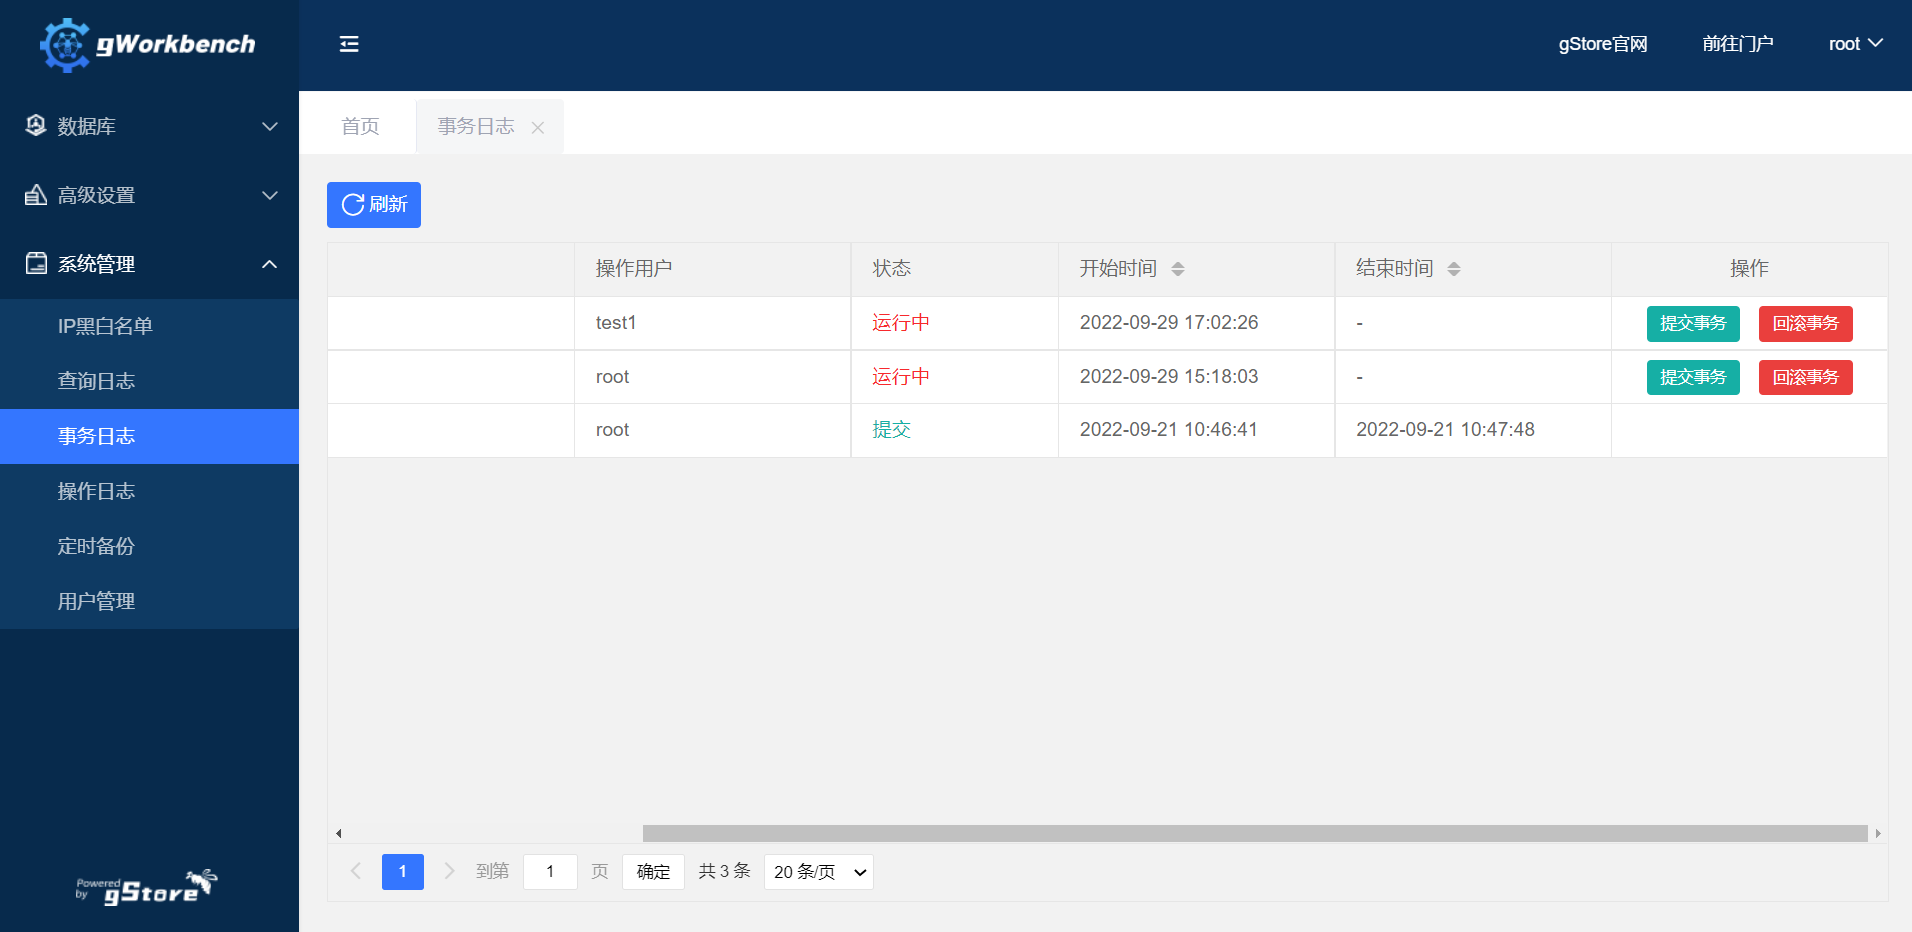
Click [System Management] - [Transaction Management] to view specific transaction information, including TID, database name, the user initiating the operation, transaction status, start time, end time, etc.
Meanwhile, transactions can also be committed and rolled back.
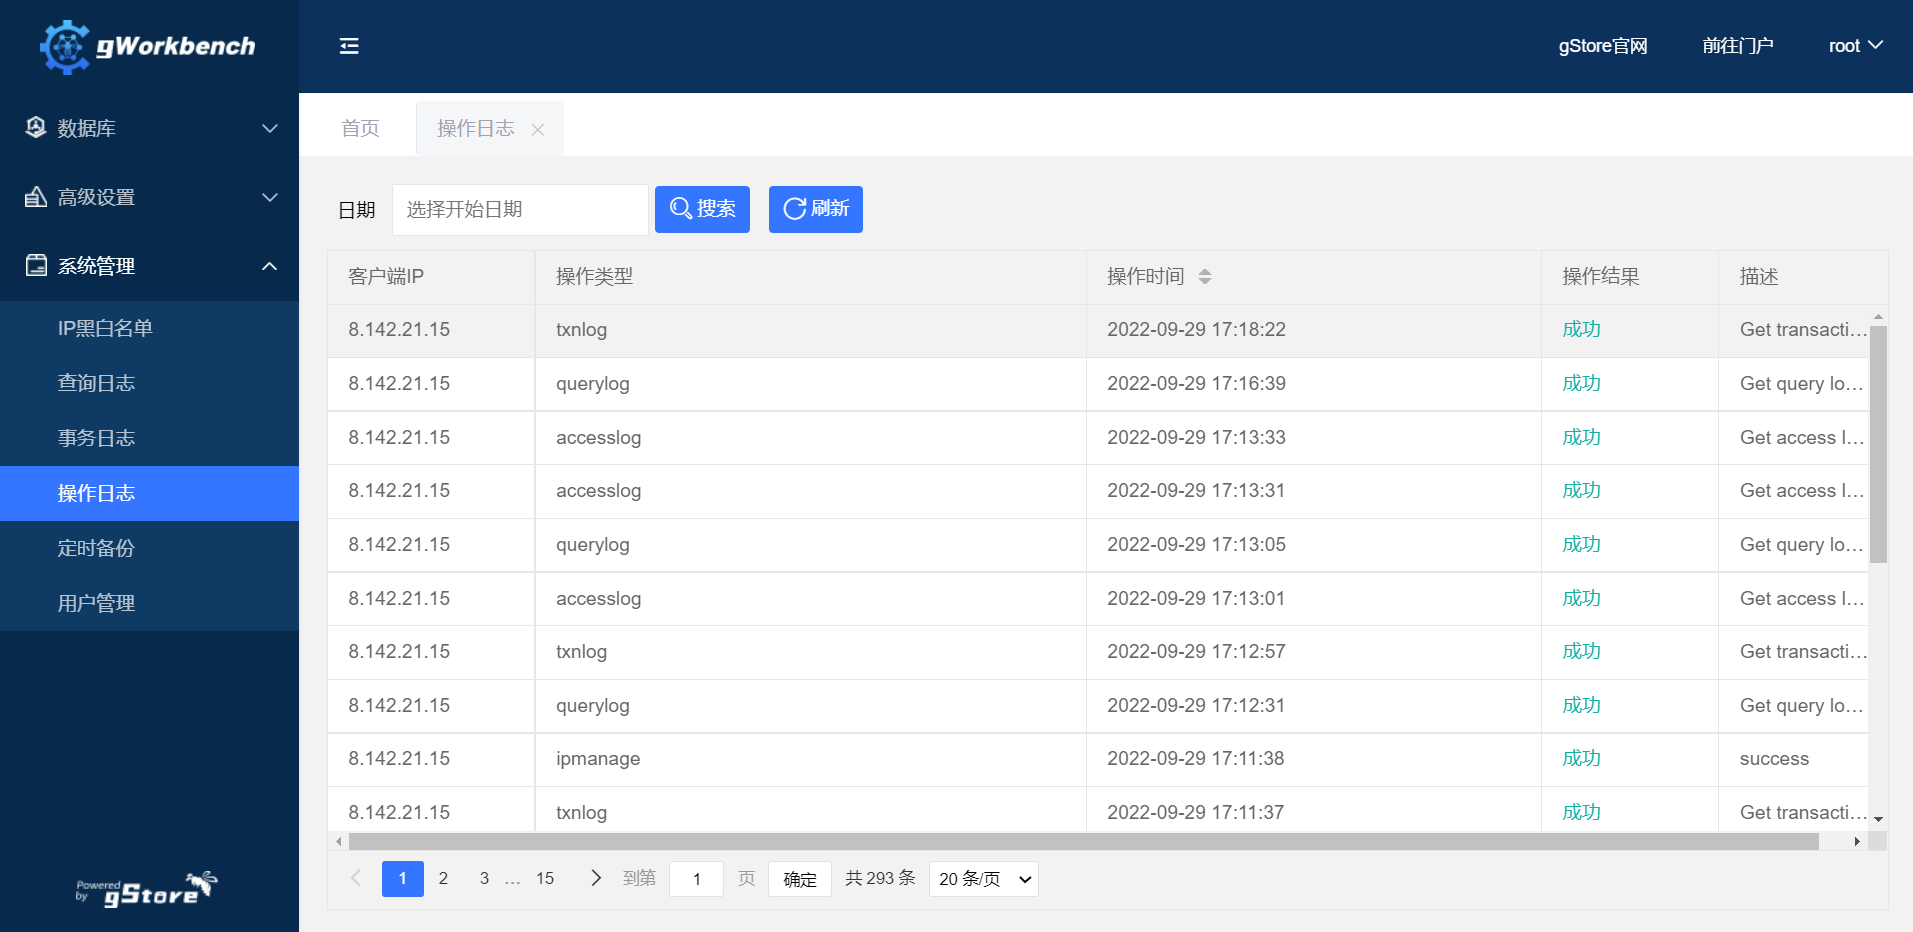
Click [System Management] - [Operation Log], select a specific date in the search bar and click "Search" to view the specific log information of this date, including client IP address, operation type, operation time, operation result and description.
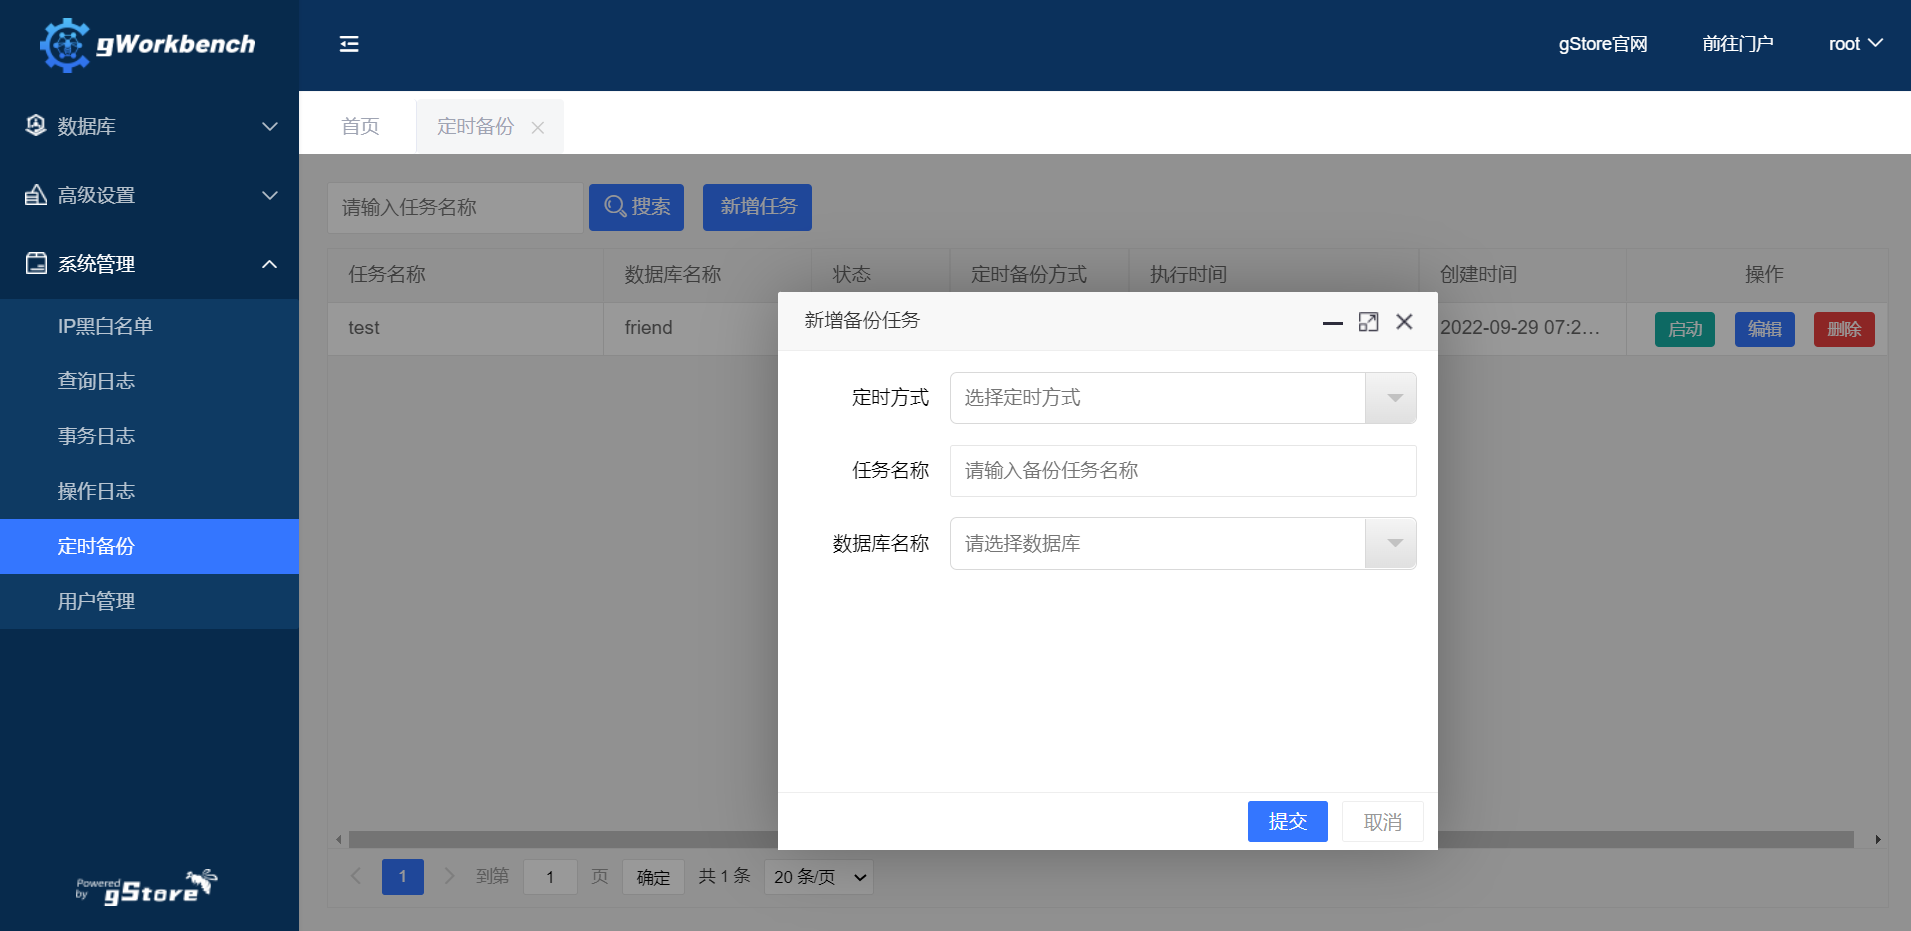
Click [Scheduled Backup] and then [New Task] to add a new backup task by filling in the scheduling mode, the task name, the database name and the backup path.
Tips: Only for root user
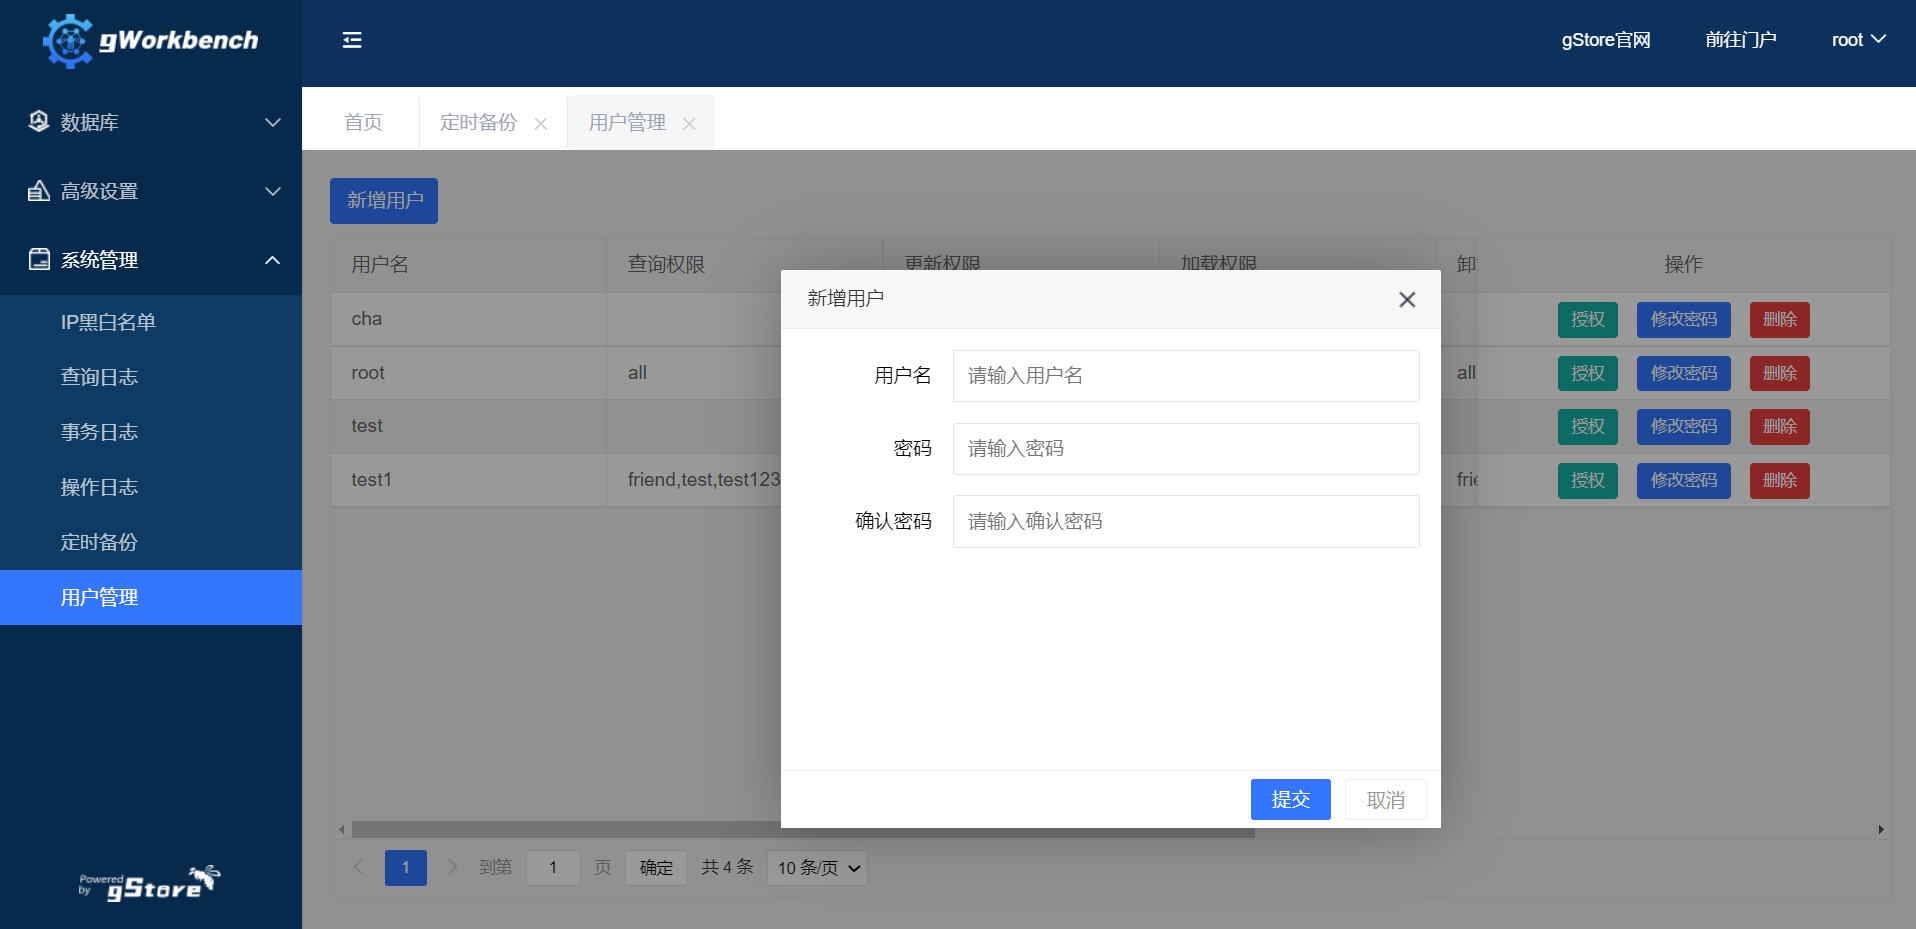
(1) Add user
- Add new users
Enter the user name and password to add a user.
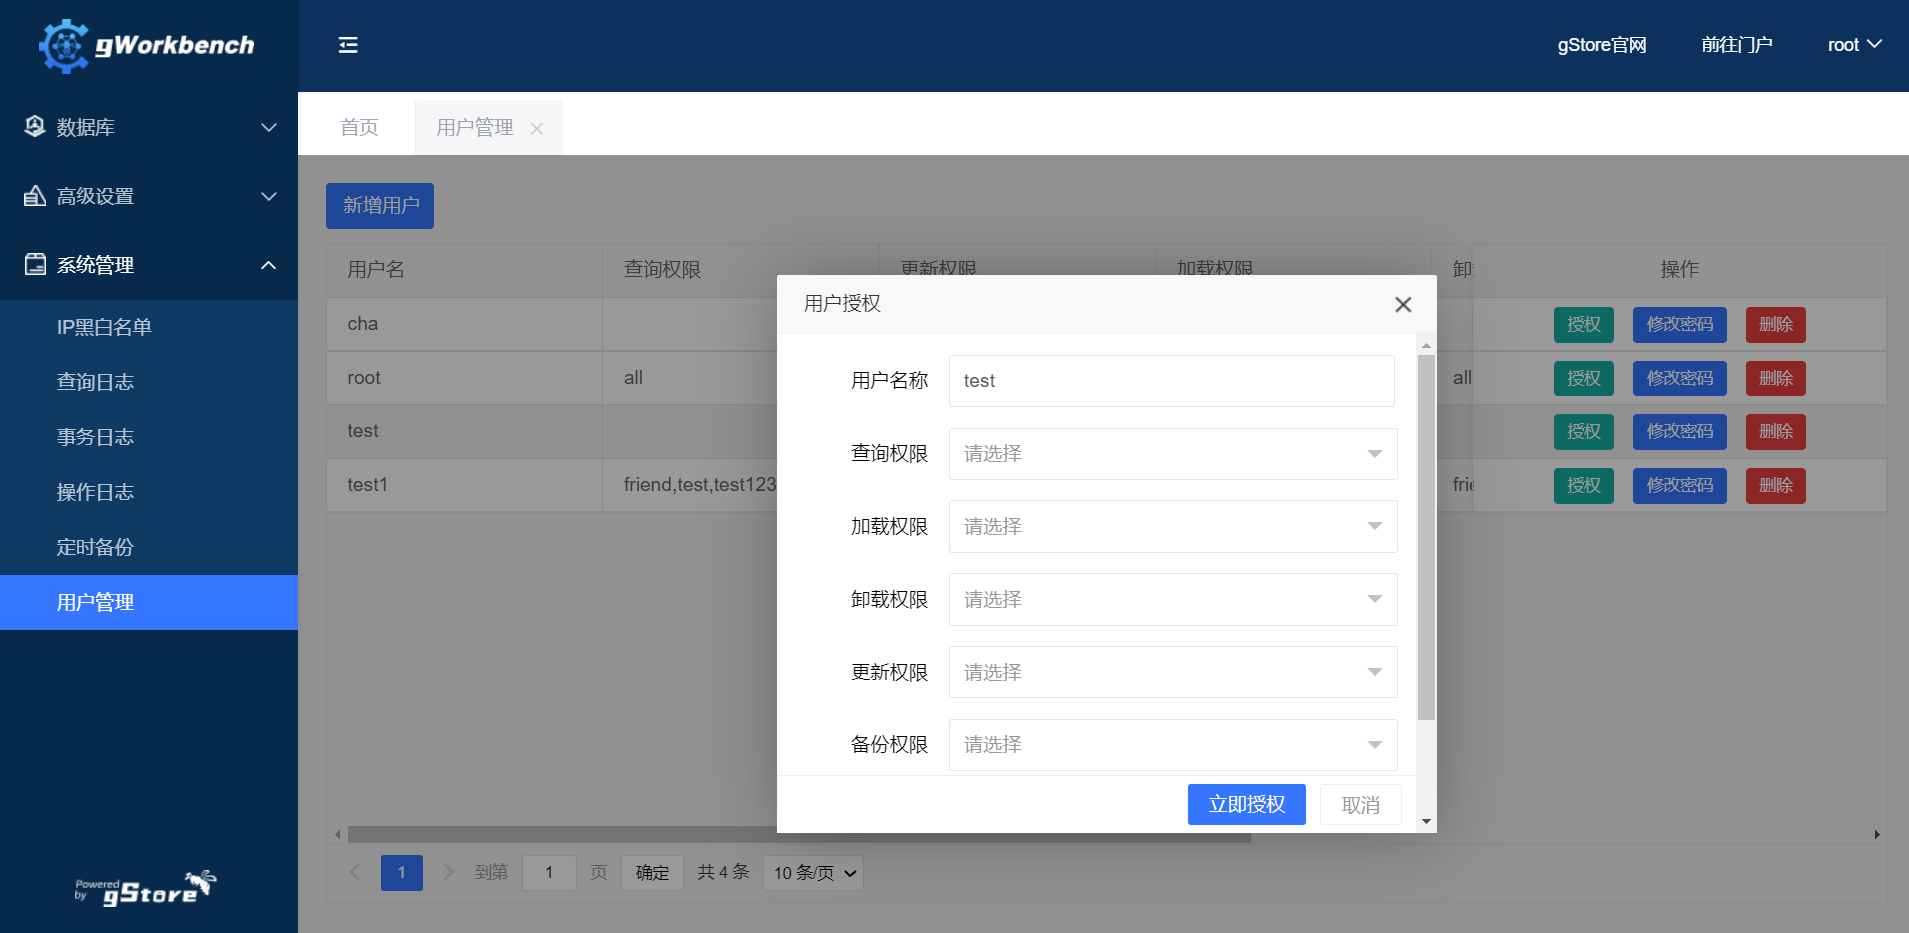
(2) User authorization
- Authorize functions for users.
Select the users and databases that you want to authorize, and add or remove query, load, unload, update, backup, restore, or export permissions.
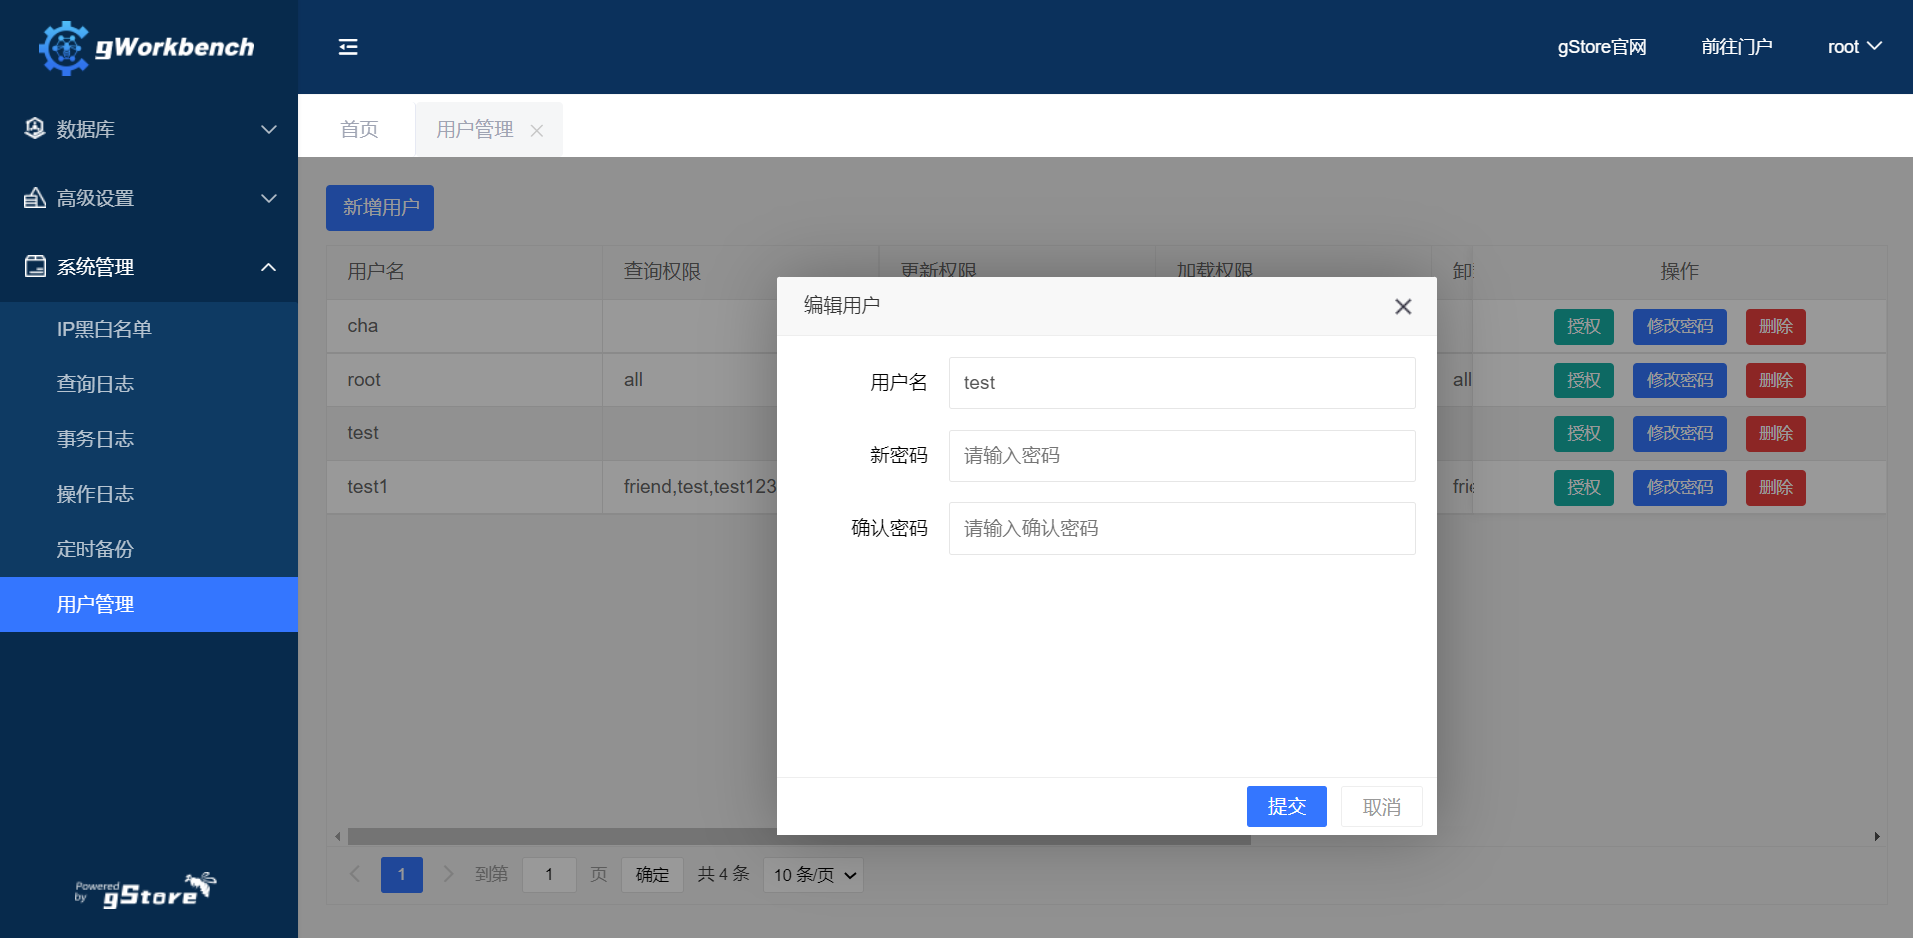
(3) Edit accounts
- Edit user account details.
Click [User Management], select a User account, click [Change password] under the operation bar, input relevant information and click [Submit] to modify the user's password.
(4) Delete accounts
- Delete user accounts.
Click [User Management], select a User account, and click [Delete] under the operation bar to delete the User.
