⚠ Open Request : ✨ [REQUEST] Birdnet-Go (opened 2024-05-07) by @matthew73210


Thanks to everyone having starred my repo! To star it click on the image below, then it will be on top right. Thanks!


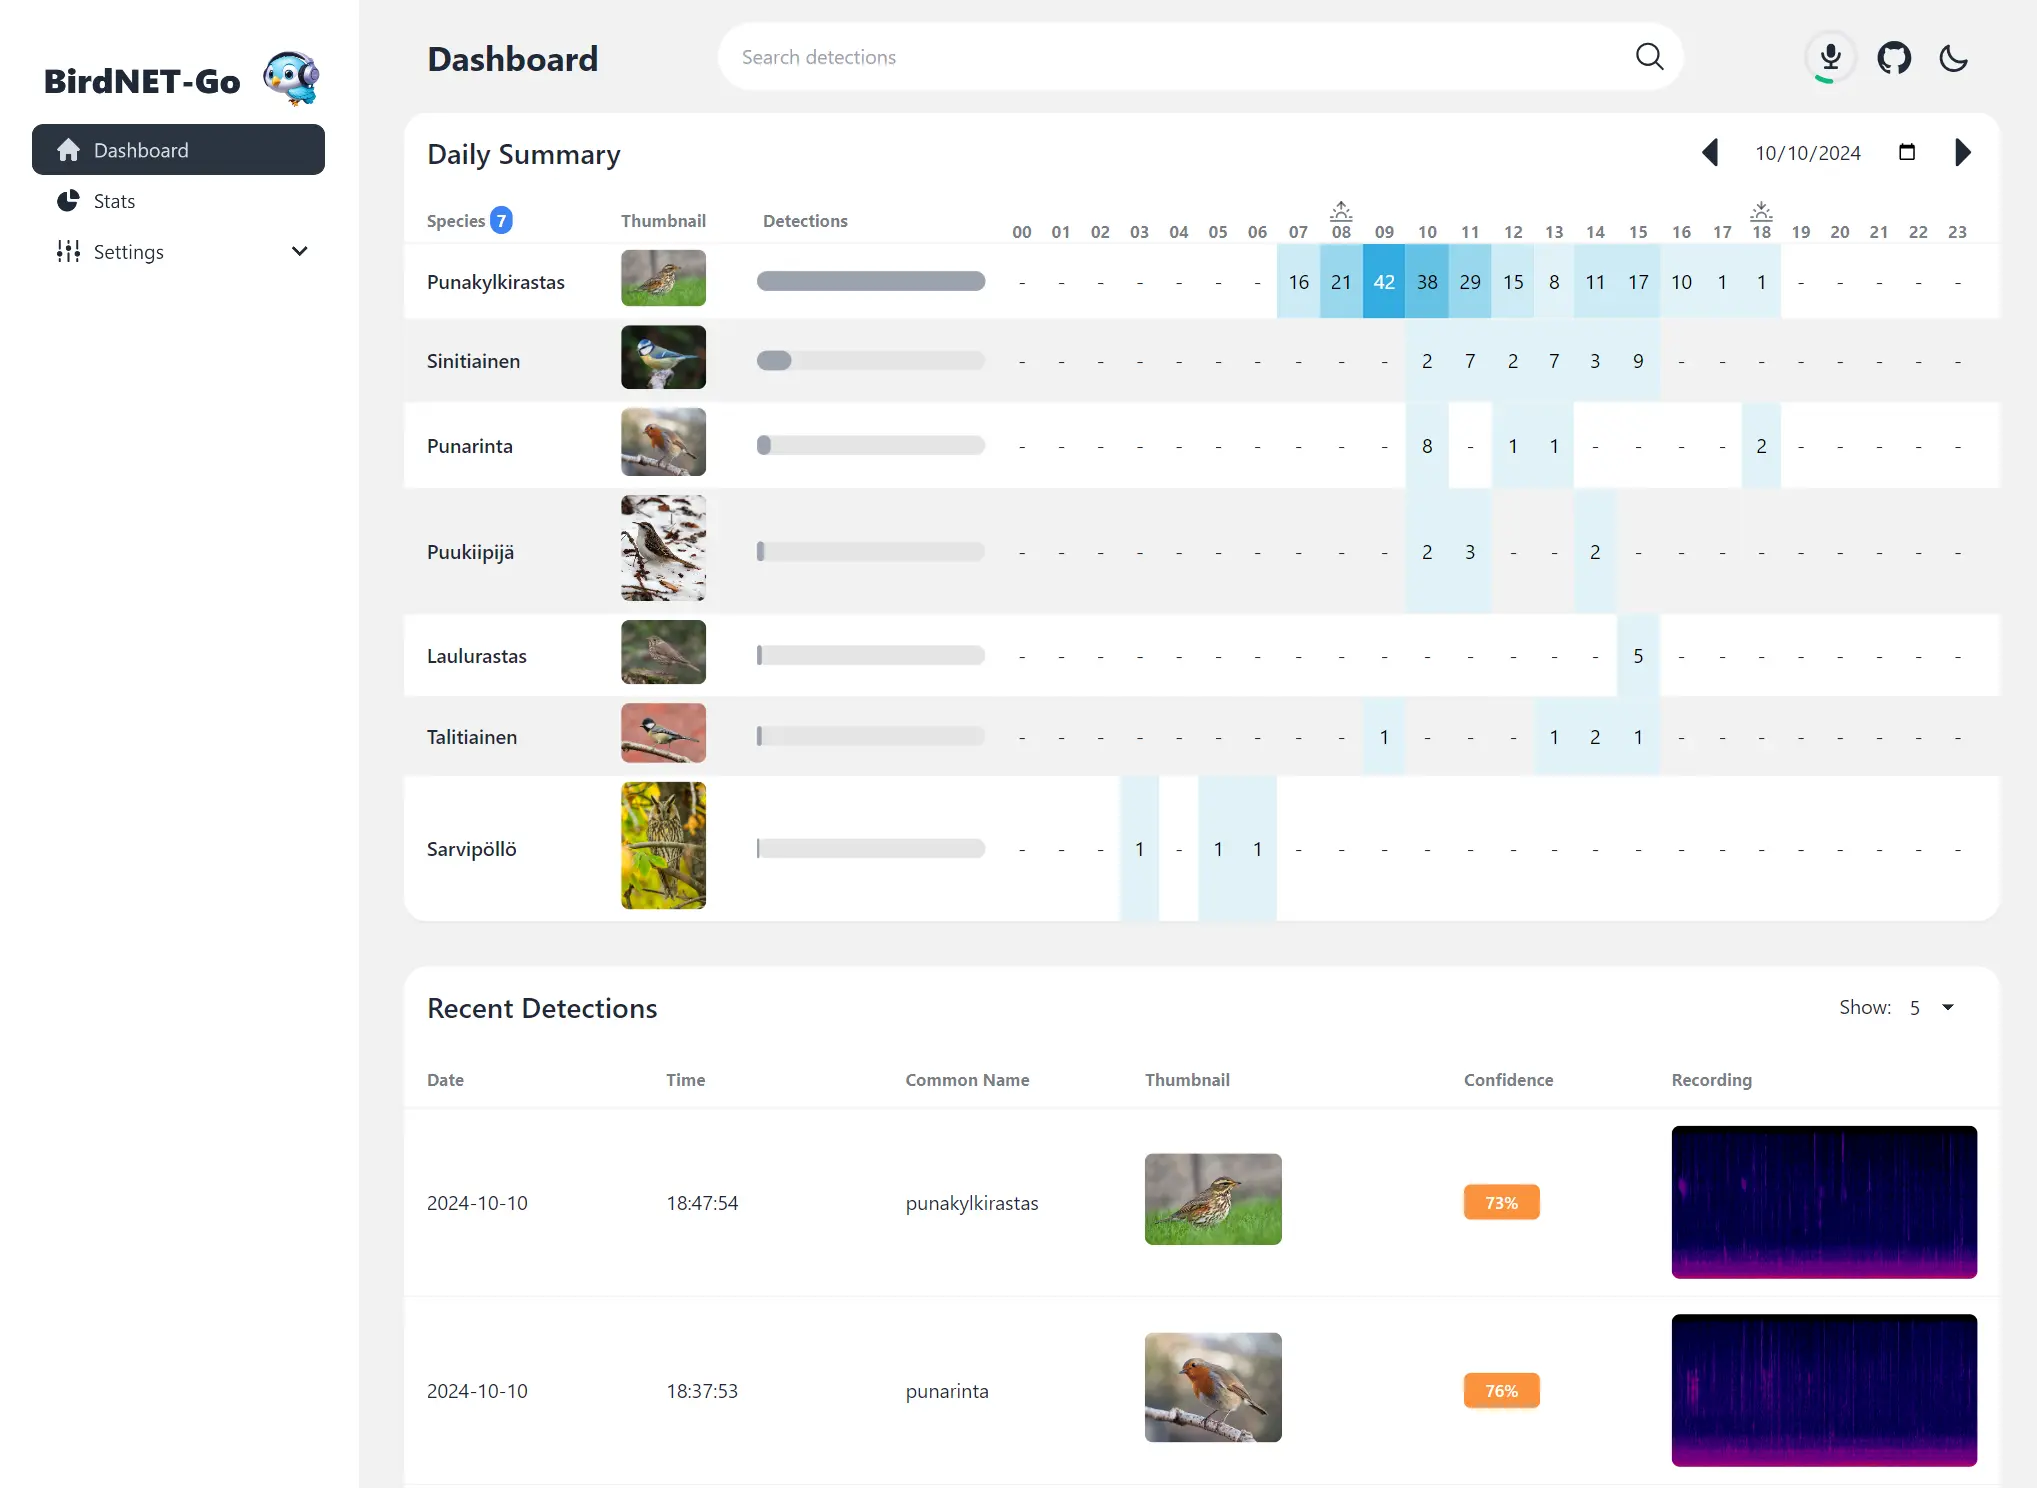
BirdNET-Go is an AI solution for continuous avian monitoring and identification developed by @tphakala
This addon is based on their docker image.
Install, then start the addon a first time. Webui can be found at http://homeassistant:8080. You'll need a microphone : either use one connected to HA or the audio stream of a rstp camera.
The audio clips folder can be stored on an external or SMB drive by mounting it from the addon options, then specifying the path instead of "clips/". For example, "/mnt/NAS/Birdnet/"
Options can be configured through three ways :
- Addon options
ALSA_CARD : number of the card (0 or 1 usually), see https://github.com/tphakala/birdnet-go/blob/main/doc/installation.md#deciding-alsa_card-value
TZ: Etc/UTC specify a timezone to use, see https://en.wikipedia.org/wiki/List_of_tz_database_time_zones#List
COMMAND : realtime --rtsp url # allows to provide arguments to birdnet-go-
Config.yaml Additional variables can be configured using the config.yaml file found in /config/db21ed7f_birdnet-go/config.yaml using the Filebrowser addon
-
Config_env.yaml Additional environment variables can be configured there
The installation of this add-on is pretty straightforward and not different in comparison to installing any other add-on.
- Add my add-ons repository to your home assistant instance (in supervisor addons store at top right, or click button below if you have configured my HA)
- Install this add-on.
- Click the
Savebutton to store your configuration. - Set the add-on options to your preferences
- Start the add-on.
- Check the logs of the add-on to see if everything went well.
- Open the webUI and adapt the software options

Not yet available
Not yet available
Create an issue on github